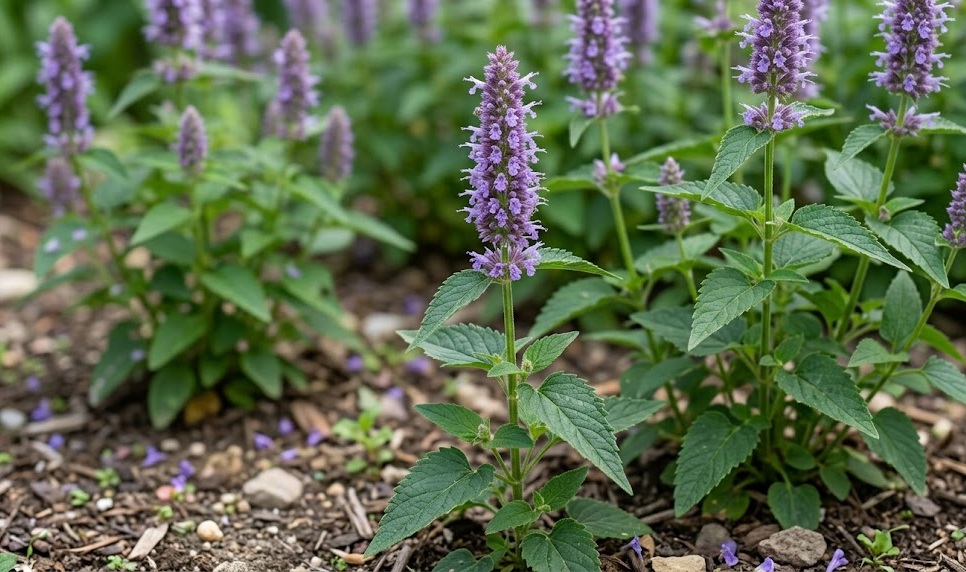
Establishing a thriving colony of anise hyssop begins with a deep understanding of its propagation requirements and early life stages. Whether you are starting from seed or using vegetative methods, the timing and environmental conditions must be carefully managed to ensure success. This plant is known for its high germination rates and willingness to adapt, but professional results require attention to detail during the initial planting phase. By following established horticultural practices, you can create a robust foundation for years of aromatic beauty in your landscape.
Starting from seed and germination techniques
Sowing seeds is the most common and cost-effective way to introduce anise hyssop into a new garden space. The seeds are quite small and require light to germinate, so they should be pressed into the soil surface rather than buried deeply. For those starting indoors, beginning the process six to eight weeks before the last frost date provides a significant head start. Using a high-quality seed-starting mix ensures proper drainage and aeration for the emerging delicate root systems.
Cold stratification can significantly improve the consistency of germination for many native perennial seeds. Placing the seeds in a damp paper towel within a sealed bag in the refrigerator for about a month mimics natural winter conditions. This process breaks the seed’s dormancy and signals that it is time to grow once they are moved to a warmer environment. If you prefer a more hands-off approach, direct sowing in late autumn allows nature to handle the stratification process for you.
Once the seeds are sown, maintaining a consistent temperature between 20 and 22 degrees Celsius is ideal for rapid development. Using a humidity dome or plastic wrap can help retain moisture, but it must be removed as soon as the first green shoots appear. Providing intense light, either from a bright window or supplemental grow lights, prevents the seedlings from becoming leggy and weak. Gradually acclimating the young plants to outdoor conditions through a process called hardening off is essential before final transplantation.
The transition to the garden should occur only after the danger of frost has passed and the soil has begun to warm. Choose a day with overcast skies or plant in the late afternoon to reduce the initial stress on the young transplants. Watering them immediately with a weak seaweed solution can help stimulate root growth and ease the transition to the new environment. Space the plants about 45 to 60 centimeters apart to allow for their mature spread and ensure adequate airflow.
More articles on this topic
Vegetative propagation through division
Division is a reliable method for multiplying existing anise hyssop plants while maintaining the specific characteristics of a chosen cultivar. This process is best undertaken in early spring when the new shoots are only a few centimeters tall. Lifting the entire root ball with a sharp spade allows you to see the natural points where the plant can be separated. Older, woody centers should be discarded in favor of the more vigorous outer sections of the clump.
Each new division must have a healthy portion of roots and at least two or three emerging buds to ensure survival. You can use a clean, sharp knife or garden shears to make precise cuts that minimize damage to the plant tissues. Replanting the divisions immediately prevents the sensitive roots from drying out in the air and sun. Ensure the new planting holes are large enough to accommodate the roots without crowding or bending them upward.
Firming the soil around the newly planted divisions eliminates air pockets that could cause the roots to desiccate. A thorough watering after planting helps settle the soil and provides the necessary hydration for the plant to begin establishing itself. You may notice some slight wilting in the first few days, but the plants usually recover quickly if kept consistently moist. This method is particularly useful for filling large areas quickly or sharing favorite plants with neighbors and friends.
Propagation through division also serves as a rejuvenation technique for aging plants that may be losing vigor in the center. By breaking up the old crown, you stimulate the production of new, more productive growth from the roots. Most professional gardeners recommend dividing anise hyssop every three to four years to maintain a healthy and attractive appearance. This regular maintenance ensures that your garden remains filled with strong, floriferous specimens season after season.
More articles on this topic
Softwood cuttings for rapid multiplication
Taking softwood cuttings in late spring or early summer is another effective way to propagate anise hyssop during the growing season. Select healthy, non-flowering stems that are flexible but firm enough to stand upright on their own. Each cutting should be about 10 centimeters long and taken just below a leaf node where growth hormones are most concentrated. Removing the lower leaves reduces moisture loss while leaving a few at the top allows the cutting to continue photosynthesizing.
Diiping the cut end into a rooting hormone can accelerate the development of new roots, although it is not strictly necessary for this species. Place the cuttings in a sterile medium such as a mix of perlite and peat moss to provide the perfect balance of moisture and air. Keeping the medium consistently damp but not saturated is the key to preventing rot before roots can form. A bright location with indirect sunlight provides enough energy without the risk of overheating the delicate cuttings.
Roots typically begin to form within two to three weeks under ideal conditions of warmth and high humidity. You can check for progress by giving a very gentle tug on the cutting; resistance indicates that root development is underway. Once a strong root system has established, the young plants can be moved into individual pots filled with standard potting soil. This intermediate step allows them to grow stronger before they are eventually introduced to the challenging conditions of the open garden.
Using cuttings is an excellent way to produce a large number of plants from a single parent without disturbing the root system. This method is especially valuable if you have a particularly fragrant or beautifully colored specimen that you wish to replicate exactly. It allows for precise control over the propagation environment and often results in a higher success rate than outdoor sowing. With a little patience, you can turn a few stems into a whole new border of aromatic hyssop.
Site selection and soil preparation for planting
The success of any propagation effort ultimately depends on the quality of the permanent site chosen for the plants. Anise hyssop requires a location that receives at least six hours of direct sunlight per day for optimal growth and oil production. While it can tolerate partial shade, the stems may become weak and the flowering display will be less impressive. Avoiding low-lying areas where water tends to collect after rain is crucial for the health of the root system.
Preparing the soil before planting involves removing weeds and incorporating organic amendments to improve the overall structure. A well-prepared bed allows the roots to penetrate deeply and quickly, which is essential for drought resistance in later years. If the soil is particularly heavy or compacted, adding expanded shale or coarse compost can help create the necessary drainage. Professional soil preparation pays dividends in the form of healthier plants and reduced maintenance requirements over time.
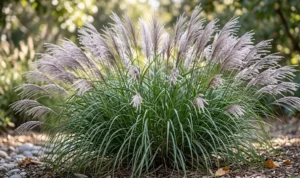
Consider the surrounding plants when deciding where to place your newly propagated anise hyssop. Its upright habit and purple flowers pair beautifully with the yellow of coreopsis or the fine texture of ornamental grasses. Ensure that there is enough space between the hyssop and its neighbors to allow for air circulation and easy maintenance access. Thinking about the full mature size of the plant during the planting phase prevents overcrowding and competition for resources later on.
Finalizing the planting process with a thin layer of mulch helps to suppress weed competition and regulate soil temperature. Be careful to keep the mulch away from the direct base of the plant to avoid moisture-related crown issues. Regularly monitoring the new transplants during their first few weeks in the garden ensures they receive the care needed to become fully established. Successful planting is the bridge between propagation and a beautiful, self-sustaining garden feature.