The successful establishment of perennial ryegrass begins with a deep understanding of the specific environmental conditions required for its germination and growth. You must approach the planting process with precision, as the initial steps taken will determine the density and health of the turf for years to come. This species is favored for its remarkably fast germination rate, often showing green shoots within just a week of sowing. A professional planting strategy ensures that the seeds have optimal contact with the soil and sufficient resources to develop strong foundations.
Selecting the right time of year for planting is the first critical decision you will make in the propagation process. You should aim for periods when the soil temperature is between ten and eighteen degrees Celsius for the best results. In most temperate climates, late summer or early autumn provides the ideal window because the soil is warm and moisture is often more consistent. Spring is also a viable option, though you must be prepared to manage more competition from emerging summer weeds.
The quality of the seed you choose is just as important as the technique you use to plant it. You should always look for certified seed that has a high germination percentage and a low weed seed content. Investing in premium cultivars often pays off in the long run through better disease resistance and a more attractive appearance. Always check the label for the “pure live seed” rating to ensure you are getting the best value for your project.
Soil preparation is a task that cannot be overlooked if you want a professional-grade result. You should start by removing all existing vegetation and any large rocks or debris from the designated area. Tilling the soil to a depth of at least ten centimeters will help loosen the ground and improve the air-to-water ratio. This is also the perfect time to incorporate any necessary soil amendments based on your recent soil test results.
Ground preparation and leveling
Creating a smooth and level surface is essential for both the aesthetic appeal and the practical maintenance of your new lawn. You should use a heavy rake to break up large clumps of soil and distribute the earth evenly across the site. Any low spots will collect water and may lead to fungal issues, while high spots will be prone to scalping by the mower. Spending extra time on the leveling phase will make every future maintenance task much easier and more effective.
More articles on this topic
Firming the soil before sowing helps to prevent settling and ensures that the seeds stay at the correct depth. You should use a light lawn roller or simply walk over the area to create a stable base that still allows for water penetration. The soil should be firm enough that your feet don’t sink in, but not so hard that it becomes compacted. This balance is crucial for creating the perfect seedbed where young roots can easily find their way down.
Moisture management during the preparation phase sets the stage for rapid germination once the seeds are in the ground. You should lightly water the prepared area a few days before planting to ensure there is moisture deep in the soil profile. Avoid planting in muddy conditions, as this can lead to uneven seed distribution and poor soil structure. The goal is to have a crumbly, moist texture that provides an inviting environment for the new biological life.
Final raking just before sowing creates small grooves in the soil that help hold the seeds in place. You should aim for a fine, “salt and pepper” texture on the surface of the ground. This increased surface area improves the contact between the seed and the soil, which is vital for moisture absorption. A well-prepared seedbed is the hallmark of a professional planting project and significantly increases the chances of a perfect lawn.
Sowing techniques and seed distribution
Uniform distribution of the seed is the key to achieving a thick, carpet-like appearance without unsightly patches. You should use a calibrated broadcast or drop spreader to ensure that the correct amount of seed is applied per square meter. It is often helpful to divide the total amount of seed in half and apply it in two passes at right angles to each other. This “checkerboard” pattern minimizes the risk of leaving gaps or creating overly dense areas.
More articles on this topic
The depth at which the seed is placed can make the difference between a successful lawn and a total failure. You should aim for a planting depth of about three to six millimeters for perennial ryegrass seeds. If the seeds are buried too deep, they may run out of energy before they reach the surface and see the light. Conversely, seeds left entirely on the surface are more likely to dry out or be eaten by hungry birds.
Once the seed is spread, a very light raking or rolling will help tuck the seeds into the soil surface. You should be careful not to move the seed around too much, as this can ruin the uniform distribution you just achieved. Using a water-filled roller can help press the seed into the ground, ensuring the vital soil-to-seed contact required for hydration. This step also helps protect the seeds from being washed away during the first few watering sessions.
In some cases, applying a light layer of mulch or straw can help protect the new seeds while they germinate. You should use a material that is free of weed seeds and will not smother the young plants as they emerge. A thin layer of peat moss or specially designed seed-starting mulch can help retain moisture and keep the soil temperature stable. This extra layer of protection is especially useful on sloped areas where erosion might be a significant concern.
Post-planting care and germination
The period immediately following sowing is the most critical time for the survival of your new perennial ryegrass. You must keep the soil surface consistently moist but not saturated to trigger the germination process. This often requires light watering several times a day, especially if the weather is warm or windy. If the seeds dry out even once after they have started to swell with water, they will likely die.
As the first green shoots appear, you can gradually reduce the frequency of watering while increasing the amount applied each time. This transition encourages the young roots to grow deeper into the soil in search of moisture. You should continue to monitor the area closely for any signs of drying out, as the young plants are still very delicate. Avoid walking on the new grass during this phase, as the fragile tissues are easily damaged by pressure.
Fertilization during the establishment phase should be handled with care to avoid burning the new growth. You should use a “starter fertilizer” that is high in phosphorus to support rapid root development. Applying this fertilizer at the time of planting or shortly after germination provides the necessary boost for the young plants. Always follow the manufacturer’s instructions to ensure you are providing the right amount of nutrients for the specific area.
Mowing the new lawn for the first time is a significant milestone that should only happen when the grass reaches a certain height. You should wait until the blades are about eight to ten centimeters tall before you bring out the mower. Ensure that the mower blades are extremely sharp to prevent pulling the young plants out of the ground. For the first few mows, you should only remove the top third of the grass to avoid stressing the developing root systems.
Alternative propagation methods
While sowing from seed is the most common method for perennial ryegrass, other options like sodding are available for instant results. You should consider using sod if you need an immediate green cover or if you are working on a steep slope where erosion is a major problem. Sodding involves laying pre-grown mats of grass onto a prepared soil surface, providing an “instant lawn” that is already established. This method is more expensive than seeding but saves a significant amount of time and early-stage maintenance.
Plugging and sprigging are less common for this specific species but can be used in certain restoration projects. You should know that perennial ryegrass is a bunch-forming grass, meaning it doesn’t spread through runners as aggressively as some other species. This makes it less suited for propagation through individual plugs compared to creeping grasses like Kentucky bluegrass. However, in a mix, these methods can help fill in small damaged areas without a full renovation.
Overseeding is a vital propagation technique used to maintain the density of an existing perennial ryegrass lawn. You should perform this task every few years to replace older plants with fresh, vigorous new growth. This process involves spreading seed directly over the existing turf, often after a thorough aeration or vertical mowing. It is a cost-effective way to keep your landscape looking its best without starting from scratch.
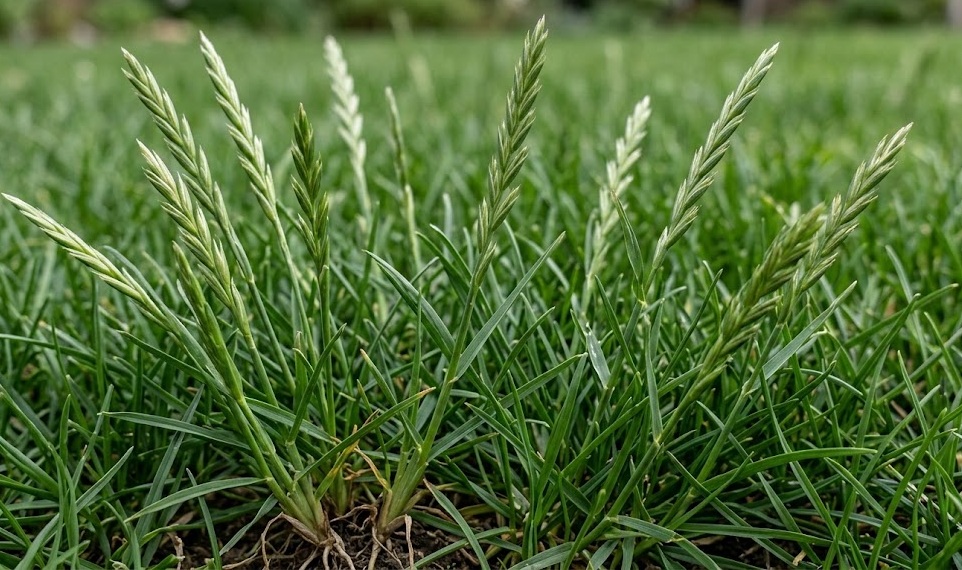
Natural reseeding can occur if the grass is allowed to grow tall and produce seed heads, though this is rarely desirable in a managed lawn. You should generally avoid letting the grass go to seed, as it shifts the plant’s energy away from root and leaf production. In a professional setting, we rely on controlled propagation methods to ensure the genetic purity and quality of the turf. Sticking to proven planting schedules will yield a much more predictable and attractive result for your gardening projects.