The initial phase of establishing a chickpea crop is the most critical period for ensuring a high-yield harvest at the end of the season. You must select the right time for sowing based on the soil temperature and the anticipated local weather patterns in your specific region. Proper preparation of the seedbed creates an environment where the young sprouts can emerge quickly and establish a deep root system. If you pay close attention to these early details, you will set the stage for a healthy and resilient stand of plants.
Seed selection and preparation
Choosing high-quality seeds is the first step in a professional planting process that leads to a successful agricultural outcome. You should always source your seeds from a reputable supplier to ensure they are free from pathogens and have a high germination rate. Selecting a variety that is specifically adapted to your local climate and soil type will give the crop a significant advantage. Before planting, you might consider treating the seeds with a specific inoculant to encourage the early development of nitrogen-fixing nodules.
Inspecting the seeds for physical damage or signs of disease is a mandatory task that prevents future problems in the field. You need to discard any seeds that are cracked, discolored, or show signs of fungal growth, as they are unlikely to produce healthy plants. Uniform seed size is also important for mechanical planting, as it ensures an even distribution across the entire growing area. Taking the time to prepare your materials properly is a hallmark of a professional approach to gardening and agriculture.
Soaking the seeds for a short period before planting can sometimes accelerate the germination process in very dry conditions. However, you must be careful not to over-soak them, as this can lead to rot if the soil stays too wet after sowing. In most professional settings, planting dry seeds into slightly moist soil is the preferred method for ensuring consistent and healthy emergence. Always follow the specific recommendations for the variety you have chosen to achieve the best possible results.
Soil preparation and sowing techniques
The soil needs to be worked until it reaches a fine tilth that allows for excellent seed-to-soil contact. You should remove any large stones, clumps of heavy clay, or old plant debris that might obstruct the path of the emerging seedlings. Leveling the ground ensures that water will distribute evenly and that mechanical tools can move through the rows without difficulty. A well-prepared seedbed is the foundation upon which the entire success of the growing season is built.
More articles on this topic
When it comes to the actual sowing, you should aim for a depth of about five to eight centimeters depending on the moisture level. Planting too shallow can leave the seeds vulnerable to birds or drying out, while planting too deep may prevent them from reaching the surface. You must maintain a consistent depth across the field to ensure that all the plants emerge at the same time. This uniformity makes future maintenance tasks and the final harvest much easier to manage effectively.
The spacing between the rows should be wide enough to allow for airflow and mechanical cultivation, but close enough to shade the ground. You should generally aim for a distance of thirty to forty-five centimeters between rows to optimize the use of space and light. Proper spacing reduces the risk of fungal diseases by preventing the buildup of humidity within the plant canopy. Professional growers often use precision seeders to achieve the exact density required for the highest possible yield.
Germination and early growth management
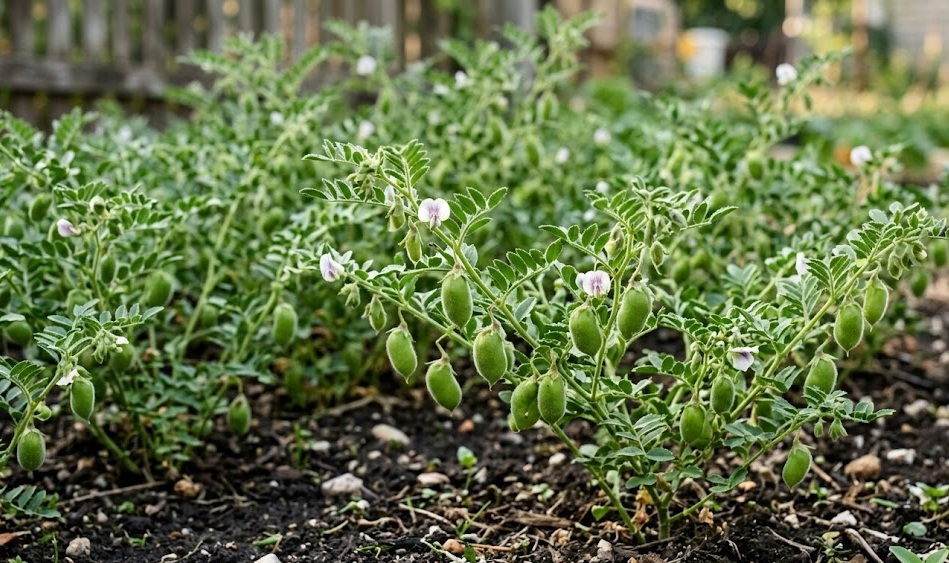
Once the seeds are in the ground, you must monitor the soil temperature and moisture levels very closely. Germination typically occurs within seven to ten days when the conditions are ideal and the soil is sufficiently warm. You will see the first small shoots breaking through the surface, at which point the plant’s nutritional needs begin to increase. During this delicate stage, the young sprouts are particularly vulnerable to extreme weather and competition from fast-growing weeds.
Providing a light amount of moisture can help the seedlings establish themselves if the weather remains unexpectedly dry after sowing. You should avoid heavy irrigation, as this can crust the surface of the soil and make it difficult for the sprouts to emerge. The goal is to keep the earth consistently damp but not saturated, allowing the roots to find oxygen while they grow. Observing the field daily during this period allows you to intervene quickly if any issues like pest damage or crusting occur.
More articles on this topic
The early development of the root system is the plant’s primary focus during the first few weeks of life. You cannot see this growth, but you can infer its progress by the health and vigor of the above-ground foliage. As the plants grow, they will begin to produce their first true leaves and start the process of branching out. A strong start during the germination phase is essential for building a plant that can withstand the challenges of the summer months.
Propagation methods and strategies
While direct sowing is the most common method for large-scale production, you can also explore other ways to propagate chickpeas. In some specialized gardening contexts, starting seeds in biodegradable pots can give you a head start on a short growing season. However, chickpeas have a sensitive taproot and do not generally like being transplanted once they have begun to grow. If you choose this path, you must move the plants to the field while they are still very young to minimize root disturbance.
Saving seeds from your own harvest is a traditional and effective way to propagate the crop for the following year. You should select the healthiest and most productive plants in your field to serve as the source for your future seed stock. Allow the pods to dry completely on the plant before harvesting them and storing the seeds in a cool, dry place. This method allows you to develop a strain of chickpea that is perfectly adapted to the specific conditions of your own land.
Maintaining the genetic purity of your crop requires that you prevent cross-pollination with other varieties if you are growing more than one type. While chickpeas are mostly self-fertile, a small amount of crossing can occur if different varieties are planted too close together. If you are serious about professional propagation, you should keep adequate distance between different fields or rows of distinct varieties. This attention to detail ensures that the characteristics of your favorite varieties remain consistent over many generations.