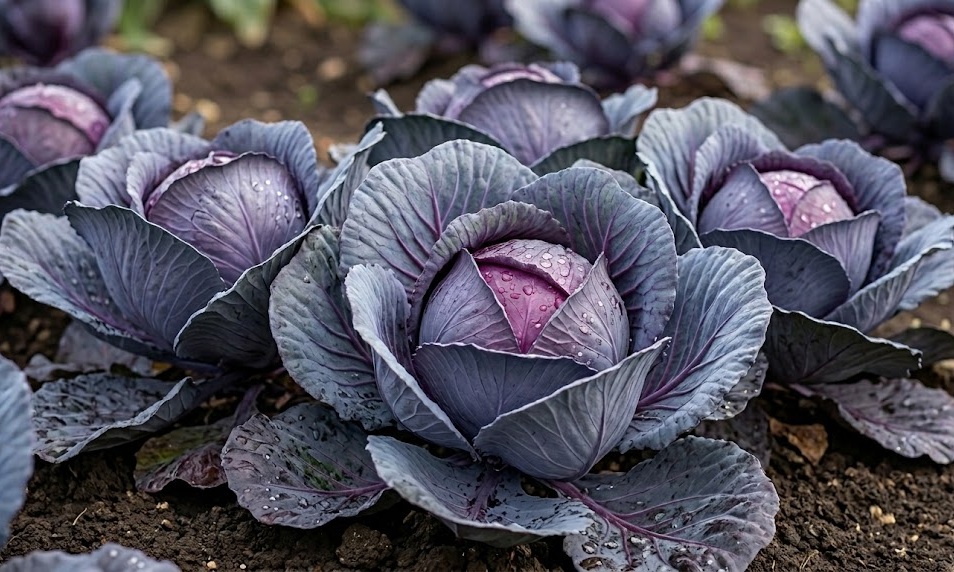
While red cabbage does not require the extensive pruning that fruit trees or tomatoes might, a targeted approach to trimming can significantly improve plant health and crop quality. Strategic removal of specific plant parts helps in directing energy toward the central head, improving airflow, and reducing the risk of pest infestations. A professional gardener knows exactly when to intervene and when to let the plant grow naturally to maximize its biological potential. This guide covers the essential techniques for maintaining your red cabbage through careful pruning and end-of-season cleanup.
Trimming the lower leaves of the red cabbage is a common practice used to improve ventilation around the base of the plant. As the head develops, the oldest, lowest leaves can sometimes touch the soil, where they become prone to rot and provide a bridge for pests. You should use a sharp, clean pair of shears to remove any leaves that are yellowing, damaged, or lying directly on the ground. This simple act of hygiene keeps the plant’s environment drier and less inviting to soil-borne pathogens.
Be careful not to over-prune, as the plant needs its large outer leaves to produce the energy required for head formation. You should only remove leaves that are clearly no longer contributing to the plant’s health or those that pose a structural risk. Each leaf removed is a small reduction in the plant’s total photosynthetic capacity, so balance is essential. A professional grower treats every leaf as a valuable resource and only removes them with a specific purpose in mind.
Pruning should always be done on a dry day to ensure that the wounds on the stem heal quickly and don’t become an entry point for bacteria. You will notice that the plant produces a natural “scab” over the cut area within a few hours if the air is dry and moving. Avoid pruning in the early morning when the dew is still heavy on the leaves or during periods of high humidity. Taking these small precautions significantly reduces the risk of accidental disease transmission throughout your garden.
By keeping the area around the stem clean and open, you also make it much easier to apply mulch and monitor the soil moisture. It allows you to see the base of the plant clearly, which is where many pests like root maggots or cutworms first appear. This visibility is a key component of a proactive pest management strategy and helps you catch issues before they escalate. A well-trimmed cabbage patch looks professional and is much easier to maintain throughout the long growing season.
More articles on this topic
Thinning techniques for better airflow
In the early stages of the garden cycle, thinning your red cabbage plants is a form of “pruning” that ensures each individual has the space it needs to thrive. If you have direct-sown your seeds, you must be brave enough to remove the smaller, weaker seedlings to prevent overcrowding. You should aim for a final spacing that allows the mature leaves of neighboring plants to just barely touch. This arrangement maximizes the use of space while still allowing for the necessary airflow between the rows.
Overcrowded plants are much more likely to suffer from fungal diseases like downy mildew because the humidity stays trapped between the leaves. You will find that well-spaced plants dry out faster after rain or irrigation, which is the best natural defense against many pathogens. Thinning also reduces the competition for nutrients and water, leading to a more uniform and high-quality crop. It is a professional standard to prioritize the quality of individual plants over the total quantity of a crowded bed.
When thinning, you should always choose the most vigorous seedlings with the thickest stems and the deepest color. Use a small pair of scissors to snip the unwanted seedlings at the soil level rather than pulling them out by the roots. This prevents any disturbance to the delicate root system of the plant you have chosen to keep. This careful approach ensures that the remaining cabbage can continue its growth without any setback or stress.
As the plants grow larger, you may need to do a second round of thinning if you notice that the canopy is becoming too dense. This is particularly important in regions with high humidity or frequent summer rains where air stagnation is a constant threat. Removing every second leaf in a particularly crowded area can sometimes be enough to restore the necessary balance. A professional gardener is constantly evaluating the physical space of the garden and making adjustments as the season progresses.
More articles on this topic
Seasonal trimming routines
Establishing a regular routine for checking and trimming your red cabbage helps you stay ahead of potential problems. You should do a quick walkthrough of your garden at least once a week to look for any leaves that have been damaged by wind or pests. Removing these damaged sections prevents them from becoming a source of decay that could spread to the healthy parts of the head. This “little and often” approach to maintenance is much more effective than trying to fix a major problem all at once.
During the mid-season, you may notice small “side shoots” or secondary heads beginning to form at the base of the main stem. You should pinch these out as soon as they appear to ensure that all the plant’s energy is focused on the primary central head. Allowing side shoots to grow can result in a smaller and less dense main harvest, as the plant’s resources are divided. This targeted removal is a classic professional technique for producing “show-quality” vegetables.
As the harvest approaches, you can do a final trim of the outermost wrapper leaves to help the head “tighten” and finish its development. You will find that this can sometimes speed up the final maturing process and make the harvest much cleaner and easier. However, you must leave enough leaves to protect the head from sunscald and physical damage during the final weeks. The goal is to present a clean, solid, and vibrant red cabbage head at the end of the season.
After the final harvest, the “pruning” shift moves toward clearing the entire plant from the garden bed. You should remove the root balls as well as the stems, as these can harbor diseases and pests through the winter. This post-harvest cleanup is an essential part of the agricultural cycle and prepares the ground for the next crop in your rotation. A professional finishes the season as carefully as they started it, ensuring the long-term health of their land.