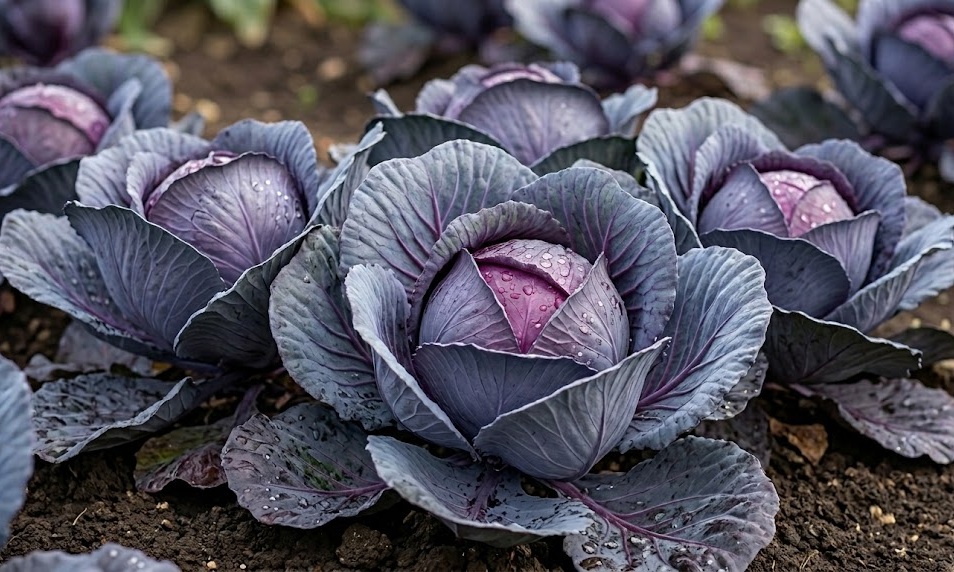
Successful propagation of red cabbage begins with high-quality seeds and a controlled environment that mimics the ideal spring conditions. Whether you choose to start your plants indoors or sow them directly into the soil, the early stages of life dictate the ultimate quality of the harvest. Attention to detail during the germination and seedling phases ensures that each plant develops a robust root system and a resilient frame. This guide explores the professional techniques required to move from a tiny seed to a thriving transplant in your garden.
Starting seeds indoors gives you a significant advantage by extending the growing season and protecting vulnerable sprouts from erratic spring weather. You should use a sterile, fine-textured seed starting mix that provides excellent drainage while holding enough moisture for germination. Sowing the seeds about one centimeter deep ensures they have enough darkness to sprout while remaining close enough to the surface. Maintaining a consistent temperature of around twenty degrees Celsius will result in rapid and uniform emergence across your seed trays.
Once the first true leaves appear, it is essential to provide intense light to prevent the seedlings from becoming leggy and weak. You can use specialized grow lights positioned just a few centimeters above the plants to simulate the full spectrum of the sun. As the seedlings grow, you should thin them out to ensure that each individual has enough space for its foliage to expand. This early selection process allows you to focus your energy on the strongest specimens, leading to a more productive garden overall.
Ventilation is another key factor in indoor propagation that many beginners often overlook. Using a small fan to create a gentle breeze around the seedlings strengthens their stems through mechanical stress. This simulated wind also reduces the humidity levels around the leaves, preventing the dreaded damping-off disease. You will find that seedlings grown with good airflow are much sturdier and adapt more quickly when they are finally moved outdoors.
Seedling hardening off
The process of hardening off is a bridge between the protected indoor environment and the harsh realities of the outdoor garden. You must introduce your young red cabbage plants to direct sunlight and fluctuating temperatures gradually over a period of seven to ten days. Start by placing them in a shaded, sheltered spot for just an hour or two on the first day. Slowly increasing their exposure each day allows the plant’s cuticle to thicken and its internal chemistry to adjust to the UV radiation.
More articles on this topic
Skipping this crucial step often results in transplant shock, where the plants wilt, turn white, or stop growing altogether. You should monitor the weather closely during this week and bring the plants back inside if frost or heavy rain is forecasted. The goal is to toughen the plants without causing them any permanent damage or growth setbacks. A well-hardened seedling should look vibrant and sturdy, with a deep color that indicates high chlorophyll and anthocyanin levels.
Reducing the frequency of watering during the hardening process can also help in preparing the plants for the garden. This slight water stress encourages the roots to seek out moisture more aggressively, which will be useful once they are in the ground. However, you must be careful not to let the small containers dry out completely, as this can kill the delicate root hairs. Balance is the key to producing a plant that is ready to hit the ground running.
By the end of the transition period, your seedlings should be able to spend a full night outdoors without any adverse effects. This signals that they have successfully adapted to the local microclimate and are ready for permanent transplanting. Professional growers never rush this process, as they know that a week of patience can save a month of stunted growth later in the season. Your red cabbage will thank you with rapid establishment and a much lower mortality rate.
Transplanting depth and spacing
When the time comes to move your red cabbage into the garden, the physical layout and depth of planting are paramount. You should dig a hole that is slightly deeper than the seedling’s original container to allow for some stem burial. Planting the seedling slightly deeper can provide extra stability and encourage adventitious roots to grow from the buried portion of the stem. Ensure that the soil is firmly pressed around the root ball to eliminate air pockets that could dry out the roots.
More articles on this topic
Spacing is one of the most common areas where gardeners make mistakes, often crowding plants too closely together. Red cabbage requires at least forty-five to sixty centimeters between each plant to allow for full leaf expansion and adequate airflow. Rows should be spaced about seventy centimeters apart to give you enough room to move between them for maintenance and harvesting. Giving each plant its own territory reduces competition for light and nutrients, leading to larger and more uniform heads.
Watering the plants immediately after transplanting is a non-negotiable step to settle the soil and hydrate the roots. You might consider adding a very diluted liquid seaweed fertilizer to the water to help reduce the stress of the move. Choosing a cloudy day or transplanting in the late afternoon prevents the sun from wilting the fresh transplants before they can recover. This careful approach to the initial planting ensures that the cabbage doesn’t lose any momentum in its development.
Labeling your rows with the variety and the date of transplanting will help you track the progress and expected harvest dates. You should also take this time to install any physical barriers, like bird netting or insect mesh, that might be needed. Protecting the plants from the very first hour they are in the garden is much easier than trying to solve a problem later. A professional layout is the foundation of an organized and high-yielding agricultural space.
Direct sowing methods
In regions with a long growing season or for a late-autumn harvest, direct sowing red cabbage into the garden bed is a viable option. You should wait until the soil has warmed up sufficiently, as cold, wet earth can cause the seeds to rot before they germinate. Preparing a fine seedbed by raking the soil and removing any large clumps is necessary for good seed-to-soil contact. Sowing the seeds in small groups every fifty centimeters allows you to thin them later to the strongest single plant.
Directly sown plants often develop a more resilient taproot because they are never disturbed by the transplanting process. You will notice that these plants can sometimes catch up to earlier transplants because they don’t experience the typical two-week recovery period. However, they require more diligent weeding and watering in the early stages because they are more vulnerable to environmental changes. Protecting the emerging sprouts from slugs and snails is critical during the first few weeks of life.
Maintaining consistent moisture in the top layer of soil is the biggest challenge when direct sowing in the open garden. You may need to water the area lightly every day until the seedlings are well-established and have grown their first few leaves. Using a light horticultural fleece can help keep the moisture in and protect the tiny plants from the direct heat of the sun. Once the plants reach about ten centimeters in height, they can be treated much like their transplanted counterparts.
Thinning the seedlings is a task that requires a steady hand and a lack of sentimentality for the discarded plants. You should always keep the strongest, most vibrant seedling in each cluster and remove the others by cutting them at the soil level. Pulling them out can disturb the roots of the plant you wish to keep, so scissors are the preferred tool. This method ensures that your garden remains productive and that every cabbage has the space it needs to thrive.