Successful planting of this perennial starts with choosing the right time of year to introduce it to your garden space. You should ideally aim for early spring or early autumn when the temperatures are mild and the soil is moist. These windows of opportunity allow the plant to establish a strong root system before the stress of summer or winter. Ensuring that the ground is workable and not frozen is the first practical step in the planting process.
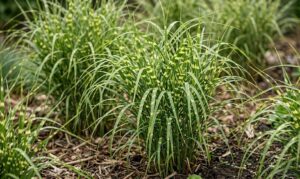
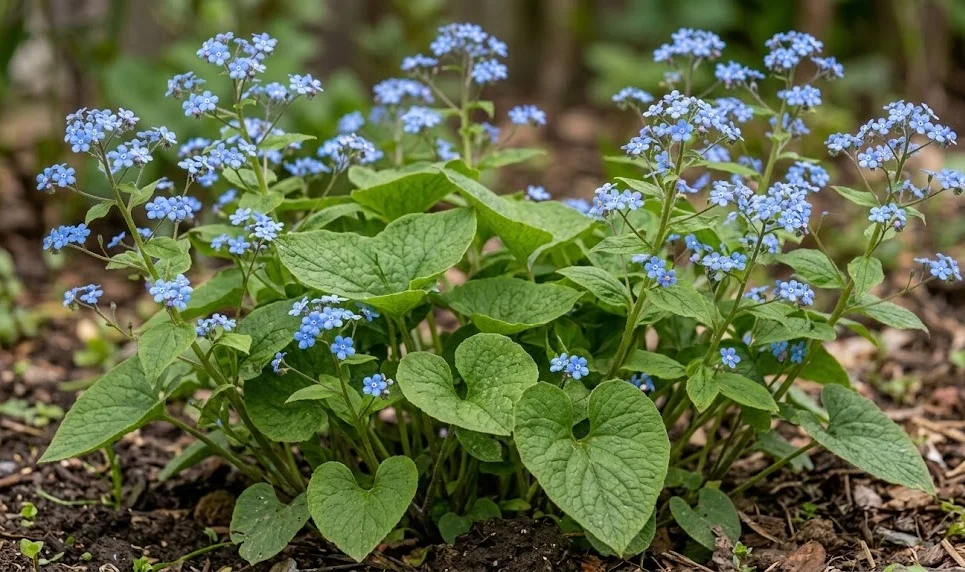
Selecting a location with the correct amount of shade is the next critical decision for any gardener. You should look for areas that receive dappled sunlight or morning sun followed by afternoon shade. Deep, heavy shade is also acceptable, though the plant may grow a bit more slowly and produce fewer flowers. Avoiding the hot, drying rays of the midday sun will prevent the delicate foliage from scorching and turning brown.
The soil in your chosen spot should be loose, friable, and rich in decomposed organic matter. You can prepare the area by digging a hole that is twice as wide as the current root ball of the plant. Mixing in some well-rotted manure or garden compost will provide a nutrient-rich foundation for the new arrival. Ensuring that the site has good natural drainage is essential to prevent the roots from sitting in stagnant water.
When you are ready to put the plant in the ground, you should handle the root ball with great care. You must place the plant at the same depth it was growing in its original container to avoid crown rot. Gently firm the soil around the base of the plant to remove any large air pockets that could dry out the roots. Watering the area thoroughly immediately after planting will help settle the soil and reduce transplant shock.
Professional planting techniques
Spacing is a vital consideration if you want to create a full and lush groundcover effect over time. You should generally space the individual plants about 30 to 45 centimeters apart to allow for their natural spread. This distance ensures that each plant has enough room to reach its full size without competing too much with its neighbors. Overcrowding can lead to poor air circulation and an increased risk of foliage diseases during humid weather.
More articles on this topic
Using a starter fertilizer can give your newly planted perennials an extra boost during their first few weeks. You should choose a product that is high in phosphorus to encourage strong root development rather than just top growth. Always follow the manufacturer’s instructions to avoid over-fertilizing, which can burn the sensitive new roots of the plant. Applying the fertilizer to the bottom of the planting hole and covering it with a layer of soil is a safe method.
Mulching immediately after planting is a highly recommended practice for establishing these shade-loving plants successfully. You should apply a layer of bark chips or shredded leaves about five centimeters deep around the base. This layer helps to keep the soil temperature consistent and prevents the rapid evaporation of vital moisture. Make sure to keep the mulch a small distance away from the stems to prevent moisture from trapped against the bark.
Monitoring the new plants daily for the first two weeks is essential for identifying any immediate issues. You should check for signs of wilting, which might indicate that the plant needs more frequent watering. If the weather is unexpectedly hot or windy, you may need to provide some temporary protection. Once you see new leaves beginning to emerge from the center, you can be confident that the plant has started to settle in.
Division as a propagation method
Dividing established clumps is the most common and reliable way to propagate this plant in a home garden. You should wait until the plant is at least three or four years old before attempting to divide it for the first time. The best time for this procedure is in the early spring just as the first leaves begin to appear. This timing allows the new divisions to establish themselves before the heat of the summer months arrives.
More articles on this topic
To begin the process, you should carefully dig up the entire clump with a sharp spade or a garden fork. You will need to shake off some of the excess soil to see the structure of the rhizomatous root system clearly. Using a clean, sharp knife, you can cut the clump into smaller sections, making sure each piece has at least one growing point. Larger divisions tend to establish themselves much more quickly than very small pieces.
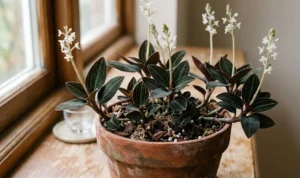
Replanting the new divisions immediately is the best way to ensure their survival and continued growth. You should treat each new piece as a brand-new plant and follow all the standard planting procedures mentioned earlier. If you cannot plant them right away, keep the roots moist and shaded in a temporary container or a plastic bag. Never let the roots dry out completely during the division process as this can be fatal to the plant.
Watering the new divisions regularly is even more important than it is for established nursery plants in your garden. Their root systems have been disturbed and reduced in size, so they have less ability to take up water. You might notice some minor wilting in the first few days, but the plants should recover quickly if kept moist. Most divisions will grow into full-sized, beautiful plants by the following growing season.
Growing from seeds and cuttings
Propagation from seed is possible but requires a bit more patience and attention to detail than division. You can harvest the small, black seeds once they are fully ripe and have turned dark on the spent flower stalks. Sowing the seeds immediately in a cold frame or a protected outdoor seedbed often yields the best results. The seeds require a period of cold stratification over the winter to break their dormancy and germinate in the spring.
If you choose to start seeds indoors, you must simulate the winter conditions using a refrigerator for several weeks. You should sow the seeds in a moist, sterile seed-starting mix and cover them lightly with a thin layer of grit. Keep the containers in a cool but bright location and ensure that the soil remains consistently damp but not soggy. Germination can be erratic, so do not give up if the seedlings do not appear all at once.
Root cuttings provide another interesting way to increase your stock of these plants, especially for certain cultivars. You should take these cuttings in late winter or very early spring while the plant is still mostly dormant. Select thick, healthy sections of the root and cut them into lengths of about five centimeters each. Planting these horizontally in a tray of sandy compost will eventually lead to the development of new shoots.
Each of these propagation methods has its own advantages depending on your goals and the time of year. Division is the fastest way to get large plants, while seeds allow you to produce a large number of specimens. Root cuttings are a great way to experiment with the plant’s biology and learn more about its growth patterns. Whichever method you choose, you will find that propagating this species is a rewarding and educational experience.