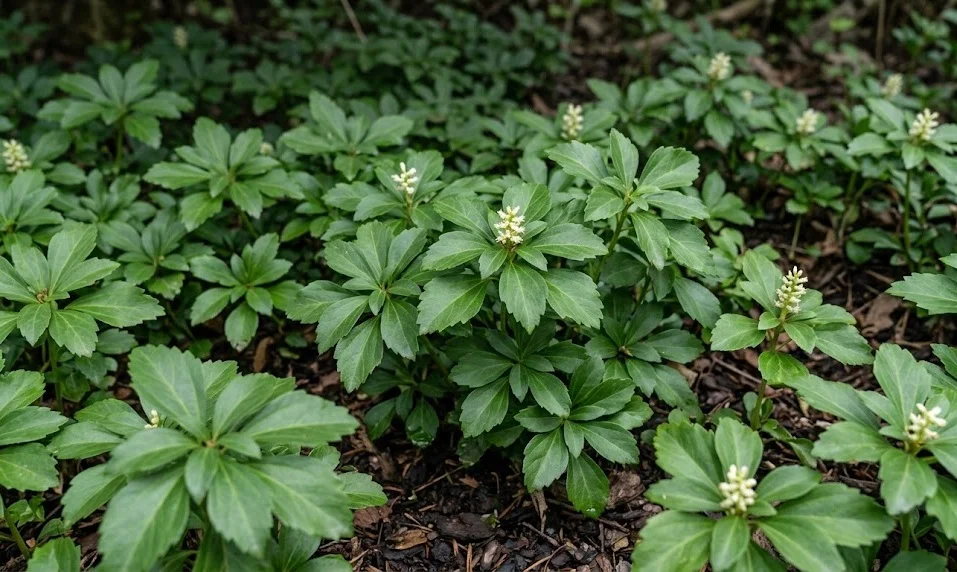
Pruning and cutting back Japanese spurge is a maintenance task that helps to keep the groundcover looking youthful, dense, and healthy. While many people think of groundcovers as “plant and forget” options, a little bit of strategic trimming can significantly improve their long-term performance. This species responds very well to pruning, which can be used to control its spread, remove damaged foliage, or stimulate a flush of fresh growth. Understanding the proper techniques and timing for this task is essential for any gardener who wants a professional-looking landscape.
The most common reason for pruning Japanese spurge is to thin out an old, overgrown mat that has become too thick for its own good. Over time, the lower parts of the stems can become woody and lose their leaves, leading to a sparse appearance at the ground level. By selectively removing some of the older stems, you allow more light and air to reach the base of the plants. This simple act encourages the rhizomes to send up new, vibrant green shoots that will quickly fill in the gaps and revitalize the entire bed.
Early spring is the absolute best time to perform any major cutting back or rejuvenation pruning. This timing allows you to remove the winter-damaged foliage just as the plant is preparing its first big growth spurt of the year. If you prune in the spring, the new growth will quickly hide your cuts, leaving you with a fresh-looking carpet of green in just a few weeks. You can also use this opportunity to clean up any debris that has become trapped in the dense foliage over the winter months.
While major pruning is usually an annual or biennial task, you can do light touch-up trimming at any point during the growing season. If you see a few stray stems that are growing over a path or into another plant’s space, feel free to snip them back. Japanese spurge is quite forgiving and will not be harmed by minor aesthetic adjustments throughout the summer. Just avoid any heavy pruning in the late autumn, as you don’t want to encourage new growth that won’t have time to harden off before the frost.
Tools and techniques for effective trimming
For small areas or precision work, a sharp pair of handheld bypass pruners is the best tool for the job. These allow you to make clean, quick cuts without crushing the stems, which helps the plant heal faster and reduces the risk of disease. Always ensure your tools are clean and sharp before you start to prevent tearing the delicate tissues of the plant. If you are working in a large bed, you may want to use garden shears to speed up the process, but be careful to maintain a natural look.
More articles on this topic
When you are thinning out the plants, focus on removing the tallest and oldest stems first to allow the younger growth to take over. You should cut these stems back as close to the ground as possible to encourage new shoots to emerge from the rhizomes. Avoid simply “haircutting” the top of the plants, as this can lead to a thicket of messy, branched growth at the tips. Cutting to the base creates a much cleaner look and promotes a healthier growth habit for the entire colony.
If an entire area has become unsightly or diseased, you can perform a more drastic “mowing” technique to reset the growth. By setting your lawnmower to its highest setting and carefully running it over the bed, you can remove all the top growth at once. This should only be done in the early spring and only on healthy, well-established plantings that have the energy to recover. It is a bold move, but it can result in a perfectly even and incredibly dense carpet of new green leaves within a single season.
After any significant pruning session, it is a good idea to provide the plants with a bit of extra care to help them recover. A light watering and a thin application of compost or organic fertilizer will give the plants the boost they need to produce new foliage. You should also ensure that the area is well-mulched to protect the newly exposed soil and help retain moisture. With this professional approach, your Japanese spurge will bounce back stronger and more beautiful than ever before.
Maintaining the edges and controlling spread
Controlling the perimeter of your Japanese spurge bed is an ongoing task that keeps your garden looking tidy and well-defined. Because the plant spreads via underground rhizomes, it can slowly creep into lawn areas or adjacent flower beds if left unchecked. The best way to manage this is to use a sharp edging tool or a spade to cut a clean line around the border of the planting. Removing the encroaching stems and their roots once or twice a year is usually enough to keep the groundcover in its designated space.
More articles on this topic
If the spurge has grown over a stone or brick edge, you can simply use shears to trim it back to the line of the hardscaping. This creates a very crisp, formal look that works beautifully in more structured garden designs. Many professional landscapers prefer this “tailored” look, as it highlights the contrast between the soft texture of the leaves and the solid lines of the path. Regular maintenance of these edges prevents the plants from becoming a tripping hazard or looking neglected.
When you remove the unwanted spread from the edges, you can often use those rooted pieces to fill in gaps elsewhere or start new plantings. This is a very efficient way to make the most of your pruning efforts and expand your garden for free. Simply tuck the rooted stems into a new spot with some good soil and keep them watered until they take hold. It turns a routine maintenance task into a productive propagation session that benefits the entire landscape.
Finally, remember that the goal of pruning is to support the plant’s natural beauty rather than to fight against it. Japanese spurge is meant to be a soft, flowing groundcover, so avoid making it look too rigid or artificial. By following its natural growth patterns and only intervening when necessary, you can maintain a landscape that looks both professional and organic. A well-managed bed of Japanese spurge is a testament to the skill and care of a dedicated gardener.