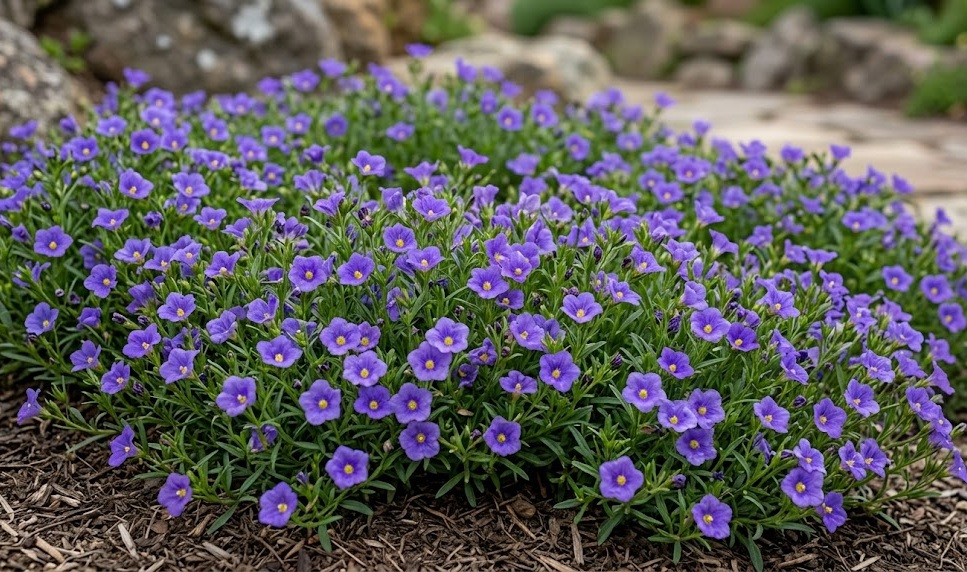
The successful establishment of the cupflower in your garden begins with a precise and well-planned planting strategy. This versatile species can be introduced to the landscape through several different methods, each requiring a specific set of skills. Whether you are starting from scratch with seeds or expanding an existing collection through cuttings, the fundamentals remain the same. Understanding the biological requirements of the plant during its earliest stages is the key to creating a thriving floral carpet.
The timing of your planting activities is the first major decision that will influence the outcome of your project. It is generally recommended to wait until the danger of frost has completely passed and the soil has begun to warm up significantly. Planting in cold, wet soil can cause the young root systems to struggle and may lead to stunted growth. Professional growers often monitor soil thermometers to ensure the conditions are perfect for the transition.
Site selection is equally important, as the plant will spend its entire life in the location you choose today. You should look for a spot that receives plenty of sunlight but is also protected from the most extreme afternoon heat if you live in a hot climate. The soil at the site should be tested for its drainage capabilities to avoid future issues with standing water. A well-chosen site reduces the need for constant corrections and interventions as the plant matures.
Preparing the ground involves more than just digging a hole; it requires creating a welcoming environment for the new roots. Incorporating a balanced amount of organic matter will provide the initial nutrients the plant needs to establish itself. You should also ensure the soil is loose and friable so that the roots can penetrate deep into the earth with ease. A professional approach to preparation ensures that the plant has everything it needs from the very first day.
Propagation from seeds
Starting from seeds is a cost-effective way to produce a large number of plants for expansive garden beds. To get a head start on the season, many professionals begin the sowing process indoors several weeks before the last frost. The seeds are quite small and should be handled with care to ensure they are distributed evenly across the growing medium. Providing a consistent temperature and light source is crucial for a high germination rate.
More articles on this topic
The growing medium for seeds should be a fine-textured, sterile mix that retains moisture without being heavy. Sowing the seeds on the surface and pressing them lightly into the soil is usually better than burying them deeply. They often require a bit of light to trigger the germination process, so a thin layer of vermiculite can be used if needed. Keeping the tray covered with a clear lid can help maintain the high humidity levels required for the tiny sprouts.
Once the seedlings have developed their first set of true leaves, they will need to be thinned or transplanted into larger containers. This stage requires a delicate touch to avoid damaging the fragile stems and roots of the young plants. Providing a weak solution of liquid fertilizer can help support their rapid growth during this critical phase. Monitoring the light levels is important to prevent the seedlings from becoming leggy and weak.
Hardening off the young plants is a vital step before they can be permanently moved into the outdoor garden. This process involves gradually exposing them to outdoor conditions over the course of a week or two. Start with a few hours in a sheltered spot and slowly increase their time in the sun and wind. This professional technique prevents transplant shock and ensures the plants are robust enough to handle the natural environment.
Vegetation through cuttings and division
For those who want to replicate a specific plant’s characteristics, vegetative propagation through cuttings is a reliable method. Softwood cuttings taken in the late spring or early summer usually root quite easily under the right conditions. You should select healthy, non-flowering stems for the best chance of success in this process. Using a rooting hormone can speed up the development of new roots and improve the overall success rate.
More articles on this topic
The cuttings should be placed in a well-draining potting mix and kept in a humid environment until roots are established. Removing the lower leaves and keeping the remaining foliage misted will help prevent the cutting from drying out. A professional setup might include a bottom-heat mat to stimulate root growth even in cooler ambient temperatures. Once you feel resistance when gently tugging on the cutting, you know that the roots have begun to form.
Division is another effective way to propagate established clumps that have become too large or dense. This is typically done in the early spring just as the new growth is beginning to emerge from the ground. Use a sharp spade to lift the entire clump and then carefully divide it into smaller sections with a clean knife. Each new section must have a healthy portion of both roots and shoots to survive the transition.
After dividing, the new plants should be replanted immediately into prepared soil and watered thoroughly. This method not only provides you with new plants but also rejuvenates the original specimen by giving it more space. Professional gardeners often use division as a regular part of their maintenance routine every few years. It is a quick and efficient way to expand your garden’s floral coverage while maintaining plant health.
Best practices for transplanting
When moving your young plants or divisions into their permanent home, the depth of the hole is a critical factor. You should aim to plant them at the same level they were growing in their original containers or clumps. Planting too deep can lead to stem rot, while planting too shallow can cause the roots to dry out quickly. Professional precision during this step is essential for a smooth transition and rapid establishment.
Spacing the plants correctly is the final piece of the planting puzzle that dictates the future look of the bed. For a dense ground cover effect, you might space them closer together, but always consider the mature spread of the variety. Overcrowded plants will compete for resources and may not flower as profusely as those with adequate room. A professional layout takes into account the future growth and ensures each plant has its own dedicated space.
Immediately after transplanting, a deep and thorough watering is necessary to settle the soil around the roots. This helps eliminate any air pockets that could cause the roots to dry out and die. Applying a light layer of mulch after watering will help keep the moisture where it is needed most. Avoid placing the mulch directly against the stems to prevent any issues with moisture-related decay.
The first few weeks after planting are a time of high vulnerability for the new additions to your garden. You should monitor them closely for any signs of wilting or stress and adjust your care accordingly. Providing temporary shade on particularly hot days can help the plants focus their energy on root development. With a professional and attentive approach, your new cupflowers will soon be well-established and ready to bloom.