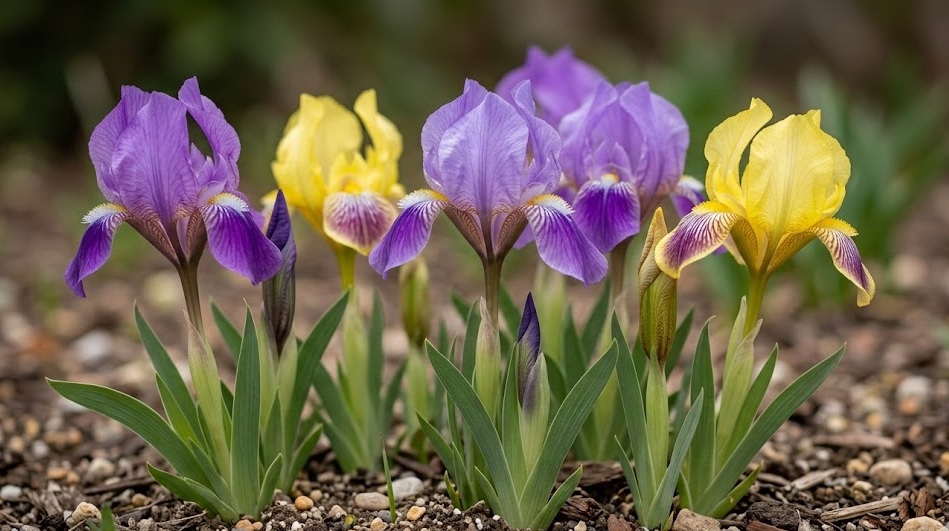
Refining the appearance and health of your plants through strategic trimming is a hallmark of professional garden maintenance. You will find that these miniature irises require very little pruning compared to many other perennials, but the tasks you do perform are critical for their success. The goal is to remove spent tissue and encourage the plant to focus its energy on the vital rhizomes rather than on old growth or seed production. Proper technique and timing are the keys to a clean and vibrant garden that looks beautiful in every season.
The first major task of the year is deadheading, which involves the removal of the flowers once they have finished their brief but intense display. You should wait until the individual bloom has shriveled and lost its color before carefully pinching or cutting it off the stalk. This prevents the plant from wasting valuable energy on the development of seed pods that are not needed for a healthy garden display. By removing the old flowers, you also keep the plant looking tidy and prevent the growth of grey mold on the decaying petals.
Once the entire flower stalk has finished blooming, you should cut it back close to the base where it emerges from the foliage. You must be careful not to damage the surrounding green leaves, which are still busy collecting energy from the sun for next year’s growth. Using a small, sharp pair of garden snips is much better for this task than trying to pull the stalks out by hand. A clean cut heals quickly and minimizes the risk of introducing pathogens into the main body of the plant.
The leaves of the dwarf iris should generally be left alone throughout the spring and early summer as long as they remain green and healthy. You should only remove individual leaves if they become severely damaged, yellowed, or show signs of disease like leaf spot. These green fans are the “solar panels” of the plant, and their health is directly responsible for the size and quality of the flowers you will see next year. Maintaining as much healthy green foliage as possible is a secret to long-term success with all types of iris.
Summer maintenance and the dormancy phase
As the heat of summer intensifies, you may notice that some of the outer leaves on your plants begin to turn yellow or brown. This is a natural part of the dormancy process and is nothing to worry about as long as the center of the fan remains firm and green. You can gently pull away these dead outer leaves to keep the garden looking clean and to improve the airflow around the rhizome. This simple act of grooming reduces the number of hiding places for pests like slugs and snails during the summer months.
More articles on this topic
The “summer fan trim” is a technique often used by professional growers when they are dividing and transplanting their irises. You should cut the leaves back to about one-third of their original height, creating an inverted “V” or fan shape with your shears. This reduces the surface area of the foliage, which in turn limits the amount of water lost through transpiration while the roots are recovering. If you are not moving your plants, however, this type of drastic cutting is usually not necessary and should be avoided to preserve energy.
Maintaining a clear space around the base of each clump is just as important as the pruning you do on the plants themselves. You should remove any encroaching weeds or stray groundcover that might be trying to grow over the iris rhizomes and shade them out. A clean soil surface allows the sun to reach the top of the root, which is a natural way to prevent rot and keep the plant healthy. This attention to detail in the surrounding environment is what separates a professional garden from a casual backyard.
Observing the growth habits of your specific varieties will help you decide when a light touch is better than a heavy hand. Some cultivars may hold their green foliage much longer into the summer, while others might go dormant very quickly after the spring flowering is over. You should adjust your grooming schedule to match the actual condition of your plants rather than following a strict calendar. This responsive approach ensures that you are supporting the plant’s natural cycles rather than working against them.
Autumn cleanup and final winter preparation
The most significant cutting back of the year happens in the late autumn after the first few frosts have caused the foliage to die back completely. You should wait until the leaves are mostly brown and have lost their upright structure before removing them for the winter. Use your garden shears to cut the fans down to about two or three centimeters above the soil surface, being careful not to nick the rhizome. This thorough cleanup removes the material where many common pests and diseases like to overwinter.
More articles on this topic
Proper disposal of the trimmed foliage is a critical step in maintaining a healthy garden ecosystem over the long term. You should gather all the cut leaves and stalks and remove them from the garden beds entirely to prevent any lingering issues from returning in the spring. If your plants have been healthy, this material can go into your compost pile, but if you suspect any disease, it is better to dispose of it in the trash. Cleanliness in the autumn is the best way to ensure a fresh and healthy start for your garden when the spring returns.
Taking a final look at the rhizomes after the foliage has been removed allows you to check for any signs of rot or physical damage that might have occurred during the summer. You should ensure that the tops of the rhizomes are still firm and that they have not been buried too deeply by shifting soil or mulch. If you find any soft spots, you can carefully cut them away and treat the wound with a little bit of powdered sulfur to prevent further decay. This final inspection is a proactive measure that can save a prized plant from disappearing over the winter.
Preparing your tools for storage after the autumn cleanup is the final step in your professional maintenance routine for the year. You should clean your shears and snips thoroughly, removing any sap or dirt, and then apply a light coating of oil to prevent rust. This ensures that your equipment will be ready to go and in perfect condition when it’s time to start the cycle all over again in the early spring. A well-maintained garden starts with well-maintained tools, and this level of care reflects your dedication to your craft.