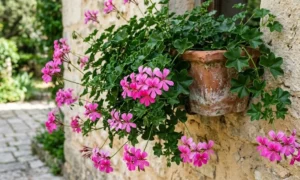
Preparing your ivy for the challenges of the winter months is a critical part of its annual maintenance cycle. You must understand that while most ivy varieties are remarkably hardy, they still benefit from specific protective measures when the temperatures drop significantly. The combination of freezing ground and drying winds can be particularly stressful for evergreen foliage. Professional overwintering techniques ensure that your ivy remains vibrant and ready to burst into new growth as soon as the spring arrives.
Assessing winter hardiness and risks
Understanding the specific hardiness zone of your ivy variety is the first step in determining the level of winter protection it will require. You should be aware that while common green ivy is often very cold-resistant, some variegated cultivars can be much more sensitive to frost. Researching the cold tolerance of your specific plants allows you to tailor your protective measures to their actual needs. This proactive approach prevents unnecessary loss of foliage or entire plants during an exceptionally harsh winter season.
The primary risk for outdoor ivy during the winter is not just the cold, but the physiological drought caused by frozen soil. You must realize that when the ground is frozen, the roots cannot absorb water to replace the moisture lost from the leaves through evaporation. This can lead to “winter burn,” where the evergreen leaves turn brown and brittle as they dry out completely. Protecting your plants from the desiccating effects of cold winter winds can significantly reduce the severity of this common problem.
Younger ivy plants or those that have recently been transplanted are at a much higher risk during their first few winters in the ground. You should provide extra care for these specimens to ensure they survive the transition and become fully established in your garden. Their root systems are not yet deep enough to reach the unfrozen soil below the frost line, making them more vulnerable to dehydration. A little extra attention during these early years will pay off with a lifetime of healthy and robust growth.
Container-grown ivy faces unique challenges because the root ball is much more exposed to temperature fluctuations than it would be in the ground. You should consider moving these pots to a more sheltered location or insulating them with burlap or bubble wrap to protect the roots. Frozen roots in a pot can expand and cause the container to crack, which further exposes the plant to the elements. Managing the root temperature is just as important as protecting the foliage when overwintering your containerized ivy.
More articles on this topic
Outdoor protection strategies
Mulching the base of your outdoor ivy is one of the most effective and simplest ways to protect the root system from deep freezes. You should apply a layer of wood chips, straw, or shredded leaves at least five to ten centimeters thick around the plant’s foundation. This organic barrier helps to maintain a more stable soil temperature and prevents the cycles of freezing and thawing that can push roots out of the ground. It also helps to conserve any existing soil moisture, providing a vital reservoir for the plant during dry winter spells.
Anti-desiccant sprays are a professional tool that can be used to provide an extra layer of protection for the foliage of your ivy. You can apply these products to the leaves in late autumn to create a thin, protective film that reduces the amount of moisture lost to the air. This is particularly beneficial for plants that are located in exposed, windy areas where winter burn is most likely to occur. Make sure to follow the application instructions carefully and apply the spray on a day when the temperature is above freezing.
Constructing a temporary windbreak can provide essential shelter for ivy that is growing in a particularly vulnerable part of your garden. You can use burlap stretched between wooden stakes to create a screen that deflects the harshest winter gusts away from the plant. This physical barrier reduces the wind chill and helps to keep the humidity levels around the foliage slightly higher than in the surrounding area. Providing this type of structural protection can make a significant difference in the winter survival of more delicate ivy varieties.
Hydration before the ground freezes is a critical task that you should never overlook in your autumn gardening routine. You should water your ivy deeply and thoroughly throughout the autumn to ensure the plant has a full reserve of moisture in its tissues. A well-hydrated plant is much more resilient to the stresses of winter than one that is already struggling with a lack of water. This final thorough soaking is one of the best gifts you can give your ivy before it enters its period of winter dormancy.
More articles on this topic
Winter care for indoor ivy
Indoor ivy plants also require a shift in their care routine as the seasons change and the indoor environment becomes dryer and darker. You should move your plants closer to windows to maximize their exposure to the limited winter sunlight. However, be careful not to place them too close to cold glass or drafty windowsills, as this can cause temperature stress. Finding the right balance between light and warmth is the key to keeping your indoor ivy happy during the short winter days.
Managing the humidity around your indoor ivy is especially important when the central heating system is running and drying out the air. You should consider using a humidifier or placing the pots on trays filled with moist pebbles to increase the local moisture levels. Misting the leaves regularly can also help, but be mindful not to overdo it and create conditions that favor fungal growth. A slightly cooler room with higher humidity is much better for ivy than a very warm and dry environment.
Watering requirements for indoor ivy typically decrease during the winter because the plant is growing more slowly and the days are shorter. You should always check the soil moisture before adding water to prevent the risk of root rot during this sensitive time. Allow the top few centimeters of soil to dry out more than you would during the active growing season in the spring or summer. Being conservative with your watering will help the plant maintain a healthy root system throughout the dormant period.
You should stop all fertilization of your indoor ivy during the winter months to avoid encouraging weak and leggy new growth. The plant needs this time of rest to conserve its energy for the vigorous development that will occur when the light levels increase in the spring. If you notice any yellowing or leaf drop, it is usually a sign of environmental stress rather than a lack of nutrients. Resisting the urge to fertilize will lead to a much stronger and healthier plant in the long run.
Preparing for the spring transition
As the winter begins to fade and the first signs of spring appear, you should gradually remove any protective coverings from your ivy. You should do this over several days to allow the plant to slowly acclimate to the increasing light and fluctuating spring temperatures. Removing mulch or windbreaks too early can expose the plant to late-season frosts, so monitoring the local weather forecast is essential. This careful transition period ensures that your ivy enters the new growing season without any unnecessary setbacks.
Inspect your ivy for any signs of winter damage, such as brown leaves or dead stem tips, once the danger of severe frost has passed. You should use clean, sharp shears to prune away any affected areas to make room for the new growth that is about to emerge. This light spring cleaning improves the appearance of the plant and helps it focus its energy on producing healthy new foliage. Removing the dead wood also reduces the risk of pests and diseases taking advantage of the weakened plant tissue.
Gentle fertilization can be resumed once you see the first signs of active new growth on your ivy vines. You should start with a diluted balanced fertilizer to provide a mild boost to the plant’s nutrient levels after the winter dormancy. This initial feeding supports the rapid development of new leaves and stems that characterize the spring growth flush. As the weather continues to warm, you can gradually return to your regular summer fertilization schedule.
Reassessing the plant’s support structure is a professional task that should be done every spring as part of your general garden maintenance. You should check that the ivy is still securely attached and that the trellis or wall is strong enough to handle another season of growth. This is the perfect time to guide any new vines and ensure the plant is growing in the desired direction and shape. Preparing the framework for the coming year ensures that your ivy remains a beautiful and well-managed feature in your landscape.