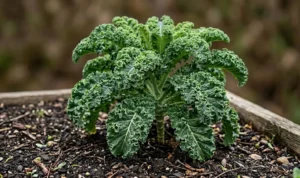
Successful cultivation of Brussels sprouts begins with a thorough understanding of the specific timing and techniques required for effective propagation. Because these plants have a exceptionally long growing season, you must plan your planting schedule carefully to ensure they reach maturity before the onset of extreme winter weather. Choosing the right starting environment and soil composition will give your seedlings the best possible chance of developing into strong, productive adults. Your commitment to precision during the early stages of the life cycle is what ultimately determines the quality of your autumn harvest.
The first step in the propagation process is selecting high-quality seeds from a reputable source that specializes in cool-weather crops. You should look for varieties that are well-suited to your local climate and have a proven track record of disease resistance. Starting seeds indoors allows you to control the temperature and humidity, giving the young plants a significant head start over the weeds. A sterile seed-starting mix provides the ideal balance of moisture retention and drainage for the delicate emerging roots.
Maintaining a consistent temperature of around fifteen to twenty degrees Celsius is ideal for triggering germination in most brassica seeds. You should keep the planting medium moist but not waterlogged to prevent the seeds from rotting before they can sprout. Once the first green shoots appear, they require a strong light source to prevent them from becoming leggy and weak. Providing a gentle breeze from a small fan can help strengthen the stems of the young seedlings as they grow.
As the seedlings develop their first true leaves, they will begin to outgrow their initial containers and require more space for their roots. You should be prepared to transplant them into larger pots or “harden them off” before they are moved into the permanent garden beds. This transition period is critical for acclimating the tender plants to the fluctuations of the outdoor environment. By taking the time to propagate your plants correctly, you build a solid foundation for a healthy and resilient garden.
Selecting and sowing the perfect seeds
When choosing your seeds, consider whether you want an early-maturing variety or one that is specifically bred for long-term winter storage. Early varieties are great for a quick harvest, while late-season types often develop a deeper, more complex flavor after being exposed to frost. You should also check the packet for information regarding the height of the mature plant and the expected size of the sprouts. Having a clear goal for your harvest will help you select the genetics that best match your personal gardening style.
More articles on this topic
Sowing the seeds at the correct depth is essential for ensuring a high germination rate across your entire crop. Generally, a depth of about one centimeter is sufficient for the small, round seeds to find enough moisture and darkness to sprout. You should space the seeds evenly in your trays to prevent overcrowding, which can lead to competition for light and nutrients. Labeling your trays clearly will help you keep track of different varieties and sowing dates throughout the spring.
The quality of the water you use during the germination phase can also impact the health of your future plants. You should use room-temperature water that is free from high levels of chlorine or other harsh chemicals whenever possible. A fine misting bottle is perfect for keeping the surface of the soil damp without displacing the seeds or compacting the growing medium. Consistent hydration is the most important factor in the first few days after the seeds have been placed in the soil.
If you prefer to sow your seeds directly into the garden, you must wait until the soil has warmed up and the danger of heavy frost has passed. Direct sowing requires more attention to weed control and moisture management, as the young seedlings are more vulnerable to environmental stress. However, this method eliminates the risk of transplant shock and allows the plants to develop deep taproots from the very beginning. Both methods can be successful if you pay close attention to the specific needs of the young plants.
Essential care for developing seedlings
Once your seeds have germinated, the primary focus shifts to providing the right balance of light and nutrition for rapid growth. You should ensure that your light source is positioned just a few centimeters above the tops of the plants to keep them compact. If the seedlings start to lean toward a window, you must rotate the trays daily to promote even development on all sides. Strong, sturdy seedlings are much more likely to survive the transition to the outdoor garden than those that are tall and spindly.
More articles on this topic
Fertilizing young seedlings should be done with caution to avoid burning the sensitive new roots with high concentrations of minerals. A diluted liquid seaweed extract or a very weak organic fertilizer can provide a gentle boost of micronutrients. You should wait until the plants have at least two sets of true leaves before you begin any supplemental feeding. Observing the color and texture of the leaves will tell you if the plants are getting exactly what they need to thrive.
Air circulation is often overlooked in the indoor nursery, but it is vital for preventing “damping off” and other fungal issues. A small oscillating fan can simulate the natural movement of the wind, which encourages the plant to deposit more lignin in its stems. This physical strengthening makes the seedlings much more resilient when they finally face the elements in the open garden. Keeping the air fresh and moving also helps regulate the humidity levels around the foliage.
Potting on is the process of moving seedlings into larger containers as they grow to prevent them from becoming root-bound. You should handle the young plants by their leaves rather than their stems to avoid crushing the delicate vascular tissue. Use a high-quality potting soil that is rich in organic matter to provide the nutrients needed for this stage of development. Giving the roots more room to expand will result in a much more vigorous plant when it is finally time for permanent planting.
Transplanting techniques for outdoor success
The process of moving your plants from the protected nursery to the garden is a major milestone in the growing season. You must begin the “hardening off” process about a week before you plan to transplant by gradually increasing their exposure to the outdoors. Start by placing the pots in a sheltered, shady spot for a few hours each day and slowly move them into more sun and wind. This gradual acclimation prevents the leaves from scorching and the plants from wilting under the intensity of the sun.
Choosing a cloudy day or planting in the late afternoon can help reduce the initial stress on the newly transplanted brassicas. You should dig a hole that is slightly larger than the root ball and add a handful of compost to the bottom for an extra boost. Gently firm the soil around the base of the plant to eliminate any air pockets that could dry out the roots. Watering the plants immediately after they are in the ground helps settle the soil and provides much-needed hydration.
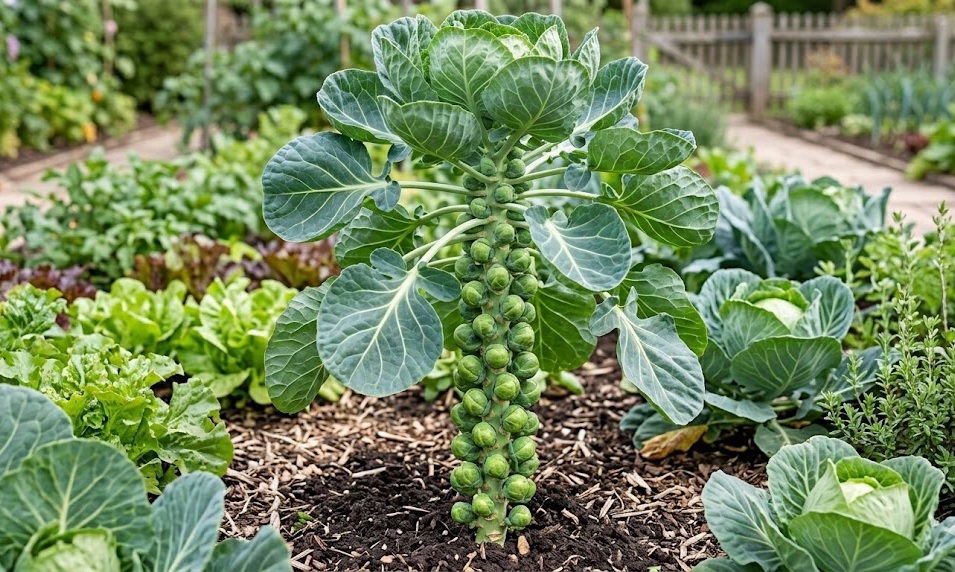
Spacing is incredibly important when you are setting out your permanent rows in the vegetable patch. You should leave at least sixty centimeters between each plant to allow for their massive leaf canopy and tall stalks. Rows should be spaced about seventy-five centimeters apart to provide enough room for you to walk between them for maintenance. Giving each plant its own dedicated space reduces competition for resources and helps prevent the spread of diseases.
In the first few days after transplanting, you should keep a close eye on the moisture levels in the soil to ensure the roots are establishing. If the weather is particularly sunny and hot, you might provide some temporary shade using old crates or garden fabric. Once the plants show signs of new growth, you will know that they have successfully anchored themselves in their new home. A successful transplanting phase is the key to a productive and stress-free growing season.
Advanced propagation and timing tips
Timing your planting is a delicate dance between the length of your growing season and the arrival of the winter cold. You should calculate back from your average first frost date to determine the best time to start your seeds in the spring. Most varieties require between one hundred and one hundred and fifty days to reach full maturity and produce a harvest. Starting too late may result in small, underdeveloped sprouts, while starting too early can expose the plants to summer heat stress.
If you are dealing with a particularly short growing season, look for “early” varieties that have been bred to mature in fewer days. These types often produce smaller plants but are much more reliable in northern climates where autumn comes quickly. Conversely, in regions with long, mild winters, you can experiment with staggered plantings to extend your harvest well into the new year. Understanding the specific phenology of your chosen variety is a mark of a truly professional grower.
Some experts prefer to use soil blocks rather than plastic trays for propagation because they reduce the risk of transplant shock even further. Soil blocks allow the roots to “air prune,” which creates a more fibrous and healthy root system that is ready to grow the moment it hits the ground. This method requires a bit more specialized equipment but can yield significantly better results for challenging crops like Brussels sprouts. Exploring different propagation methods allows you to find the one that works best for your specific garden conditions.
Maintaining a clean and organized nursery space is just as important as the techniques you use to sow and grow. You should sanitize all your tools and containers between uses to prevent the carryover of pathogens from one year to the next. Keeping detailed records of your successes and failures with different propagation timings will help you improve every year. Professionalism in the nursery translates directly to success in the field and a more rewarding gardening experience overall.