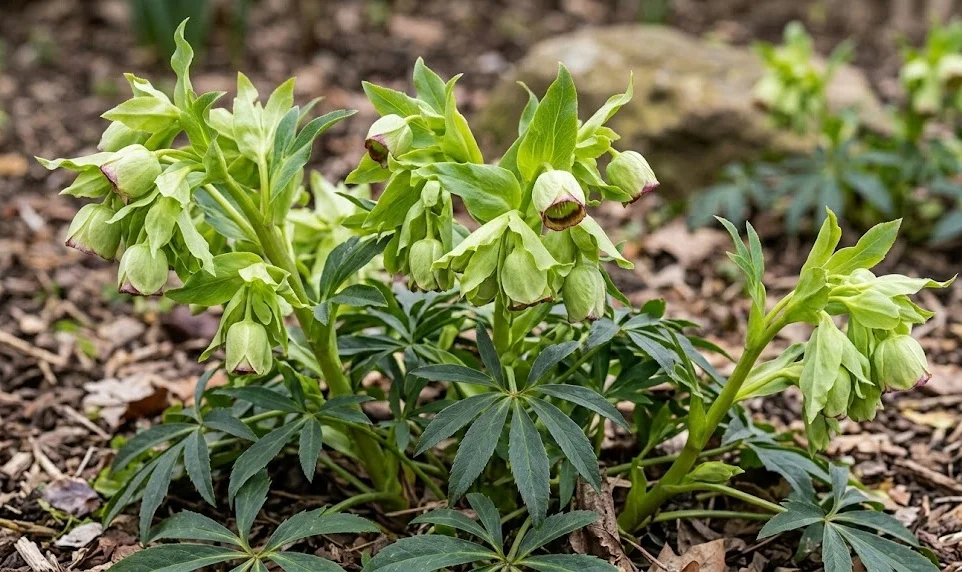

Expanding your woodland garden collection requires a clear understanding of proper establishment and reproduction methods for key ornamental species. Planting and propagating the stinking hellebore successfully depends heavily on replicating its natural forest habitat and respecting its delicate root structure. Whether you are installing container-grown specimens or experimenting with fresh seeds, precision during these early stages determines future success. This professional guide breaks down the essential techniques needed to establish and multiply these resilient evergreen perennials effectively.
Site selection and soil preparation essentials
Choosing the perfect location is the most critical factor when planning to introduce stinking hellebore into your garden landscape. This woodland native thrives best in areas that replicate the protective canopy of a natural forest environment. Partial to full shade is highly recommended, especially in regions that experience intensely hot and dry summer afternoons. Spending time analyzing your garden’s microclimate before planting will pay massive dividends in the future health of your specimen.
The ideal soil composition should be rich in organic matter, highly permeable, and preferably alkaline to neutral in pH. If your garden features heavy, compacted clay, you must dedicate effort to improving its structural texture before planting. Mixing in a generous amount of leaf mold, well-composted organic material, and sharp sand will create the necessary drainage. This plant absolutely deters stagnant moisture, which can quickly rot the deep, fleshy root system if left unaddressed.
Consider the proximity of neighboring plants and trees when finalizing your chosen planting site within the garden design. Established trees can offer excellent shade, but their aggressive roots might compete with the young hellebore for moisture and nutrients. Finding a balanced spot where the plant receives dappled light without being completely starved of water is an art worth mastering. Air circulation is equally important, so avoid cramped corners where stagnant air can foster fungal diseases.
Preparing the planting bed several weeks in advance allows the soil amendments to settle and integrate naturally. Dig a wide, deep hole that is at least twice the size of the plant’s current root ball to encourage easy expansion. Incorporating a slow-release organic fertilizer or bone meal into the bottom of the hole provides a gentle nutrient boost. This thorough preparation ensures that the young plant encounters minimal resistance as its roots begin to explore the surrounding earth.
More articles on this topic
Step-by-step planting process for optimal establishment
Once your site is thoroughly prepared, the actual planting process must be executed with precision and care to prevent transplant shock. Gently remove the young plant from its container, taking care not to tear or violently disrupt the tightly bound roots. If the specimen is severely root-bound, very gently loosen the outer roots with your fingers to encourage outward growth. Handling the root ball with respect ensures a much faster transition into its permanent new home.
Lower the root ball into the prepared hole, checking the depth carefully against the surrounding ground level. It is absolutely vital that the crown sits precisely even with or slightly higher than the existing soil surface. Planting too deeply can smother the crown, leading to poor growth or fatal rot in subsequent months. Fill in the space around the roots with your prepared soil mix, tamping it down gently with your hands.
Avoid stamping the earth down firmly with your boots, as this heavy pressure can over-compact the soil and eliminate vital air pockets. Once the hole is filled, water the area thoroughly and deeply to help settle the soil around the root system. This initial watering bridges any hidden gaps in the earth, ensuring the roots make direct contact with the moist soil. If the soil settles significantly after watering, add a small amount of extra topsoil to maintain the proper level.
Finish the installation process by applying a clean layer of organic mulch around the perimeter of the new plant. Keep the mulch about two inches away from the main stems to prevent moisture accumulation against the delicate crown tissue. This protective layer will conserve essential soil moisture and suppress competitive weed growth during the critical establishment phase. Monitor the new plant closely over the next few weeks, providing steady moisture whenever the top inch of soil feels dry.
More articles on this topic
Propagating through deliberate seed sowing
Propagating this plant from seed is a highly rewarding method that aligns perfectly with its natural reproductive cycle. The seeds ripen in late spring or early summer, contained within conspicuous green pods that gradually turn brown and split open. For the highest success rate, it is best to harvest and sow these seeds immediately while they are completely fresh. Fresh seeds possess high viability and respond enthusiastically to immediate contact with moist, warm soil conditions.
If you choose to sow directly into the garden, select a protected nursery bed with fine, weed-free soil. Scatter the fresh seeds thinly across the surface and press them gently into the earth without burying them too deeply. A exceptionally thin dusting of fine grit or sieved compost is all that is required to protect them from wind. Keep the area consistently damp but never saturated, allowing nature to manage the natural temperature fluctuations required for germination.
Alternatively, you can sow the seeds into seed trays filled with a high-quality, free-draining propagation compost mix. Placing the trays in a cold frame outdoors exposes the seeds to the natural winter chill necessary to break their internal dormancy. This process, known as cold stratification, is a critical requirement for many woodland species before they can sprout. Patience is essential, as germination can take several months, with green shoots typically appearing early the following spring.
Once the young seedlings develop their first set of true leaves, they can be carefully pricked out into individual small pots. Use a rich but airy potting mix to support their rapid root development during this initial growth stage. Keep the young potted plants in a sheltered, partially shaded area, watering them regularly to maintain stable moisture levels. They will generally be sturdy enough to transplant into their permanent garden positions by autumn or the following spring.
Division and alternative propagation methods
While growing from seed is highly effective, division offers an alternative method for propagating established specimens under specific circumstances. It is important to note that this particular species does not possess the same creeping rhizomatous growth habit as some other hellebores. Consequently, it develops a single, woody crown that can be somewhat challenging and risky to divide successfully. This method should generally be reserved for mature, multi-stemmed plants that have grown exceptionally large over several years.
The ideal timing for attempting a division is in early autumn when the plant enters a period of active root growth. Carefully dig up the entire mature clump, lifting it gently from the soil to minimize damage to the deep root system. Use a sharp, sterilized knife or a specialized garden saw to slice cleanly through the tough, woody crown structure. Ensure that each separated section retains several healthy stems and a substantial, functional portion of the root system.
Replant the divided sections immediately into their pre-prepared permanent locations or large containers filled with fertile soil. Follow the same planting depth rules, keeping the crown perfectly level with the surrounding soil surface to avoid rot. Water the new divisions deeply and consistently to encourage rapid root re-establishment before the onset of winter freezing. Providing a temporary protective mulch layer will help safeguard the newly disrupted root systems from severe temperature drops.
Because division can cause significant stress to this species, some gardeners prefer to rely on natural self-seeding instead. The plant naturally drops hundreds of seeds, creating a ready supply of wild seedlings around the base of the mother plant. Gently digging up and potting these naturally occurring seedlings is often much easier and safer than dividing an old crown. Whichever method you choose, expanding your collection allows you to create a beautifully cohesive woodland tapestry throughout your garden landscape.