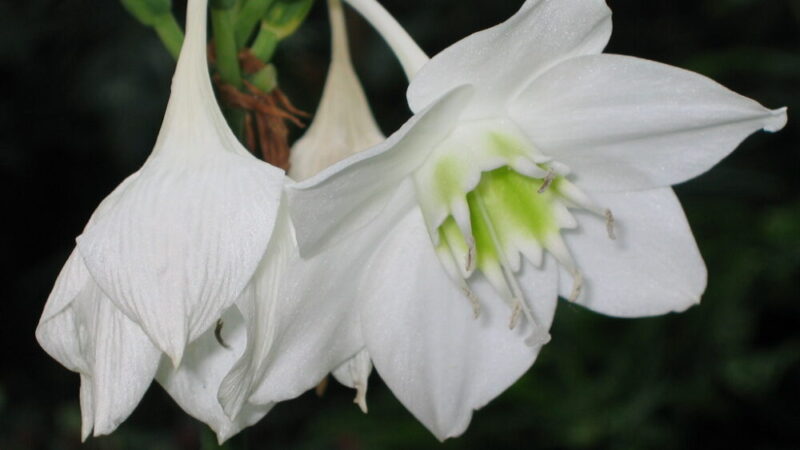
Planting and propagation of the Amazon lily
Successfully establishing an Amazon lily in your home begins with the crucial first steps of planting and propagation, a process that lays the foundation for years of lush growth and beautiful blooms. Unlike plants grown from seed, the Amazon lily is cultivated from bulbs, which are essentially underground storage organs packed with all the energy needed to sprout and flourish. Proper planting technique is paramount; it involves selecting a healthy bulb, choosing the right container, and using an appropriate soil mix to create an environment where the bulb can thrive without the risk of rot. Understanding the specific needs of this tropical beauty from the very beginning will set you on a direct path to success, ensuring your new plant adapts quickly and grows vigorously.
The initial selection of the bulb itself is a critical determinant of future success. When purchasing a new Amazon lily or receiving a division from another plant, inspect the bulb carefully. A healthy bulb should feel firm and heavy for its size, without any soft spots, mould, or signs of disease. It should ideally have some healthy, white roots already present at its base. Avoid any bulbs that appear shrivelled, desiccated, or mushy, as these are unlikely to be viable. Starting with a robust, high-quality bulb gives your plant the best possible head start in its new environment.
Choosing the correct pot is just as important as the soil that goes into it. The Amazon lily flowers most prolifically when it is slightly pot-bound, meaning its roots fill the container snugly. Therefore, resist the temptation to plant a single bulb in a very large pot, as this can lead to the soil staying wet for too long, promoting bulb rot. A pot that is just a few centimetres wider than the bulb itself is ideal for a single planting. For a fuller look, you can plant three to five bulbs together in a slightly larger pot, which often results in a more dramatic and quicker floral display. Ensure the pot has at least one drainage hole at the bottom to allow excess water to escape freely.
The act of planting requires a careful hand to position the bulb correctly within the soil. Fill your chosen pot with a well-draining, rich potting mix, and create a small depression in the centre. Place the bulb in this depression, with its pointed end facing upwards and the basal plate with its roots facing down. The critical detail is the planting depth: the top one-third of the bulb, including its “neck” from where the leaves will emerge, should remain above the soil line. Planting the bulb too deeply is a common mistake that can lead to rot and inhibit the emergence of both leaves and flower stalks. Once positioned, gently firm the soil around the bulb to hold it in place.
Choosing the right container and soil
The foundation of a healthy Amazon lily is built upon the choices you make for its home, specifically the container and the soil medium. The pot you select must have excellent drainage capabilities, as the primary threat to this plant’s bulb is rot caused by waterlogged conditions. A standard nursery pot made of plastic or a more decorative terracotta pot are both excellent choices, provided they have ample drainage holes at the bottom. Terracotta pots have the added advantage of being porous, which allows soil to dry out more evenly, offering an extra layer of protection against overwatering. The size of the container is crucial; it should be snug, providing just enough room for the bulb and a small amount of soil around it to encourage the pot-bound condition that stimulates flowering.
More articles on this topic
The ideal soil composition must replicate the rich, loamy, and well-aerated floor of a tropical rainforest. A pre-packaged, high-quality potting mix designed for houseplants or African violets can serve as an excellent base. However, to perfect it for the Amazon lily, you should amend this base mix to enhance its drainage and structure. Incorporating about one-third of an aerating material like perlite, coarse sand, or fine orchid bark will create the perfect texture. This addition prevents the soil from compacting, ensuring that oxygen can reach the roots and that water flows through freely, leaving behind the necessary moisture without creating a soggy environment.
When preparing the soil, aim for a consistency that is light and fluffy, not heavy and dense. You can also enrich the mixture with a small amount of organic matter, such as compost or well-rotted leaf mould, to provide a slow release of essential nutrients. This mimics the naturally fertile conditions of its native habitat. Before planting, it is a good practice to lightly moisten the soil mix so that it is damp but not soaking wet. This ensures the bulb is not placed into a bone-dry environment, which can be stressful, nor into a muddy one, which encourages rot from the outset.
Ultimately, the combination of the right pot and the perfect soil creates a symbiotic system that supports the Amazon lily’s health. The well-draining pot prevents water from stagnating, while the airy, rich soil provides the perfect balance of moisture, aeration, and nutrients. Getting this foundational aspect right is a non-negotiable step. It is far easier to provide the correct environment from the beginning than to try and correct problems like root rot later on. Investing time in creating the perfect home for your bulb will be repaid tenfold with vigorous growth and spectacular blooms.
The step-by-step planting process
The process of planting an Amazon lily bulb is straightforward but requires attention to detail to ensure its successful establishment. Begin by preparing your chosen pot and soil mix. Place a piece of mesh or a coffee filter over the drainage hole at the bottom of the pot to prevent soil from washing out while still allowing water to escape. Fill the pot about two-thirds full with your well-aerated, rich potting medium. Do not compact the soil; keep it light and airy to facilitate root growth and proper drainage. This initial preparation sets the stage for a healthy root environment.
More articles on this topic
Next, carefully position the bulb in the centre of the pot. If you are planting multiple bulbs for a fuller display, arrange them evenly, leaving a few centimetres of space between each one. The orientation of the bulb is critical: the flat, wider base where the roots emerge should be at the bottom, and the tapered, pointed end, often called the neck, must face upwards. This neck is where the new leaves and flower stalks will emerge, so it is vital that it is not buried. Holding the bulb in place with one hand, begin to add more soil around it.
As you add the remaining soil, be mindful of the planting depth. The goal is to leave the top quarter to one-third of the bulb, including the entire neck, exposed above the soil surface. This is the most crucial step in preventing bulb and neck rot. Gently firm the soil around the bulb’s base with your fingertips to secure it in place and eliminate any large air pockets. The final soil level should be about a centimetre or two below the rim of the pot to allow space for watering without overflow.
Once the bulb is securely planted, the final step is to provide an initial, careful watering. Water the soil thoroughly until you see water begin to drain from the bottom of the pot, which ensures that the entire soil volume is evenly moist and helps settle the soil around the roots. After this initial watering, allow the pot to drain completely and discard any excess water from the saucer. Place the newly planted bulb in a warm location with bright, indirect light. Avoid watering again until the top few centimetres of the soil have dried out, allowing the bulb to acclimate to its new home without being overwhelmed by moisture.
Propagation through division
Propagation of the Amazon lily is most successfully and commonly achieved through the method of division. This process involves separating the small, new bulbs, known as offsets or daughter bulbs, that naturally form around the base of the main, or mother, bulb over time. This method is not only a way to create new plants but also serves as a necessary maintenance task to prevent overcrowding in the pot, which can eventually lead to a decline in the plant’s vigour and flowering. The ideal time to divide your Amazon lily is during repotting, typically in the spring after a flowering cycle has finished.
To begin the process of division, you must first carefully remove the entire plant from its pot. Lay the plant on its side and gently squeeze the pot to loosen the root ball, then slide it out. Once it is free, gently shake and brush away the excess soil so you can clearly see the cluster of bulbs and the root system. You will notice smaller bulbs attached to the sides of the larger, original ones. These offsets are the key to creating new, independent plants that will be genetically identical to the parent.
The separation of the offsets requires a gentle but firm hand. Look for offsets that have developed their own set of roots and are at least a third of the size of the mother bulb, as these will have the best chance of surviving on their own. In many cases, you can gently tease them apart with your fingers. If they are more firmly attached, you may need to use a clean, sharp knife to make a precise cut, ensuring that each offset you remove has some of its own roots attached. Avoid simply pulling them off, as this can damage the basal plate of both the parent and the offset, which is where roots and new growth originate.
Once the offsets are separated, they are ready to be planted as new individuals. Pot each offset into its own small container, using the same well-draining soil mix and following the same planting guidelines as for a mature bulb, ensuring the neck remains above the soil line. It is important to use a pot that is appropriately sized for the small bulb to avoid overwatering. After planting, water them sparingly at first and place them in a warm spot with indirect light. Be patient, as it may take a year or two for these newly propagated plants to reach maturity and produce their first flowers, but the reward is a growing collection of these beautiful plants.
📷: Flickr / Szerző: 阿橋花譜 HQ Flower Guide / Licence: CC BY-SA 2.0