The process of establishing a new colony of these elegant perennials begins with a clear understanding of their unique growth habits and requirements. Successful planting is not merely about placing a bulb in the ground, but rather about creating an environment where it can thrive for many years. Whether you are starting with a young nursery plant or a division from an existing clump, the initial steps are crucial for long-term success. Careful planning and attention to detail during the planting phase will reward you with a magnificent display of blooms in the seasons to follow.
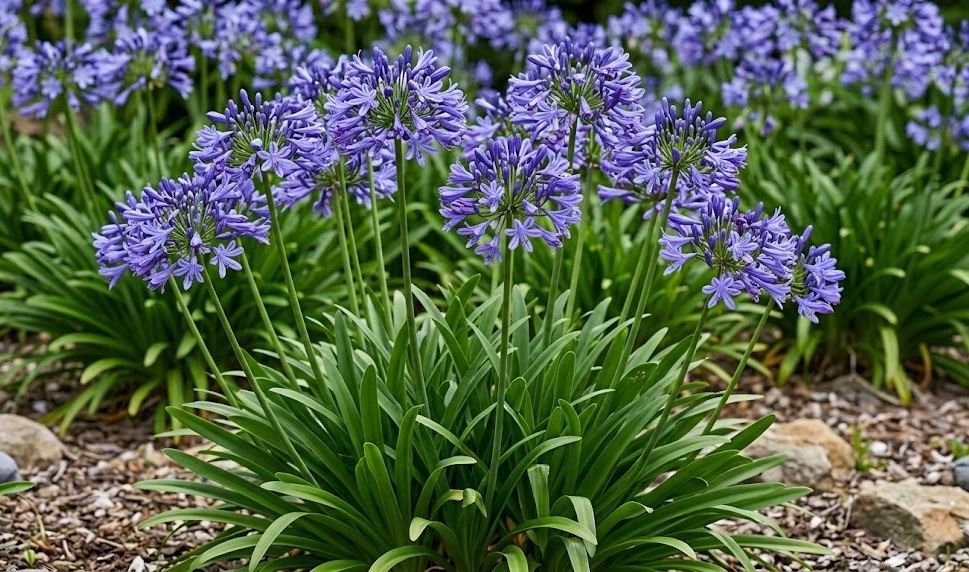
Selecting the ideal site for your African lilies is the first and perhaps most important decision you will make. These plants demand a location that receives full sun for the majority of the day to ensure they have enough energy for flowering. While they can tolerate some partial shade, the resulting stems may be weaker and the number of flower clusters will likely be reduced. Ensure the chosen area has excellent drainage, as these plants do not enjoy having their roots submerged in water for long periods.
Before you begin digging, it is beneficial to prepare the soil by incorporating organic matter to improve its structure and fertility. Use a garden fork to loosen the earth to a depth of at least twelve inches, allowing the fleshy roots to expand easily. If your soil is particularly heavy clay, adding some coarse sand or grit will help facilitate better drainage and aeration. A well-prepared bed provides the perfect starting point for the roots to establish themselves quickly and securely.
When you are ready to plant, dig a hole that is slightly larger than the root ball of your specimen. Place the plant in the hole so that the crown—the point where the leaves meet the roots—is just at or slightly below the soil surface. Filling the hole back in with a mixture of native soil and compost ensures that the plant has immediate access to nutrients. Firm the soil gently with your hands to remove any large air pockets, but avoid packing it so tightly that you damage the roots.
Practical steps for successful planting
After placing the plant in the hole, the next step is to ensure it receives adequate hydration to settle into its new home. Give the newly planted lily a thorough watering, allowing the moisture to reach deep into the root zone. This helps the soil settle around the roots and reduces the initial stress of transplantation. It is a good idea to monitor the moisture levels daily for the first few weeks until you see signs of new growth.
More articles on this topic
Spacing is another critical factor that professionals always consider when designing a garden layout. African lilies are known for their ability to spread and form dense clumps over time, so they need room to expand. A general rule of thumb is to leave at least eighteen to twenty-four inches between each plant to allow for future growth. This spacing also ensures that each plant receives enough light and air circulation to stay healthy and productive.
If you are planting in a container, the rules change slightly to accommodate the restricted environment. Choose a pot that is large enough to house the roots comfortably but not so large that excess soil becomes waterlogged. Use a high-quality potting mix specifically designed for Mediterranean or container plants to provide the right balance of drainage and nutrients. Ensure the pot is placed in a sunny spot on your patio or balcony where it can soak up the warmth.
Mulching immediately after planting can provide a significant boost to the establishment of your lilies. A two-inch layer of bark chips or compost will help keep the roots cool and retain moisture during the critical first few weeks. Make sure the mulch does not touch the base of the plant directly, as this can encourage rot in the crown. This simple step not only helps the plant but also gives the planting area a clean and professional appearance.
Propagation through division of clumps
One of the most effective ways to increase your collection of African lilies is through the method of division. This process involves lifting an established clump and carefully breaking it into smaller sections, each with its own roots and leaves. This is best done in the early spring or late autumn when the plant is not actively flowering. Division not only gives you new plants but also helps rejuvenate older clumps that may have become overcrowded.
More articles on this topic
To divide a plant, start by digging a wide circle around the base to ensure you get as much of the root system as possible. Once the clump is lifted from the ground, use a sharp spade or two garden forks back-to-back to split the roots. You should aim to create sections that have at least two or three healthy growing points or “fans” of leaves. Discard any old, woody material from the center of the original clump that no longer looks vigorous.
Replanting the divided sections should be done as quickly as possible to prevent the roots from drying out in the air. Treat each new division as a young plant, following the same planting guidelines regarding soil preparation and depth. It is normal for the foliage to look a bit tired for a week or two after this process as the plant recovers. With proper watering and care, these divisions will quickly establish themselves and often bloom in their very first year.
Professional gardeners often use division as a way to maintain the overall health and aesthetics of a border. By regularly dividing your plants every four or five years, you can keep the growth manageable and the flowering consistent. It is also a wonderful way to share your favorite varieties with friends and fellow gardening enthusiasts. This traditional technique is a cost-effective and rewarding part of managing a professional-grade garden display.
Growing new plants from collected seeds
Propagation from seed is a slower but fascinating way to grow African lilies, offering the chance to see the entire lifecycle of the plant. You can collect seeds from the dried pods that form after the flowers have faded in late summer. The seeds are typically black, flat, and winged, designed to be carried short distances by the wind. Keep in mind that plants grown from seed may not always look exactly like the parent plant, which can lead to interesting variations.
Start your seeds in a tray filled with a light, well-draining seed-starting mix during the early spring months. Sow the seeds thinly on the surface and cover them with a very light layer of compost or vermiculite. Place the tray in a warm, bright spot but away from direct, scorching sunlight which can dry out the delicate seedlings. Maintaining a consistent temperature of around twenty degrees Celsius will encourage the best germination rates.
Germination can be a slow process, often taking anywhere from three to eight weeks depending on the conditions. Once the seedlings have developed two or three small leaves, they are ready to be pricked out into individual small pots. Use a gentle touch when handling the young plants to avoid damaging their fragile roots and stems. Continue to grow them in a protected environment, such as a greenhouse or a sunny windowsill, until they are large enough to be hardened off.
It usually takes two to three years of growth before a seed-grown African lily is large enough to produce its first flower. While this requires a good deal of patience, the satisfaction of seeing a plant bloom that you started from a tiny seed is immense. During this nursery phase, ensure the young plants are regularly watered and given a weak liquid fertilizer to support their development. This method is ideal for those who want to produce a large number of plants for a significant landscaping project.