Establishing a new colony of these charming perennials begins with understanding the best methods for planting and the various ways they can be multiplied. Whether you are starting from a few nursery pots or trying to grow them from seed, the process is straightforward and rewarding for gardeners of all skill levels. These plants are exceptionally hardy, making them a forgiving choice for those who are new to woodland gardening or native plant restoration. By following a few professional techniques, you can ensure your new violets take root quickly and begin to spread their beauty across your landscape.
Ideal planting locations and site preparation
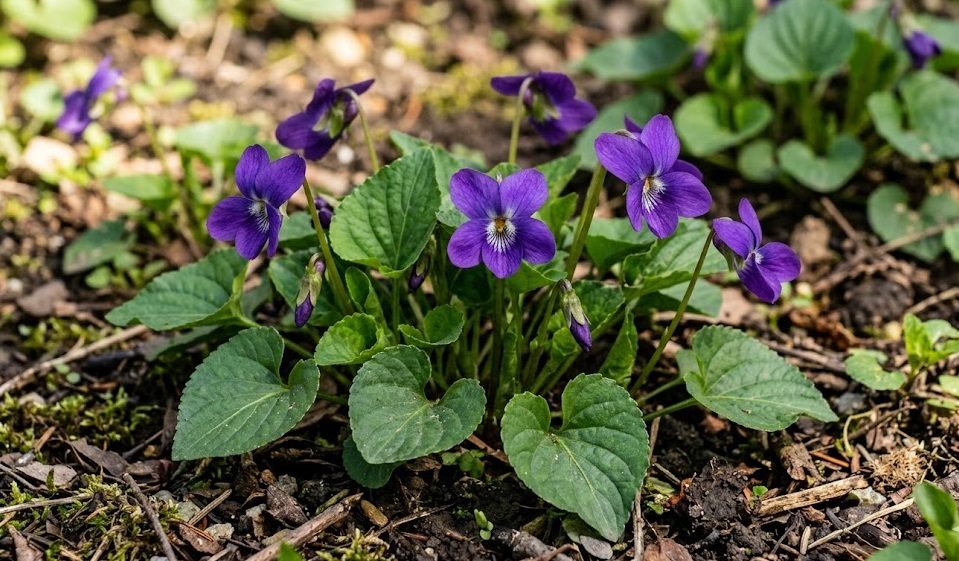
Selecting the right spot is the most important decision you will make when introducing common blue violets to your garden. You should look for an area that receives dappled sunlight or partial shade, particularly during the intense heat of the afternoon. While they can survive in full sun if the soil is kept constantly wet, they will look much healthier and require less maintenance in a shaded environment. Areas under deciduous trees are perfect, as the plants get plenty of light in early spring before the canopy closes.
Before you put your plants in the ground, you must prepare the soil to give them the best possible start. You should clear the area of any aggressive perennial weeds and loosen the soil to a depth of at least six inches. Incorporating a generous amount of organic matter, such as leaf mold or aged compost, will improve the soil structure and nutrient content. This preparation ensures that the delicate young roots can easily penetrate the earth and find the moisture they need to establish themselves.
Spacing is another consideration that depends on how quickly you want the area to be covered by the foliage. If you want a dense carpet within one growing season, you should space the plants about six to eight inches apart. For a more gradual filling of the space, a distance of twelve inches between plants is perfectly acceptable and more economical. Keep in mind that these plants will naturally fill in the gaps through their own spreading mechanisms over the next two years.
Timing your planting is crucial for minimizing transplant shock and ensuring long-term survival. The best times to plant are in the early spring, just as the new growth begins, or in the early autumn when the temperatures start to cool. Planting during these periods allows the roots to settle in without the stress of extreme summer heat or frozen winter ground. If you must plant during the summer, be prepared to provide extra shade and daily watering until you see signs of new growth.
More articles on this topic
Sowing from seeds and natural dispersal
Growing common blue violets from seed requires a bit of patience, as they often have specific dormancy requirements that must be met. The seeds usually need a period of cold stratification, which is a cold and moist treatment that mimics a natural winter. You can achieve this by sowing the seeds directly in the garden in late autumn, allowing nature to take its course over the winter months. Alternatively, you can store the seeds in a damp paper towel in the refrigerator for about six to eight weeks before sowing them indoors.
When sowing indoors, use a light seed-starting mix and barely cover the seeds with a thin layer of soil, as they may need some light to germinate. You should keep the soil consistently moist and place the trays in a cool area with bright, indirect light. Germination can be erratic, with some seeds sprouting within weeks and others taking several months to emerge. Once the seedlings have developed at least two sets of true leaves, they can be hardened off and moved to their permanent outdoor location.
You can also take advantage of the plant’s natural dispersal methods to expand your collection without much effort. The violet produces “hidden” flowers called cleistogamous blossoms that never open but produce a large amount of fertile seed. These seeds are often carried away by ants, which are attracted to a small fatty attachment on the seed called an elaiosome. By encouraging a diverse insect population in your garden, you may find new violets appearing in ideal spots you hadn’t even considered.
If you want to collect the seeds yourself, you must keep a close eye on the seed pods as they mature and turn from green to brown. The pods are explosive, meaning they will burst open and fling the seeds several feet away once they are fully ripe. To capture them, you can tie a small piece of fine mesh or a nylon stocking around the maturing pod to catch the seeds as they are released. Store the collected seeds in a cool, dry place if you are not planning to sow them immediately.
More articles on this topic
Vegetative propagation through clump division
Division is the fastest and most reliable way to create new plants that are identical to the parent colony. You should plan to divide your violets every three to four years, or whenever the center of the clump begins to look sparse. The best time for this process is in the early spring when the first leaves are just starting to unfurl from the ground. At this stage, the plant’s energy is focused on root and leaf production, which helps the divisions recover quickly from the move.
To begin the division, use a sharp spade or a garden fork to carefully lift the entire clump out of the ground. You should shake off the excess soil so you can clearly see the structure of the rhizomes and the individual growing points. Gently pull the rhizomes apart by hand, or use a clean knife to cut them into smaller sections, ensuring each piece has at least one healthy bud and several roots. Discard any old, woody centers that no longer produce vigorous growth.
Once you have your divisions, you should replant them as quickly as possible to prevent the roots from drying out in the air. Dig a hole that is slightly larger than the root system and set the division at the same depth it was previously growing. Firm the soil gently around the roots to remove any air pockets and water the area thoroughly to settle the earth. A light layer of mulch around the new plants will help retain moisture and suppress weeds while they are getting established.
You can also propagate violets using the runners or offsets that the plant naturally produces as it expands. These small plantlets often form roots while still attached to the mother plant, making them very easy to transplant. Simply snip the connecting runner and lift the small plantlet with a trowel, ensuring you get a good amount of the existing root system. This method is an excellent way to fill in small bare spots in your garden or to share plants with friends and neighbors.
Establishing and caring for young plants
The first few weeks after planting or dividing are the most critical for the long-term success of your violets. You need to ensure the soil remains consistently moist, as the young roots are not yet deep enough to access moisture from the lower layers of the earth. If the weather is particularly sunny or windy, the new plants may wilt slightly; this is normal, but they should perk up after a good watering. Avoid using any strong fertilizers during this period, as they can burn the sensitive new root tips.
Mulching is a vital step in the establishment process, as it helps regulate soil temperature and conserves precious moisture. Use a natural material like shredded bark, pine needles, or compost, and apply it in a layer about two inches thick. Be careful not to pile the mulch directly against the crown of the plant, as this can trap too much moisture and cause the stems to rot. The mulch will eventually break down and add valuable nutrients back into the soil, further benefiting the growing violets.
Protecting your new plants from physical disturbance will give them the peace they need to grow strong. You should keep pets and heavy foot traffic away from the newly planted area to avoid compacting the soil or crushing the tender leaves. If you have issues with birds or squirrels digging in the fresh soil, a temporary covering of light bird netting can be very effective. Once the plants have established a solid root system and started to spread, they will be much more resilient to minor disturbances.
Monitoring for signs of growth is the best way to tell if your planting efforts have been successful. You should see new leaves emerging from the center of the crown within a few weeks of planting. If the plants appear to be struggling, check the soil moisture levels and ensure they are not being smothered by neighboring plants. With a little bit of initial attention, your common blue violets will soon become a self-sustaining and beautiful part of your garden landscape.