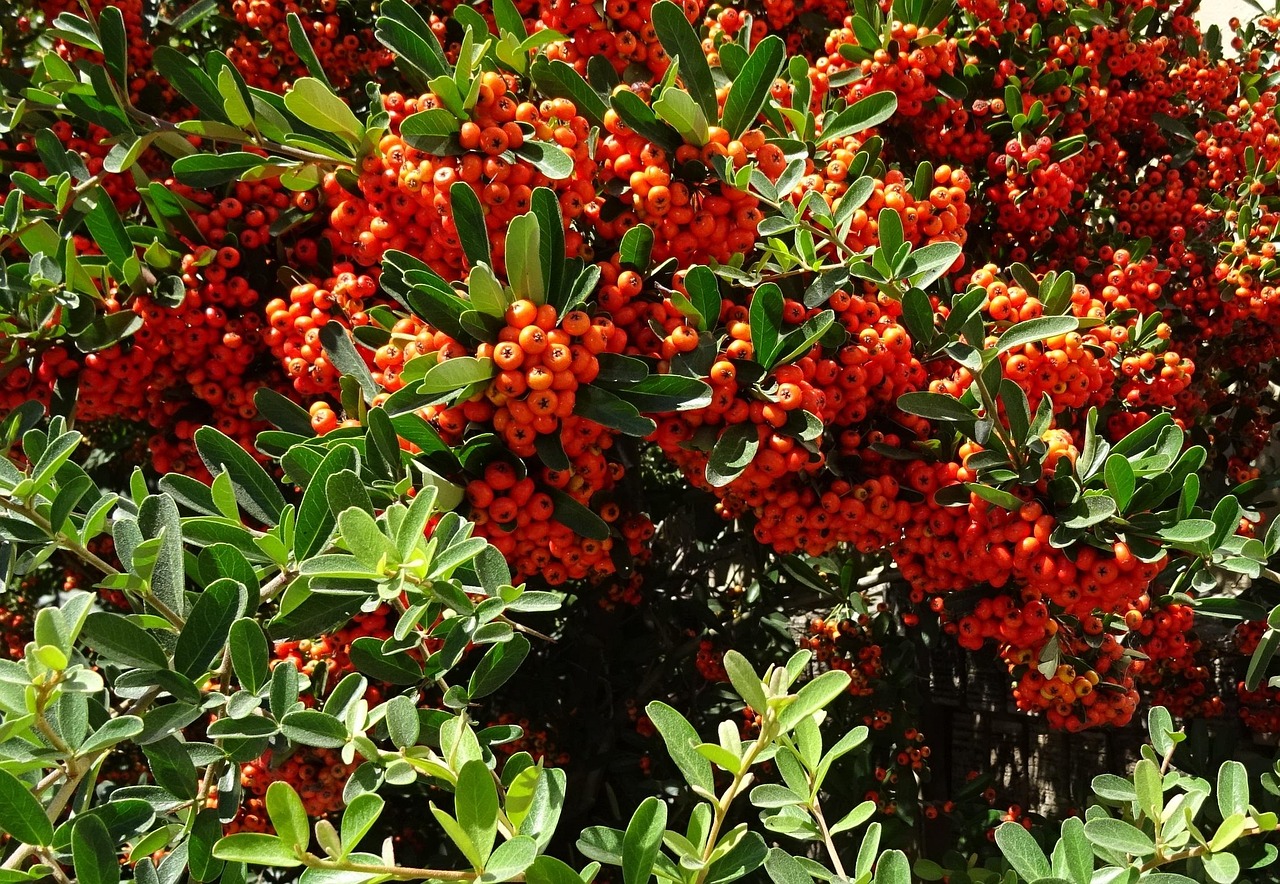
Successfully establishing a Pyracantha in your garden begins with thoughtful planting, a process that lays the foundation for a healthy and vigorous shrub for years to come. This versatile plant, known for its thorny branches, attractive white blossoms, and brilliant autumn berries, is relatively straightforward to plant, but paying attention to a few key details can make a significant difference. From choosing the right location to preparing the soil properly, each step contributes to the plant’s ability to thrive and become a stunning feature, whether as a standalone specimen, part of a mixed border, or a dense, impenetrable hedge. Likewise, understanding the methods of propagation allows you to easily multiply your stock, creating new plants from an existing favorite.
The ideal time for planting firethorn is in the autumn or spring. Autumn planting allows the root system to establish itself during the cooler, wetter months, giving the plant a head start before the onset of summer heat and potential drought. Spring planting is also perfectly suitable, but it may require more consistent watering throughout the first growing season to ensure the plant does not dry out. When selecting a site, remember that Pyracantha performs best in a position that receives full sun to partial shade. While it can tolerate some shade, a sunnier spot will encourage more abundant flowering and, consequently, a more spectacular display of berries.
Before you begin digging, it is crucial to prepare the planting area. This involves clearing any weeds or turf from the site and improving the soil if necessary. Although firethorn is adaptable to various soil types, it flourishes in well-drained soil. If you are dealing with heavy clay, incorporating organic matter like garden compost or well-rotted manure will improve its structure and drainage. This simple act of soil amendment prevents waterlogging, a condition that can be detrimental to the health of the plant’s roots.
When you are ready to plant, dig a hole that is roughly twice the width of the plant’s container and to the same depth. Gently remove the Pyracantha from its pot, being careful not to damage the root ball. Tease out any circling roots at the bottom to encourage them to grow outwards into the surrounding soil. Place the plant in the center of the hole, ensuring that the top of the root ball is level with the surrounding ground. Planting too deep can lead to problems with the stem, so checking the depth is an important final step before backfilling.
The planting process
Once the firethorn is correctly positioned in the planting hole, the next step is to backfill with the excavated soil. If you have amended the soil with organic matter, mix it thoroughly with the native soil before using it to fill around the root ball. As you backfill, gently firm the soil around the roots to eliminate any large air pockets. These pockets can cause the roots to dry out, hindering the plant’s ability to establish itself. Avoid compacting the soil too heavily, as this can impede water drainage and root growth.
More articles on this topic
After the hole is completely filled, create a shallow basin or “moat” of soil around the base of the plant. This simple feature helps to direct water straight to the root zone where it is needed most, preventing runoff. This is particularly useful for new plantings, as it ensures that the water you apply is used efficiently. This watering ring will naturally break down over time as the plant becomes established and its root system expands further into the surrounding garden soil.
Immediately after planting, it is essential to give the shrub a thorough watering. This not only provides much-needed moisture to the roots but also helps to settle the soil around the root ball, further reducing air pockets. Continue to water the newly planted firethorn regularly for the first full growing season, especially during dry spells. The goal is to keep the soil consistently moist but not waterlogged, allowing the plant to develop a strong and extensive root system.
Finally, consider applying a layer of organic mulch, such as bark chips or compost, around the base of the plant. This mulch layer should be about 5-7 centimeters thick and should be kept a few centimeters away from the main stem to prevent rot. Mulching offers several benefits: it helps to conserve soil moisture by reducing evaporation, it suppresses the growth of competing weeds, and as it breaks down, it slowly releases nutrients into the soil, providing a gentle feed for your new plant.
Propagation from cuttings
Propagating Pyracantha from cuttings is an effective way to produce new plants that are genetically identical to the parent. The best time to take these cuttings is from mid-summer to early autumn, using semi-hardwood material. This refers to the current season’s growth that has started to become firm and woody at the base but remains soft and flexible at the tip. This type of wood offers the ideal combination of maturity to prevent rotting and vitality to encourage root formation.
More articles on this topic
To take a cutting, select a healthy, non-flowering shoot and cut a section that is approximately 10-15 centimeters long. Use a sharp, sterilized pair of secateurs and make the cut just below a leaf node (the point where a leaf joins the stem). The presence of this node is important as this is where the concentration of rooting hormones is highest. Once you have your cutting, carefully strip the leaves from the lower half, leaving just two or three leaves at the top to reduce water loss through transpiration.
To enhance the chances of successful rooting, you can dip the cut base of the stem into a rooting hormone powder or gel. While this step is not strictly necessary, as firethorn often roots well without it, it can significantly speed up the process and lead to a more robust root system. Prepare a pot with a suitable rooting compost, which should be very free-draining. A mixture of 50% compost and 50% perlite or coarse sand works very well for this purpose.
Insert the prepared cuttings into the compost, spacing them around the edge of the pot so that their leaves do not touch. Water the compost well and allow it to drain. To create a humid microclimate that encourages rooting, you can cover the pot with a clear plastic bag, secured with an elastic band, or place it in a propagator. Position the pot in a bright place that is out of direct sunlight and keep the compost moist. Roots should develop within 6-10 weeks, and you can check for this by gently tugging on a cutting; if you feel resistance, roots have formed.
Propagation from seed
Growing Pyracantha from seed is another viable propagation method, though it requires more patience and the resulting plants may show some variation from the parent plant. This is because many garden varieties are cultivars, and seeds produced by them may not grow “true to type,” potentially reverting to characteristics of one of their parent species. However, for creating new hedgerows or wilder plantings, this can be a very cost-effective approach. The first step is to harvest the berries in the autumn when they are fully ripe.
Once collected, the seeds must be separated from the fleshy pulp of the berry. You can do this by mashing the berries and then washing the pulp away with water; the viable seeds will typically sink to the bottom. It is important to clean the seeds thoroughly, as any remaining pulp can contain germination inhibitors or encourage fungal growth. After cleaning, the seeds should be dried on a paper towel for a day or two.
Pyracantha seeds have a natural dormancy that needs to be broken before they can germinate, a process that requires a period of cold, moist conditions known as stratification. You can achieve this naturally by sowing the seeds in a pot of compost in the autumn and leaving it outdoors in a sheltered spot over winter. The fluctuating winter temperatures will break the seed’s dormancy, and germination should occur the following spring as the weather warms.
Alternatively, you can stratify the seeds artificially. Mix the cleaned seeds with a small amount of damp sand or vermiculite, place the mixture in a sealed plastic bag, and store it in the refrigerator for about 2-3 months. After this cold period, the seeds can be sown in pots of seed-starting mix and kept in a warm, bright place. Keep the compost consistently moist, and seedlings should begin to appear within a few weeks. These young plants can then be grown on and eventually planted out into the garden.