Maintaining a healthy patch of chives requires a blend of consistent attention and an understanding of the plant’s natural growth cycle. These hardy perennials are beloved by gardeners for their resilience and their ability to provide fresh flavors throughout the growing season with minimal fuss. To ensure that your herbs remain productive, you must focus on the core elements of their environment and physical needs. Establishing a routine will help you identify any potential issues before they become significant problems for your garden.
Routine care begins with the simple act of observation as you walk through your herb garden each morning or evening. You should look for vibrant green stalks and signs of new growth emerging from the center of the clumps. If you notice any yellowing or withered leaves, these should be removed immediately to direct the plant’s energy toward healthy foliage. This basic cleaning process also improves air circulation within the dense tufts of the herb, which is vital for preventing moisture-related issues.
The soil surrounding your plants should be kept clear of weeds that might compete for essential nutrients and water. Because chives grow in tight clusters, invasive grasses can easily intertwine with the herb stalks, making them difficult to remove later. Regularly loosening the top inch of soil with a small hand tool will prevent compaction and allow the roots to breathe more effectively. This mechanical aeration is a professional technique that significantly boosts the long-term vitality of any perennial herb bed.
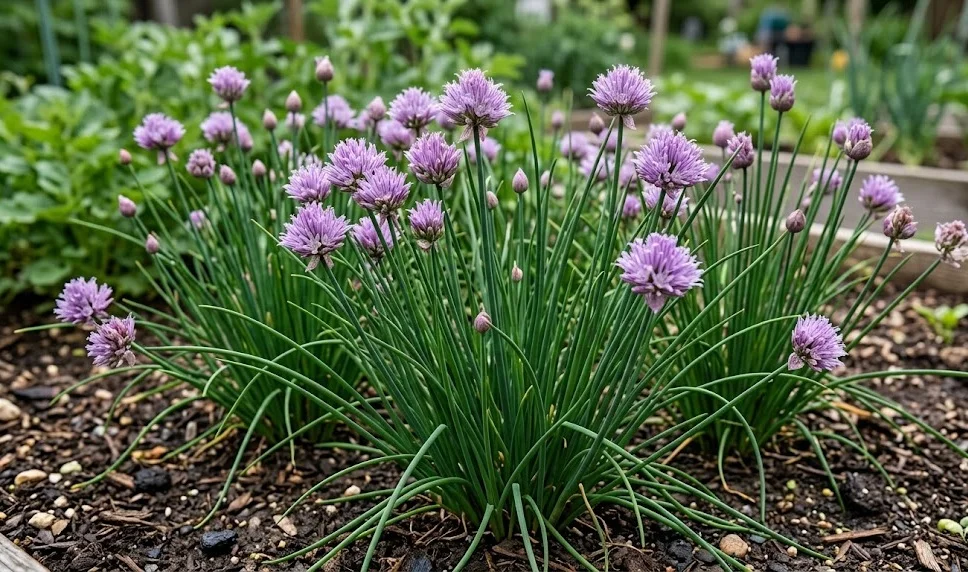
As the season progresses, you will notice the plant attempting to produce round, purple flowers on stiff stalks. While these blooms are aesthetically pleasing and edible, they can signal the plant to stop producing the tender leaves that most gardeners prefer. To maintain a constant supply of culinary-grade herbs, you should manage these flowering stems according to your specific harvest goals. Balancing the ornamental beauty of the flowers with the productive needs of the kitchen is a hallmark of an experienced horticulturalist.
Soil environment and root health
The foundation of any successful herb garden lies beneath the surface in the quality and structure of the growing medium. Chives thrive in soil that is rich in organic matter and maintains a consistent level of moisture without becoming waterlogged. Professionals often recommend incorporating well-rotted compost into the bed before the growing season begins to provide a slow-release source of nutrition. This preparation creates a crumbly texture that allows roots to expand easily and access the resources they need.
More articles on this topic
Drainage is perhaps the most critical factor when considering the long-term health of your perennial herb clumps. While these plants enjoy a drink, sitting in stagnant water will quickly lead to root rot and the eventual death of the entire colony. If your garden has heavy clay soil, you might consider planting in raised beds or adding grit to improve the internal drainage characteristics. Creating an environment where water moves freely through the root zone ensures that the plant remains vigorous even during periods of heavy rainfall.
Monitoring the pH levels of your soil can provide insights into why your herbs might be underperforming despite your best efforts. Chives generally prefer a slightly acidic to neutral range, typically between six and seven on the pH scale. If the soil becomes too alkaline or overly acidic, the plant may struggle to uptake specific micronutrients, leading to stunted growth or discoloration. Simple home testing kits are available for this purpose and can guide you in making necessary amendments like lime or sulfur.
Mulching is a highly effective professional strategy for protecting the root systems and maintaining soil consistency throughout the year. A thin layer of organic mulch, such as shredded bark or clean straw, helps to suppress weed seeds and regulate the temperature of the earth. In the heat of summer, this layer prevents the sun from baking the roots, while in the winter, it provides a buffer against extreme frost. This protective barrier acts as a natural climate control system for your herb garden.
Seasonal transitions and care
As the warmth of spring arrives, your chives will be among the first plants to signal the start of the new gardening year. This is the ideal time to clear away any dead foliage from the previous winter and apply a light top-dressing of compost to the base of the plants. Early season care focuses on encouraging rapid leaf development to provide you with your first harvest of the year. Ensuring the soil is moist during this transition period will help the plant recover from its winter dormancy.
More articles on this topic
During the peak of summer, the primary challenge changes from encouraging growth to managing the effects of heat and potential drought. You may notice that the stalks become a bit tougher or more fibrous if the temperatures remain consistently high for extended periods. Providing some light afternoon shade can help maintain the tenderness of the leaves during the most intense weeks of the season. Consistent monitoring during July and August will ensure that the plants do not enter a premature state of stress.
Autumn is a period of preparation where the gardener helps the plant store energy for the coming cold months. You should gradually reduce the frequency of harvesting to allow the plant to strengthen its bulb-like roots before the first hard frost. This is also a great time to evaluate the overall health of the patch and decide if any clumps need to be relocated or divided. Taking these steps in the fall ensures that the herb bed is perfectly positioned for a successful return in the spring.
Winter care is largely hands-off, but it still requires some basic foresight to protect your investment in the garden. In colder climates, the foliage will die back completely, which is a natural part of the perennial life cycle. You can leave the dried leaves in place to provide a bit of natural insulation or cut them back once they have fully turned brown. The goal during the winter is to keep the roots safe from extreme freeze-thaw cycles that can heave the plants out of the ground.
Harvest management for continuous growth
Knowing how and when to harvest your herbs is just as important as knowing how to plant them in the first place. You should always use sharp, clean scissors or garden shears to ensure a clean cut that heals quickly without bruising the remaining tissue. Avoid pulling the stalks by hand, as this can damage the delicate root system or accidentally uproot the entire plant. A professional cut should be made about one to two inches above the soil line to allow for rapid regrowth.
For a continuous supply, it is best to harvest from the outside of the clump toward the center. This strategy allows the younger, more tender shoots in the middle to continue developing while you take the more mature outer leaves. Never remove more than one-third of the total foliage at a single time if you want the plant to remain productive. This conservative approach ensures that the herb has enough photosynthetic surface area to recover and produce more leaves.
If you find that your plants are growing faster than you can use them, regular “maintenance harvests” are still necessary. Cutting the entire clump back periodically prevents the leaves from becoming woody and encourages a fresh flush of growth. Even if you do not plan to use the trimmings immediately, this practice keeps the plant in a juvenile and productive state. You can always freeze or dry the excess herbs to enjoy their flavor during the winter months.
Timing your harvest for the early morning hours will yield the best results in terms of flavor and nutritional content. During the night, the plant replenishes its moisture levels and essential oils, making the stalks crisp and aromatic. Once the sun is high in the sky, the heat can cause the herbs to wilt slightly and lose some of their peak intensity. Following this professional timing tip will significantly enhance the quality of the herbs you bring into your kitchen.
Indoor cultivation and container tips
Growing chives in containers is an excellent option for those with limited space or for anyone who wants fresh herbs within easy reach of the kitchen. When selecting a pot, ensure it has ample drainage holes at the bottom to prevent water from collecting around the roots. Terra cotta pots are a popular choice because they allow for better air exchange through the walls of the container. A high-quality potting mix designed for vegetables or herbs will provide the necessary structure and initial nutrients.
Plants grown in containers require more frequent monitoring than those planted directly in the ground. Because the volume of soil is limited, it can dry out very quickly, especially during hot weather or in drafty indoor environments. You should check the moisture level daily by sticking your finger into the soil to see if the top inch feels dry. Consistent watering is the key to preventing the stress that leads to stunted growth or poor flavor in container-grown herbs.
Light is another critical factor for success when growing these herbs indoors on a windowsill. They typically need at least six to eight hours of bright light to thrive and maintain their deep green color. If your kitchen does not receive enough natural sunlight, you can supplement it with a small LED grow light positioned a few inches above the plants. Rotating the pot every few days will ensure that all sides of the plant receive equal exposure and prevent it from leaning toward the light.
Fertilizing container plants is necessary because the nutrients in the potting soil are eventually washed away by regular watering. A balanced, water-soluble fertilizer applied at half strength every few weeks during the growing season will keep your herbs healthy. Be careful not to over-fertilize, as an excess of nitrogen can lead to rapid but weak growth that lacks the characteristic onion flavor. Professional container gardening is all about maintaining a careful balance of water, light, and nutrients.
Pest prevention through care
While chives are generally resistant to many common garden pests, they are not entirely immune to problems like aphids or onion flies. Maintaining a clean garden environment is your first line of defense against these unwelcome visitors. Regularly removing fallen debris and keeping the area around your herb bed free of weeds will eliminate many potential hiding spots. Healthy, well-fed plants are also naturally more capable of resisting minor infestations without significant damage.
If you notice small insects clustering on the tender tips of the leaves, a sharp blast of water from a garden hose can often dislodge them. This simple, non-toxic method is highly effective for managing small populations of aphids before they can multiply. You should perform this task in the morning to allow the foliage to dry completely before the evening cool sets in. Consistently monitoring the undersides of the leaves will help you catch any issues in their earliest stages.
Companion planting is a professional gardening technique that uses the natural properties of plants to protect one another. Chives are often planted near roses or carrots because their strong scent can deter certain pests that target those specific species. Conversely, planting flowers like marigolds nearby can attract beneficial insects that prey on the pests that might bother your herbs. This holistic approach to garden health creates a balanced ecosystem where the need for chemical intervention is greatly reduced.
Soil health plays a massive role in the prevention of diseases like rust or downy mildew, which can affect alluer species. Ensuring proper spacing between your plants allows for the airflow necessary to keep the foliage dry and discourage fungal spores from taking hold. Avoid overhead watering late in the day, as wet leaves sitting overnight provide the perfect environment for disease. By following these professional care standards, you can enjoy a productive and trouble-free herb garden for many years.
Sustaining vigor in old clumps
Over time, a patch of chives can become overly crowded, leading to smaller leaves and a general decline in productivity. This natural aging process usually manifests after three or four years of consistent growth in the same location. You will notice that the center of the clump may begin to die out, leaving a ring of growth around the perimeter. This is a clear signal from the plant that it is time for a professional rejuvenation through division.
Spring or early autumn are the best times to lift the entire clump from the ground using a sturdy garden fork. Once the roots are exposed, you can carefully pull the clump apart into several smaller sections, each with a healthy root system and a few stalks. Discard the old, woody center and replant the vigorous outer sections into freshly prepared soil. This process effectively resets the biological clock of the plant and encourages a new cycle of rapid, healthy growth.
Replanting your divided sections with plenty of space between them will prevent them from becoming crowded again too quickly. Each new clump should be placed at the same depth it was growing previously to avoid burying the crown too deeply. Water the newly moved sections thoroughly to help the roots settle into their new environment and reduce transplant shock. Following these steps every few years will keep your herb garden looking fresh and performing at its peak.
Finally, remember that gardening is a continuous learning process that rewards patience and observation. While these guidelines provide a professional framework, every garden has its own unique microclimate and soil conditions. Pay attention to how your plants respond to different weather patterns and care routines throughout the year. By developing a deep understanding of your specific environment, you will become an expert in sustaining the vigor of your chive collection.