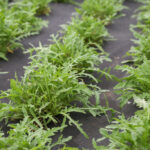
Planting and propagation of Maltese cross

Planting and propagating the Maltese cross is a straightforward and rewarding process, allowing gardeners to easily increase their stock of this brilliantly colored perennial. Whether you are starting with seeds, nursery-grown plants, or divisions from an established clump, understanding the proper techniques will ensure successful establishment and vigorous growth. This plant’s adaptability makes it a forgiving subject for propagation, and with a few key steps, you can fill your garden with its fiery blooms. The methods are simple enough for even a novice gardener to master, offering a satisfying way to create more plants for your own landscape or to share with others who appreciate its historic charm.
Propagation from seed
Propagating Maltese cross from seed is an economical and highly effective method for generating a large number of plants. The seeds can be sown directly into the garden in the spring after the last frost date has passed, or they can be started indoors several weeks earlier for a head start on the growing season. If sowing directly, prepare a well-draining seedbed in a sunny location by loosening the soil and removing any weeds. Sow the seeds thinly on the surface and cover them with a very light layer of fine soil, as they require some light for germination. Keep the seedbed consistently moist until the seedlings emerge, which typically takes two to three weeks.
For those who prefer to start seeds indoors, use a sterile seed-starting mix in trays or small pots. Sow the seeds on the surface of the moist mix about six to eight weeks before your average last frost date. Gently press them into the soil to ensure good contact but do not cover them deeply. Place the container in a warm location with plenty of light; a sunny windowsill or under grow lights is ideal. Maintaining a consistent temperature of around 20 degrees Celsius will promote the best germination rates. Once the seedlings have developed their second set of true leaves, they can be thinned or transplanted into individual pots to continue growing.
After the seedlings have grown strong and the danger of frost has passed, they must be hardened off before being planted into their permanent positions in the garden. Hardening off is the crucial process of gradually acclimating the young plants to outdoor conditions. Begin by placing the seedlings in a sheltered, shady spot for a few hours on the first day, and then gradually increase the amount of time and direct sunlight they receive over the course of a week to ten days. This prevents the shock that can occur when tender, indoor-grown plants are suddenly exposed to the more intense sun, wind, and temperature fluctuations of the outdoors.
When the seedlings are fully hardened off, they are ready to be planted in the garden. Space the young plants approximately 12 to 18 inches apart to allow for their mature size and to ensure good air circulation. Water them in well after planting to help settle the soil around the roots. It is important to note that Maltese cross plants grown from seed may not flower in their first year, as they will be dedicating their energy to establishing a strong root system. However, by their second year, they should be well-established and ready to produce a spectacular display of their signature vibrant blooms.
More articles on this topic
Planting nursery-grown specimens
For gardeners seeking a more immediate impact, planting nursery-grown Maltese cross specimens is an excellent option. These plants are typically a year or two old and have already developed a robust root system, which allows them to establish more quickly in the garden and often results in them flowering in their very first season. When selecting a plant from a garden center, look for a healthy specimen with vibrant green foliage and no signs of pests or diseases. Avoid plants that look leggy, yellowed, or have a root system that is heavily circling the bottom of the pot, as these may be stressed.
The best time to plant your nursery-grown Maltese cross is in the spring or early autumn. This timing allows the plant to establish its roots during a period of more moderate temperatures and consistent rainfall, avoiding the stress of extreme summer heat. Prepare the planting hole by digging it twice as wide as the plant’s root ball but to the same depth. It is important that the crown of the plant—the point where the stems meet the roots—sits at or slightly above the level of the surrounding soil. Planting it too deeply can lead to crown rot, a serious issue for many perennials.
Gently remove the plant from its container, being careful to tease out any circling roots at the bottom of the root ball. This encourages the roots to grow outwards into the surrounding soil rather than continuing to grow in a constricted pattern. Place the plant in the center of the prepared hole and backfill with the excavated soil, firming it gently around the root ball to eliminate any large air pockets. A common mistake is to amend the soil only in the planting hole; it is far better to amend the entire bed before planting to encourage the roots to spread widely.
After planting, water the plant thoroughly and deeply to help settle the soil and provide essential moisture to the roots. Applying a two to three-inch layer of organic mulch around the base of the plant will help to conserve moisture, suppress weeds, and regulate soil temperature. For the first few weeks, monitor the soil moisture and water the plant regularly to ensure it does not dry out while it is establishing its new root system. Once established, it will become much more self-sufficient and drought-tolerant.
More articles on this topic
Propagation through division
Division is a simple and effective method for propagating established clumps of Maltese cross, and it also serves as a vital maintenance task for revitalizing older plants. Over time, typically after three to four years, the center of a clump can become woody and less productive, resulting in fewer flowers. Dividing the plant invigorates it by creating new, younger sections that will grow with renewed vigor. The ideal time to divide Maltese cross is in the early spring, just as new growth is beginning to emerge, or in the early autumn after flowering has finished.
To begin the process, carefully dig around the entire perimeter of the clump with a sharp spade or garden fork. Once the soil is loosened, gently lift the entire root ball out of the ground. Try to preserve as much of the root system as possible during this process. Once the clump is lifted, you can use the spade, a sharp knife, or even two garden forks placed back-to-back to pry the clump apart into smaller sections. Each new division should have a healthy portion of roots and at least two to three growing points or “eyes.”
Discard the old, woody central part of the original clump, as it is the least vigorous portion, and retain the healthier outer sections for replanting. You can now replant these new divisions in other areas of your garden or share them with friends. Prepare the new planting holes in the same way you would for a nursery-grown specimen, ensuring the soil is well-drained and the location receives ample sunlight. Plant the divisions at the same depth they were previously growing, making sure the crown is level with the soil surface.
After replanting the divisions, water them in thoroughly to settle the soil and provide moisture for the roots. It is important to keep them well-watered for the first few weeks as they work to re-establish their root systems. The newly divided plants may show some signs of transplant shock, such as wilting, but they typically recover quickly. Dividing your Maltese cross not only gives you more plants for free but also ensures that your existing clumps remain healthy, vigorous, and floriferous for many years to come.
Taking basal cuttings
While division and seed propagation are the most common methods, Maltese cross can also be propagated by taking basal cuttings in the spring. This technique involves taking cuttings from the new shoots that emerge from the base of the plant. This is a great way to produce a number of new plants that are genetically identical to the parent plant, which is particularly useful if you have a variety with exceptional color or form. The best time to take these cuttings is when the new spring growth is about four to six inches tall and still soft and succulent.
Using a sharp, clean knife or pruning shears, cut several healthy shoots from the base of the plant, right at the point where they emerge from the crown. These cuttings should be taken from the outer edges of the clump where the growth is most vigorous. Once you have your cuttings, prepare them by trimming each one just below a leaf node—the point on the stem where a leaf emerges. Remove the lower leaves from each cutting, leaving only two or three leaves at the top to reduce moisture loss through transpiration.
To encourage root development, you can dip the cut end of each stem into a rooting hormone powder, tapping off any excess. Then, insert the cuttings into a pot or tray filled with a moist, sterile rooting medium, such as a mix of perlite and compost or coarse sand. Insert the cuttings about one to two inches deep, ensuring that at least one leaf node is buried, as roots will often form at these points. Space the cuttings far enough apart so that their leaves do not touch.
Place the pot or tray in a warm, bright location, but out of direct sunlight, which can scorch the young cuttings. To maintain a humid environment, you can cover the pot with a clear plastic bag or a propagator lid. Check the cuttings regularly and mist them with water if the leaves begin to wilt. Roots should begin to form within a few weeks. You can check for root growth by gently tugging on a cutting; if you feel resistance, roots have likely formed. Once the cuttings have developed a healthy root system, they can be transplanted into individual pots and grown on until they are large enough to be planted in the garden.


