The pruning and cutting back of the striped squill
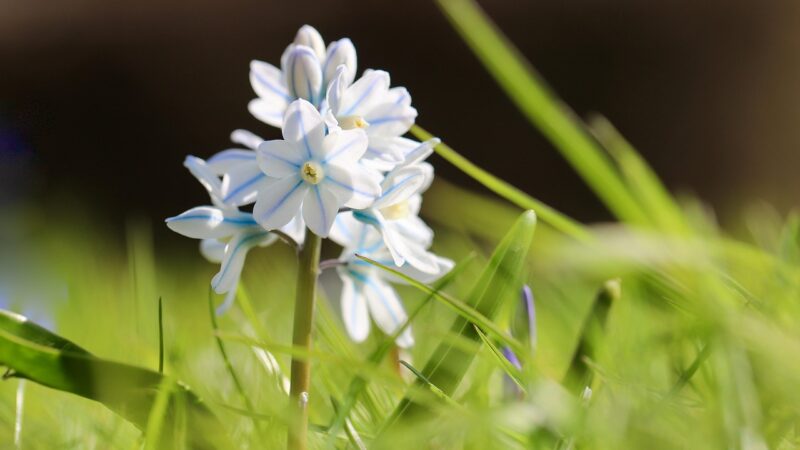
The topic of pruning and cutting back striped squill is a simple one, as these small, bulbous plants require no pruning in the traditional sense. Their care regimen is defined more by what a gardener should refrain from doing rather than by active cutting. The most critical instruction regarding the foliage is to allow it to persist and die back naturally after the flowering period has concluded. This post-flowering phase is a vital part of the plant’s life cycle, and interfering with it can have significant negative consequences for the future health and vitality of the bulbs. This patient approach is the cornerstone of successful cultivation for nearly all spring-flowering bulbs.
Unlike woody shrubs or herbaceous perennials that may benefit from being shaped, deadheaded, or cut back to encourage new growth, the striped squill’s growth pattern is finite for the season. It produces a set of leaves and flower stalks from the bulb, and once these have fulfilled their purpose, the plant’s energy is directed back underground. The leaves act as solar panels, capturing sunlight and converting it into chemical energy through photosynthesis. This energy is then transferred down to the bulb, where it is stored to fuel the next year’s growth and bloom.
The temptation to “tidy up” the garden by removing the yellowing, sometimes untidy-looking foliage can be strong, but it must be resisted. Cutting the leaves off prematurely, while they are still green or in the process of yellowing, effectively starves the bulb. It curtails the energy storage process, leading to a weaker bulb that will likely produce fewer, smaller flowers the following spring, or potentially no flowers at all. Repeatedly cutting the foliage back too early will eventually cause the bulb to perish.
Therefore, the only “cutting back” that is appropriate for striped squill is the removal of the dead, fully withered foliage once the die-back process is complete. At this stage, the leaves have given all their energy to the bulb and will detach with a gentle tug or can be raked away. This approach requires a degree of tolerance for a brief period of untidiness in the spring garden, a small price to pay for a recurring and beautiful floral display.
Post-flowering foliage care
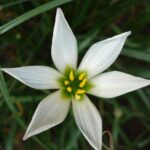
After the delicate, star-like flowers of the striped squill have faded, the plant’s foliage takes on a critical role. For approximately six to eight weeks following the bloom, the strap-like leaves will continue to absorb sunlight and manufacture food. This is the most important period for the bulb’s rejuvenation and development. The energy created during this time is what will determine the quality and quantity of flowers in the subsequent spring. For this reason, it is absolutely essential to leave the foliage completely intact until it has withered and turned yellow or brown on its own.
More articles on this topic
During this period, continue to provide the plants with adequate moisture, especially if spring rainfall is scarce. While the floral display is over, the plant is still very much active and working hard beneath the soil. Some gardeners choose to apply a light feeding of a low-nitrogen, high-phosphorus fertilizer at this time, such as bone meal, to give the bulbs an extra boost for storage. This can be gently scratched into the soil surface around the plants.
To manage the appearance of the fading foliage, which can look untidy, a good strategy is to interplant the striped squill with other perennials. As the squill’s leaves begin to yellow, the emerging growth of companion plants like hostas, ferns, geraniums, or daylilies can help to mask them. This creates a seamless transition in the garden bed, with the new foliage of the perennials covering the area as the bulbs enter their summer dormancy.
It is important to avoid the temptation to braid, tie, or bunch the leaves together, as is sometimes done with daffodils. While this may look neater, it reduces the surface area of the leaves exposed to the sun, thereby diminishing their ability to photosynthesize effectively. The best practice is simply to let the leaves lie naturally and allow the process to complete without interference.
Deadheading: is it necessary?
Deadheading, the practice of removing spent flowers, is a common garden task performed to prevent plants from setting seed and to encourage further blooming. In the case of striped squill, however, deadheading is generally not necessary or recommended for several reasons. Firstly, striped squill blooms only once per season from each bulb, so removing the faded flowers will not stimulate a second flush of blooms. Their flowering cycle is determinate and concludes after the initial spring display.
More articles on this topic
Secondly, the individual flowers are quite small and are produced in clusters on a short stalk. The effort required to deadhead each tiny flower is significant and yields very little aesthetic benefit, as the spent flowers shrivel and become quite inconspicuous on their own. The energy saved by preventing seed formation is minimal for such a small plant and is unlikely to make a noticeable difference in the bulb’s size or vigor compared to the energy generated by healthy foliage.
In fact, allowing the plants to set seed can be beneficial if you wish for them to naturalize and spread throughout the garden. Striped squill can propagate by seed, and over time, this can lead to the establishment of new patches and a more natural, meadow-like appearance. The seeds are often spread by ants in a process called myrmecochory, contributing to the gentle expansion of the colony. If your goal is to have a larger, naturalized planting, then leaving the flower heads in place is the better strategy.
The only situation in which one might consider removing the flower stalks is if you strongly wish to prevent self-seeding in a very formal garden bed. In this case, the entire flower stalk can be snipped off at the base after all the flowers on it have faded. However, for most garden settings, especially naturalistic or low-maintenance ones, it is best to simply leave the flower stalks be and allow nature to take its course.
End-of-season clean-up
The final stage of care for striped squill in their annual cycle is the end-of-season clean-up, which occurs after the foliage has completed its die-back. You will know it is time when the leaves are completely yellow or brown and have become dry and papery. At this point, they have transferred all of their stored energy back into the bulb and are no longer serving any function for the plant.
This dead foliage can now be safely removed without causing any harm to the dormant bulb below the soil. In many cases, the withered leaves will have already started to decompose and integrate into the soil. Any remaining foliage can be gently raked up or gathered by hand. This simple act of tidying can improve the appearance of the garden bed and remove any potential material that could harbor fungal spores or pest eggs over the winter, contributing to good garden hygiene.
Once the foliage is cleared, the striped squill requires no further attention until the following spring. The bulb will remain dormant underground throughout the summer and autumn. This is a good time to apply a thin layer of compost or leaf mold over the area. This acts as a slow-release fertilizer and helps to improve the soil structure, providing nutrients that will be available to the bulbs when they start growing their roots in the autumn and winter.
This final, simple clean-up marks the end of the care cycle for the year. It underscores the low-maintenance nature of striped squill; their “pruning” is less an act of cutting and more an act of patient waiting, followed by a brief tidying. This minimal intervention is all that is required to ensure these beautiful harbingers of spring return to grace the garden year after year.


