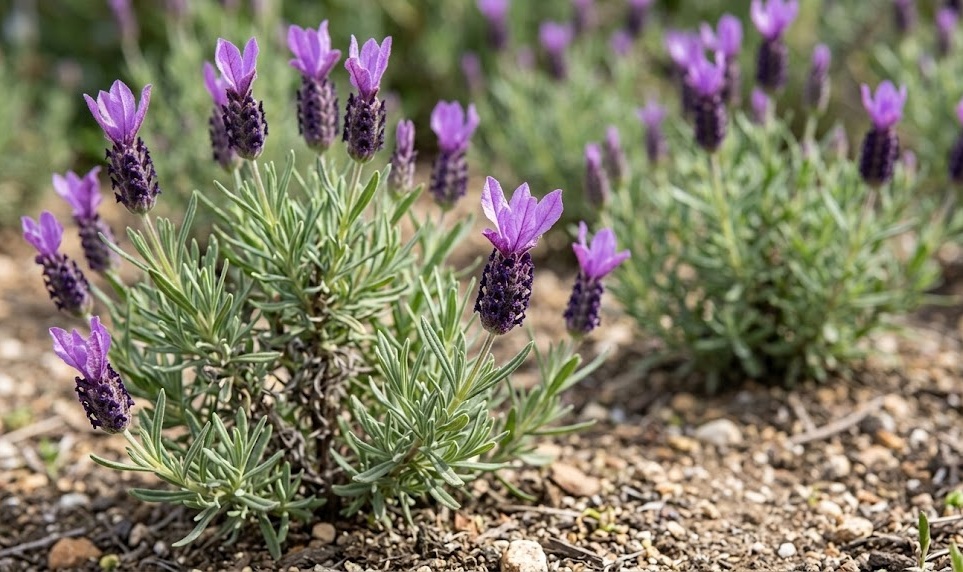
Choosing the right spot for your French lavender is the most critical decision in the planting process. This plant requires a location that receives full sun for at least six to eight hours every day. Without sufficient light, the shrub will become leggy and produce very few of its characteristic flowers. You must also consider the microclimate of your garden to ensure the plant is protected from harsh winds.
The soil in your chosen area must offer exceptional drainage to keep the roots healthy and functional. You can test the drainage by digging a small hole and filling it with water to see how fast it empties. If the water sits for more than an hour, the location is likely too damp for this species. Consider creating a raised bed or a mound if your natural garden soil is too heavy.
Air circulation is another vital factor that determines the long-term health of your lavender. You should avoid planting it in cramped corners or too close to solid walls where air becomes stagnant. Good airflow helps the foliage dry quickly after rain, which prevents many common fungal issues. Give each plant enough space to grow to its full mature width without touching its neighbors.
Proximity to walkways or seating areas is a great way to enjoy the plant’s unique fragrance. As you brush past the leaves, they release their aromatic oils into the surrounding air. However, ensure that the plant has enough room so that it does not obstruct the path as it grows. Planning for the mature size of the lavender now will save you from moving it later.
The process of planting
The best time to plant French lavender is in the spring after the danger of frost has passed. This gives the root system several months to establish itself before the heat of summer arrives. You can also plant in early autumn in milder climates where the winter is not too severe. Avoid planting during the peak of summer, as the high temperatures can cause significant transplant stress.
More articles on this topic
When you are ready to plant, dig a hole that is twice as wide as the current root ball. The depth should be exactly the same as the pot the lavender came in to keep the crown at soil level. Burying the crown too deep is a common mistake that often leads to rot and plant death. You can add a handful of bone meal or a bit of lime to the bottom of the hole.
Gently remove the plant from its container and lightly loosen the roots if they are circling the pot. Place the lavender in the center of the hole and fill it back in with the native soil. You should firm the soil down with your hands to remove any large air pockets around the roots. Do not pack it too tightly, as the roots still need some space to breathe and expand.
Initial watering is important to help settle the soil and reduce the shock of moving. You should water the base of the plant thoroughly immediately after you finish the planting process. However, do not let the area become a muddy swamp, as this can damage the roots right away. Monitor the plant closely for the first few weeks until you see signs of new growth.
Propagation through softwood cuttings
Taking cuttings is one of the most effective ways to multiply your collection of French lavender. You should look for healthy, non-flowering shoots during the late spring or early summer months. These softwood cuttings root much faster than older, more woody material from the center of the plant. Use a very sharp, sterilized knife to make a clean cut about three to four inches long.
More articles on this topic
Remove the leaves from the bottom half of the cutting to expose the nodes where roots will grow. You can dip the base of the stem into a rooting hormone to speed up the process, although it is not strictly necessary. Insert the cutting into a small pot filled with a mix of perlite and peat moss. This medium provides the perfect balance of moisture retention and aeration for the new roots.
Place the pots in a warm, bright spot that is out of direct sunlight to prevent wilting. You can cover the pots with a plastic bag to create a mini-greenhouse effect that keeps the humidity high. Check the moisture levels regularly and mist the foliage if it starts to look a bit dry. It usually takes about four to six weeks for a strong root system to develop.
Once the cuttings have established roots, you can gradually acclimate them to the outdoor environment. Start by placing them outside for a few hours a day in a protected area. Gradually increase their exposure to sun and wind over the course of a week or two. This hardening-off process is essential for the survival of the young lavender plants.
Growing French lavender from seeds
Starting lavender from seeds is a rewarding challenge, though it requires more patience than using cuttings. You should start the seeds indoors about eight to ten weeks before the last expected frost date. The seeds are quite small and should be sown on the surface of a fine seed-starting mix. Lightly press them into the soil but do not cover them deeply, as they need light to germinate.
Lavender seeds often benefit from a period of cold stratification to break their dormancy. You can place the sown trays in a refrigerator for about three weeks before moving them to a warm spot. Once they are back in the warmth, germination can still be slow and somewhat irregular across the tray. Keeping the soil temperature around twenty degrees Celsius will provide the best results for the seeds.
When the seedlings have developed two sets of true leaves, they are ready to be moved into individual pots. Handle them very carefully by the leaves rather than the stems to avoid damaging the delicate tissues. Continue to grow them in a sunny window or under grow lights until the weather outside is warm enough. They will grow slowly at first, so do not be discouraged by their initial size.
Before moving your homegrown seedlings to the garden, they must be hardened off just like cuttings. These young plants are more sensitive than established ones and need a gentle transition to the outdoors. Space them about twelve to eighteen inches apart in their final location to allow for future growth. With proper care, these tiny seedlings will become full-sized, fragrant shrubs within two years.