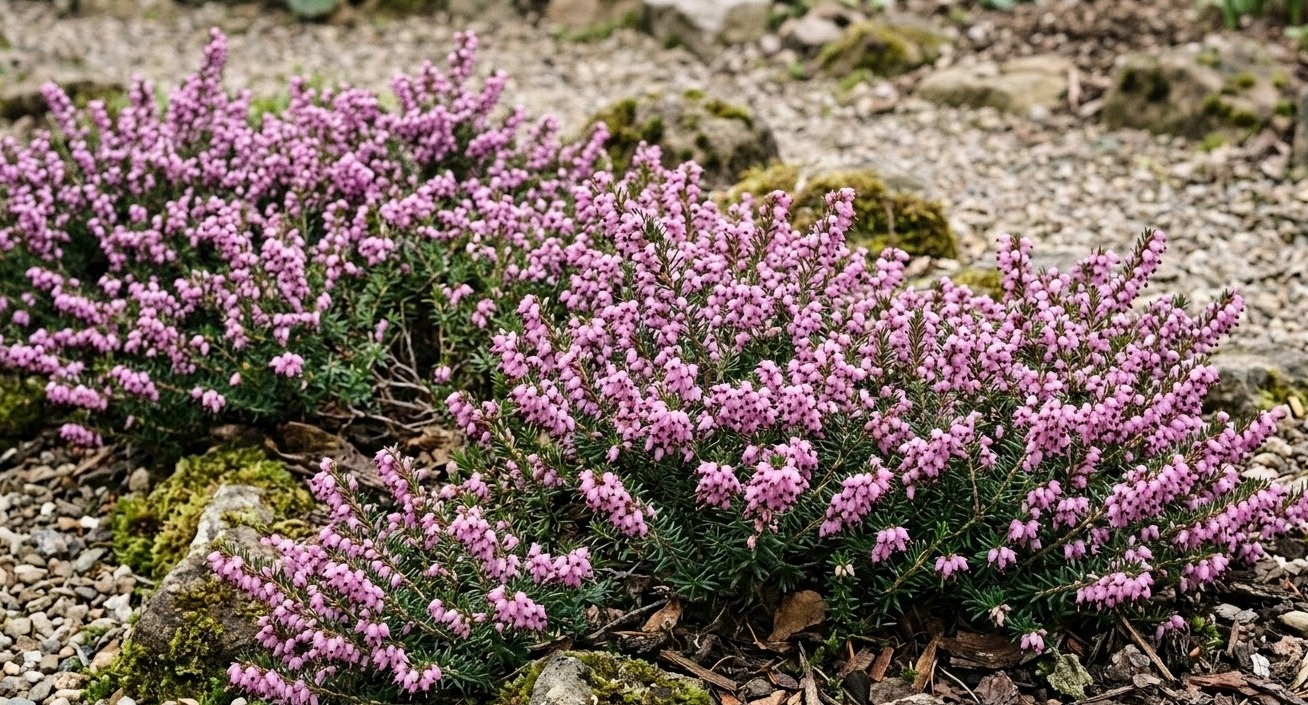
The successful establishment of the alpine heath starts with a careful assessment of the intended planting location within your garden. This evergreen shrub requires a spot that balances the need for bright light with protection from the most intense afternoon sun in warmer climates. You should look for a position that offers excellent drainage to prevent the roots from sitting in stagnant water during the rainy season. A thoughtful choice of site will reduce the need for future interventions and allow the plant to thrive naturally.
Air circulation is an often-overlooked factor that plays a crucial role in the health of your new plantings. You should avoid low-lying areas where cold air or moisture might settle, as this can lead to increased disease pressure. A slightly elevated position or a sloped area is often ideal for mimicking the plant’s natural mountain habitat. Providing a breezy environment helps to keep the foliage dry and discourages the growth of unwanted fungal pathogens.
Soil composition at the chosen site must be evaluated before you begin the actual planting process. This species prefers a soil that is rich in organic matter but retains a loose and friable structure for root penetration. If your site has naturally heavy or compacted soil, you will need to spend time amending the area to improve its physical properties. The goal is to create a growing medium that provides consistent moisture without ever becoming waterlogged.
Finally, consider the long-term spatial requirements of the shrub when choosing its permanent home in the garden. While the plants may appear small in their nursery containers, they will eventually spread to form a wide and dense mat. You should provide enough space for the plant to reach its mature width without being crowded by larger shrubs or trees. Proper spacing at the time of planting ensures that each individual has access to the resources it needs.
The process of successful planting
Once you have selected the site, the actual planting process should be handled with care to minimize transplant shock. You should dig a hole that is twice as wide as the root ball but no deeper than the container the plant is currently in. Placing the plant too deep in the ground can lead to stem rot, while planting it too high can cause the roots to dry out. The top of the root ball should be level with or slightly above the surrounding soil surface.
More articles on this topic
Before placing the shrub in the hole, gently loosen the roots if they have started to circle the inside of the pot. This step encourages the roots to grow outward into the new soil rather than continuing to grow in a tight circle. You should handle the root system delicately, as the fine roots can be easily damaged by rough treatment. Taking your time during this stage will pay dividends in the form of faster establishment and healthier growth.
Backfill the hole with a mixture of the native soil and organic amendments like compost or peat moss. You should firm the soil gently with your hands as you fill the hole to remove any large air pockets around the roots. Avoid tamping the soil down too hard with your feet, as this can compact the earth and hinder root development. A light touch is all that is needed to secure the plant while maintaining a porous soil structure.
Immediately after planting, you should water the area thoroughly to settle the soil and provide the roots with much-needed hydration. Adding a layer of organic mulch around the base of the plant will help to retain moisture and keep the soil temperature stable. Be careful to keep the mulch a few centimeters away from the main stems to prevent moisture-related bark issues. This initial care is vital for helping the plant transition from the nursery to its new home.
Propagation through cuttings and layering
Propagating your own plants is a rewarding way to expand your garden or share your favorite varieties with other enthusiasts. Semi-hardwood cuttings taken in the late summer or early autumn are usually the most successful method for this species. You should select healthy, non-flowering shoots that have started to firm up but are still somewhat flexible. Using a sharp, sterilized tool will ensure clean cuts and reduce the risk of introducing diseases to the parent plant.
More articles on this topic
The cuttings should be about five to ten centimeters long, with the leaves removed from the bottom half of the stem. You can dip the base of the cutting into a rooting hormone to encourage faster root development, though this is not always strictly necessary. Insert the cuttings into a well-draining propagation mix consisting of peat and perlite or sand. Maintaining a humid environment around the cuttings will prevent them from drying out before they can form roots.
Layering is another effective and even simpler method for propagating the alpine heath in your own backyard. This involves bending a flexible, low-growing branch down to the ground and burying a portion of it under the soil. You can secure the branch in place with a small wire hoop or a heavy stone to ensure it stays in contact with the earth. Over time, the buried section will develop its own root system while still being nourished by the mother plant.
Once the layered section has developed a strong set of roots, you can sever it from the parent and move it to a new location. This process usually takes several months or even a full growing season to ensure the new plant is self-sufficient. This method is highly reliable because the offspring remains attached to a constant supply of water and nutrients during the rooting process. It is an excellent way to create new plants with very little effort or specialized equipment.
Growing from seeds and long-term establishment
While less common than vegetative methods, growing this species from seed is a fascinating way to observe the entire lifecycle of the plant. You should collect the tiny seeds from the dried flower heads once they have completely matured on the shrub. The seeds often require a period of cold stratification to mimic the winter conditions they would experience in the wild. Sowing them on the surface of a fine, acidic seed-starting mix is usually the most effective approach.
Light is often required for the germination of these seeds, so you should not cover them with a thick layer of soil. Keep the seed trays in a cool, bright location and maintain consistent moisture by misting them regularly with water. Germination can be slow and irregular, so patience is a key requirement for any gardener attempting this method. Once the seedlings are large enough to handle, they can be transplanted into individual pots for further growth.
Young plants, whether grown from cuttings or seeds, require extra protection during their first few years in the garden. You should monitor their moisture levels closely, as their smaller root systems make them more vulnerable to drought. Providing a bit of shade during the hottest part of the day can also help them establish without excessive stress. As the plants mature, they will become increasingly resilient and better able to handle environmental fluctuations.
Establishing a large area of heath takes time and consistent effort, but the result is a beautiful and low-maintenance landscape feature. You should continue to monitor the health of your new plantings as they begin to spread and merge together. Regular weeding and occasional mulching will help the young plants fill in the gaps and create a solid carpet of color. Your dedication to the planting and propagation process will ensure a vibrant garden for many years to come.