Wintering of Persian onion
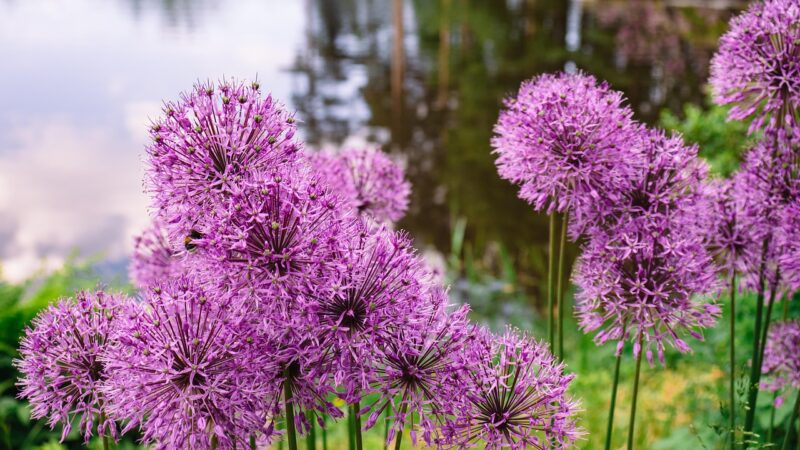
The majestic Allium aflatunense is a hardy bulbous perennial, well-adapted to withstand cold winter temperatures, a trait inherited from its native mountainous habitats in Central Asia. For most gardeners, ensuring its survival through the winter is a relatively straightforward affair that relies more on proper site preparation than on intensive intervention. The key to successful overwintering lies not in protecting it from the cold, but in protecting it from the combination of cold and wetness, which can be fatal. Understanding the plant’s dormancy and providing the right conditions before the ground freezes are the essential components of bringing your Persian onions through the winter to thrive and bloom again in the spring. This article explores the best practices for wintering Allium aflatunense, from preparing the garden bed to the optional practice of lifting and storing bulbs.
Natural hardiness and dormancy
Allium aflatunense is a naturally hardy plant, typically rated for USDA hardiness zones 4 through 8. This means it can tolerate minimum winter temperatures ranging from -34°C to -12°C (-30°F to 10°F) once it is established in the ground. This impressive cold tolerance is due to the plant’s life cycle. During the autumn and winter, the bulb is in a state of dormancy, a period of rest where metabolic activity is significantly reduced. This allows it to conserve energy and survive unfavorable conditions. The bulb, buried deep in the soil, is insulated from the most extreme air temperature fluctuations at the surface.
The dormancy period is a crucial phase for the Persian onion. Following its active growth and flowering in the spring and a dry rest in the summer, the bulb begins to prepare for winter as soil temperatures cool in the autumn. It is during this time that it develops its root system for the coming spring. A healthy root system, established in the autumn before the ground freezes, is vital for the plant’s ability to absorb water and nutrients quickly once spring arrives. This is why autumn planting is so critical for these bulbs.
The primary threat to the overwintering bulb is not the cold itself, but excessive moisture in the soil. A dormant bulb sitting in cold, waterlogged soil is extremely susceptible to fungal infections and rot. This is why the emphasis on well-draining soil is a recurring theme in the cultivation of all alliums. If the planting site allows water to drain away freely, the bulb will remain relatively dry even during periods of heavy winter rain or snowmelt, and its natural hardiness will allow it to survive the cold without issue.
In its dormant state, the plant requires no active care. There is no need for watering or fertilizing during the winter months. The bulb contains all the stored energy it needs to survive until spring. The gardener’s role in the winter is simply to ensure that the conditions established during planting—namely, excellent drainage—are sufficient to protect the bulb from its main adversary: winter wetness.
More articles on this topic
Preparing the garden bed for winter
Proper preparation of the garden bed in the autumn is a key step in ensuring the successful overwintering of Allium aflatunense. This preparation begins after the first hard frost has occurred but before the ground freezes solid. The first task is to perform a final cleanup of the area. If you haven’t already done so, remove the completely withered foliage from the summer. Additionally, clear away any fallen leaves or other garden debris from directly on top of the planting area to discourage slugs and to prevent the area from becoming overly soggy.
For newly planted bulbs, ensuring they are at the correct depth is part of their winter preparation. A planting depth of 15-20 centimeters provides a significant layer of insulating soil that protects the bulb from the rapid freeze-thaw cycles that can occur at the surface. This soil layer acts as a buffer, maintaining a more stable temperature around the bulb throughout the winter. Bulbs that are planted too shallowly are more vulnerable to heaving out of the ground as the soil freezes and thaws.
If your garden soil is heavy or prone to waterlogging, it is beneficial to take extra steps in the autumn. You can create a slight mound over the planting area to help shed excess water. Amending the soil with grit and organic matter at planting time is the most effective long-term solution, but even creating shallow diversion channels to direct surface water away from the bed can be helpful in particularly wet climates. The goal is to do everything possible to keep the immediate vicinity of the bulbs from becoming a sump.
It is important to cease all fertilization well before winter arrives. Late-season feeding could potentially stimulate new growth at a time when the plant should be entering dormancy. This new, tender growth would be quickly killed by the first frosts and would have wasted valuable energy from the bulb. The plant should be allowed to enter its natural dormant state without any artificial encouragement to grow.
More articles on this topic
The role of mulch in winter protection
Applying a layer of mulch over the garden bed in late autumn can provide significant benefits for overwintering Allium aflatunense, especially in colder climates (zones 4 and 5) or for newly planted bulbs. The primary purpose of winter mulch is not to keep the ground warm, but rather to keep it frozen. By insulating the soil, mulch helps to prevent the repeated freezing and thawing cycles that can heave bulbs out of the ground and damage their newly formed roots. A stable, frozen soil temperature is less stressful for the dormant bulb than a fluctuating one.
The timing of mulch application is critical. You should wait until after the ground has frozen to a depth of a few centimeters before applying the mulch. If you apply it too early, while the ground is still warm, you can trap that warmth and moisture, which can delay the bulb’s dormancy and potentially encourage rot. It may also provide a cozy winter home for voles or mice, which might then feed on your bulbs. Waiting for the ground to freeze ensures the bulbs are fully dormant and discourages rodent activity.
The best materials for winter mulch are those that are light and airy and will not become a compacted, soggy mat over the winter. Excellent choices include shredded leaves, pine needles, straw, or marsh hay. These materials trap air, which is an excellent insulator, and they allow for some moisture and air exchange with the soil surface. A layer of about 10-15 centimeters is generally sufficient to provide the desired insulation. Avoid using heavy materials like wet leaves or dense compost, which can hold too much moisture against the soil surface.
In the spring, it is equally important to remove the winter mulch at the right time. As the soil begins to thaw and the danger of hard freezes has passed, you should gradually rake away the mulch layer. This allows the sun to reach and warm the soil, signaling to the bulbs that it is time to begin their spring growth. Leaving the mulch on for too long can delay the emergence of the shoots and can create a damp environment that encourages slugs and disease.
Overwintering bulbs in storage
In very cold, wet climates, or for particularly prized specimens, some gardeners may choose to lift the bulbs and store them indoors over the winter. While Allium aflatunense is generally hardy enough to be left in the ground, this method provides complete control over the winter environment, eliminating any risk of rot. This practice is more common for less hardy bulb species but can be applied to Persian onions if conditions warrant it.
If you choose to lift your bulbs, the process should begin in the late summer or early autumn once the foliage has completely died back and the bulbs are fully dormant. Carefully dig up the bulbs, taking care not to damage them. Gently brush off the excess soil, but do not wash them, as this can introduce moisture that leads to rot in storage. The next step is to cure the bulbs, which allows their outer layers to dry and harden, protecting the bulb from moisture loss and disease.
To cure the bulbs, lay them out in a single layer on a screen or in a shallow tray. Place them in a warm, dry, and shady location with good air circulation for a period of one to two weeks. A covered porch, a dry garage, or a well-ventilated shed are all suitable locations. Once the outer skins are papery and dry and the roots are withered, they are ready for storage. You can trim the dried foliage and roots at this point.
For winter storage, place the cured bulbs in a mesh bag, a paper bag with ventilation holes, or a cardboard box with a loose packing material like peat moss, vermiculite, or sawdust. The key is to ensure good air circulation to prevent moisture buildup. Store the container in a location that is cool, dark, and dry. An unheated garage, a cellar, or a shed are often ideal, provided they remain above freezing. The ideal storage temperature is between 5°C and 10°C (40°F and 50°F). Remember to replant the stored bulbs the following autumn.


