Preparing for the transition into the colder months is a vital part of the annual lifecycle for these sun-loving flowers. While most varieties are grown as tender annuals that complete their journey in a single season, the way you manage the garden in winter dictates the success of next year. This process involves both the physical cleanup of the beds and the preservation of the genetic legacy of your favorite plants. Understanding these final seasonal tasks ensures a smooth and productive start when the warmth returns.
End of season cleanup and bed preparation
As the first hard frosts of autumn arrive, the vibrant green foliage will quickly turn black and brittle. This is the natural signal that the plant’s life cycle has come to an end and it is time for the final cleanup. Removing the spent plants promptly prevents them from becoming a soggy, decaying mess that can harbor mold and pests through the winter. Use a pair of sharp shears to cut the stems at ground level, or gently pull the entire root system if the soil is loose.
Assessing the health of the plants during removal is a critical step for future planning and disease management. If a particular area was heavily affected by mildew or rot, it is best to avoid composting those specific remains. Instead, dispose of them away from your garden beds to ensure the pathogens do not return in the spring. Healthy plant material, however, is a goldmine of organic matter that should be added to your compost pile to enrich future soil.
Once the plants are removed, take a moment to inspect the soil and address any issues like compaction or nutrient depletion. Winter is an excellent time to add a layer of organic mulch or well-rotted manure to the surface of the beds. This layer protects the soil structure from the erosive force of winter rain and snow while slowly breaking down to provide nutrients. The microorganisms in the soil will continue to work beneath the mulch, preparing a rich environment for next year’s seeds.
Leaving some of the seed heads in the garden can provide a valuable food source for birds during the lean winter months. Many finches and other small birds are particularly fond of the seeds and will visit your garden regularly if food is available. While this may result in some “volunteer” seedlings next year, many gardeners find the presence of winter birds to be well worth the extra weeding. It is a simple way to support local wildlife while the garden is in its dormant phase.
More articles on this topic
Seed harvesting and storage techniques
Collecting seeds is the most effective way to “overwinter” your favorite varieties and ensure they return to your garden. Wait until the flower heads have completely dried on the plant and the seeds are dark, firm, and easy to detach. It is best to harvest on a dry, sunny day to ensure that no moisture is trapped inside your storage containers. Place the collected seed heads in a paper bag and keep them in a warm, dry spot for a few more days to ensure they are fully cured.
Cleaning the seeds involves separating the valuable dark seeds from the dried petals and other chaff. You can do this by gently rubbing the seed heads between your hands over a tray or a large bowl. The heavier seeds will fall to the bottom, while the lighter debris can be blown away with a gentle breath or a light breeze. This process does not need to be perfect, but removing excess organic matter helps prevent mold during storage.
Proper storage conditions are essential for maintaining the viability of your harvested seeds until spring. Use small paper envelopes to hold the seeds, as paper allows for a tiny bit of air circulation that prevents moisture buildup. Clearly label each envelope with the variety and the date of harvest to avoid confusion when planting time arrives. Store the envelopes in a cool, dry, and dark location, such as a closet or a sealed container in a basement.
Periodically checking your stored seeds throughout the winter can help you catch any issues before they ruin the entire batch. If you notice any signs of dampness or a musty smell, spread the seeds out to dry further and consider moving them to a different location. High-quality seeds can remain viable for several years if kept under ideal conditions, giving you a reliable backup for your garden. This practice of seed saving connects you to the ancient traditions of gardening and ensures a sustainable future for your landscape.
More articles on this topic
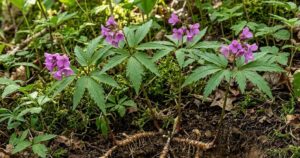
Managing perennials and tubers
While the most common varieties are annuals, some related species produce tuberous roots that can be overwintered in a similar fashion to dahlias. If you are growing these perennial types, the tubers must be lifted from the ground before the soil freezes solid. Carefully dig around the base of the plant, taking care not to nick or bruise the delicate storage organs. Shake off the excess soil and allow the tubers to dry in a shaded, frost-free area for a few days.
Once the tubers are cured, they should be stored in a medium that maintains a very slight amount of moisture without being wet. Peat moss, vermiculite, or even slightly damp sawdust are all excellent choices for packing the tubers into boxes or crates. The storage area should be cool—ideally between 4 and 10 degrees Celsius—but must never drop below freezing. If the environment is too dry, the tubers will shrivel, but if it is too wet, they will quickly rot.
Check your stored tubers once a month during the winter to ensure they are staying healthy and firm. If you see any signs of rot, cut away the affected portion with a sterile knife and allow the wound to air dry. If they appear to be shriveling excessively, a light misting of water on the storage medium can provide the necessary humidity. This hands-on approach to overwintering allows you to grow rare or particularly beautiful specimens year after year.
In early spring, a few weeks before the last frost, you can begin to wake up the tubers by moving them to a warmer, brighter spot. This encourages the first buds to sprout, giving the plants a significant head start once they are finally moved back into the garden. Once the soil has warmed and the danger of frost is gone, plant them at the same depth they were growing the previous year. This cycle of lifting and replanting is a rewarding way to maintain a permanent collection of these elegant flowers.
Planning and preparation for the new season
Winter is the perfect time for reflection and planning, allowing you to design the next season’s garden with a fresh perspective. Review your garden notes and photos to see which areas worked well and which ones could be improved. You might decide to try a new color palette or experiment with different height combinations in your borders. Researching new cultivars and ordering seeds early ensures that you have the best selection before the popular varieties sell out.
Preparing your tools and equipment during the dormant season saves valuable time when the busy spring arrives. Sharpen your shears, oil your wooden handles, and clean your seed trays and pots to prevent the spread of disease. Checking your irrigation system for leaks or clogs now is much easier than dealing with a broken pipe in the middle of a July heatwave. A well-organized shed is the foundation of a successful and stress-free growing season.
Consider the layout of your garden and whether you want to implement crop rotation or expand your flower beds. Moving your flowers to a different location each year can help prevent the buildup of soil-borne pests and diseases. If you are planning a new bed, winter is a great time to lay down cardboard or thick mulch to smother weeds in preparation for spring. This “no-dig” preparation method preserves soil structure and saves your back from unnecessary labor.
Finally, take the time to appreciate the quiet beauty of the winter garden and the promise of what is to come. Even when the ground is frozen, life is waiting just beneath the surface, preparing for the first touch of spring warmth. The cycle of growing, harvesting, and overwintering is a testament to the resilience and beauty of the natural world. With your seeds safely stored and your beds prepared, you are ready for another year of spectacular summer blooms.