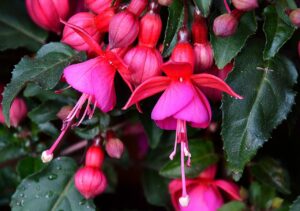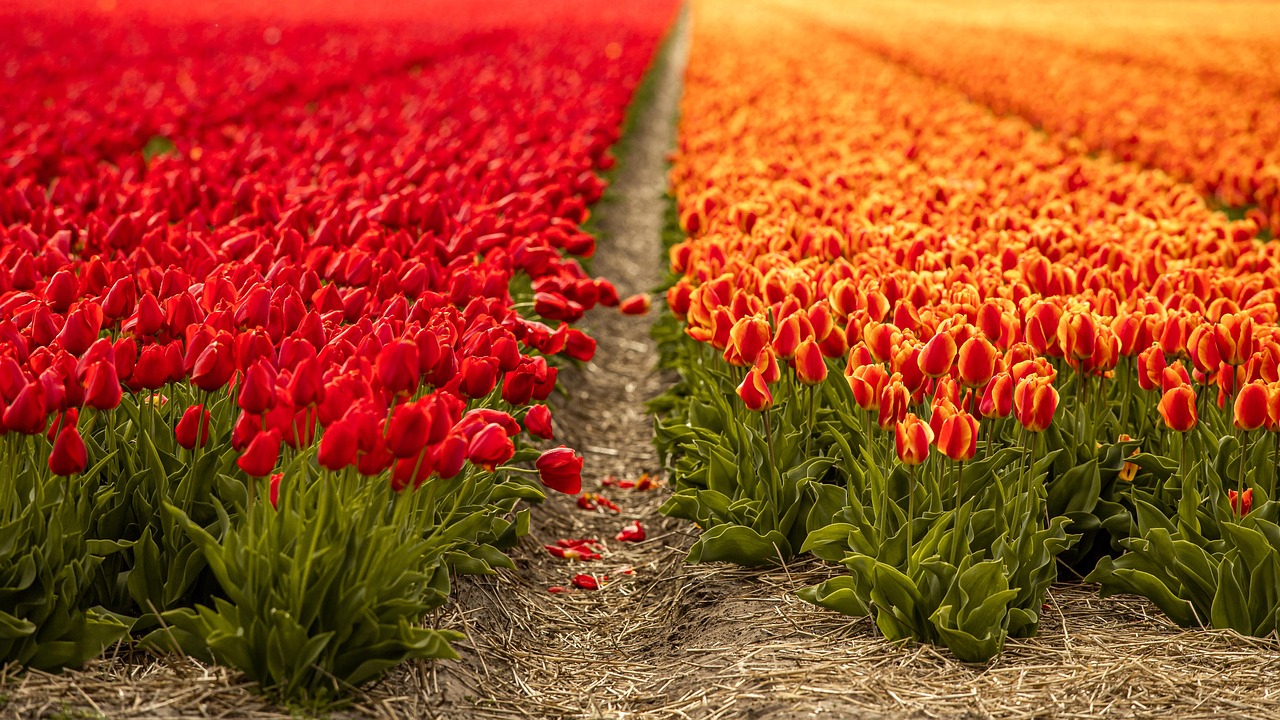
To achieve a truly breathtaking display of tulips, with their strong stems and richly saturated colors, it is essential to provide them with the right balance of moisture and nutrition. While tulips are relatively low-maintenance once established, their performance can be significantly enhanced through mindful watering and a strategic approach to fertilization. Understanding when and how to provide these fundamental resources is key to supporting the bulb’s entire life cycle, from root development in the autumn to energy storage after the spring bloom. Overlooking these aspects can lead to weakened plants and disappointing flowers. This article will delve into the best practices for watering and fertilizing your tulips, ensuring they have everything they need to thrive and return year after year.
Proper watering for tulips begins immediately after they are planted in the autumn. Once the bulbs are in the ground, it is crucial to water the area thoroughly. This initial watering serves several important purposes: it settles the soil around the bulbs, eliminating any air pockets that could hinder root growth, and it provides the necessary moisture to trigger the bulbs out of their dormancy and stimulate the development of their root systems. A strong root system established in the autumn is the foundation for a healthy plant in the spring, enabling it to efficiently absorb water and nutrients when active growth begins.
Throughout the winter, you generally do not need to provide supplemental water to your tulip beds, as natural precipitation in most climates is sufficient. The bulbs are dormant or slowly developing roots, and their water requirements are minimal. However, if you live in an area with very dry winters, it may be necessary to water the ground occasionally during prolonged dry spells, especially if the ground is not frozen. The goal is simply to keep the soil from completely drying out. Overwatering during the winter is a significant risk, as it can lead to bulb rot, so it is always better to err on the side of caution.
As spring arrives and the tulip shoots begin to emerge from the ground, their water needs increase significantly. This is the period of active growth when the stems, leaves, and flowers are rapidly developing. If rainfall is insufficient—less than about one inch per week—you should provide supplemental watering. Water the plants deeply to ensure the moisture penetrates down to the root zone, which is several inches below the surface. A thorough soaking once a week is far more effective than shallow, frequent watering, as it encourages the roots to grow deeper into the soil.
The need for consistent moisture continues through the blooming period and, crucially, for the several weeks after the flowers have faded. This post-bloom period is when the leaves are actively photosynthesizing to replenish the energy stores in the bulb for the following year’s display. Allowing the soil to become excessively dry during this time can prematurely stress the plant, causing the foliage to die back too early and preventing the bulb from fully recharging. Continue to water as needed until the foliage begins to turn yellow and wither naturally, at which point you can cease supplemental watering as the bulb prepares to enter its summer dormancy.
More articles on this topic
Fertilization strategies for optimal growth
Fertilizing tulips provides the essential nutrients they need to produce spectacular flowers and to perennialize successfully. The best time to apply fertilizer is at the time of planting in the autumn. As you are preparing the soil, incorporate a balanced, slow-release granular fertilizer specifically formulated for bulbs. These fertilizers are typically low in nitrogen and higher in phosphorus and potassium. Phosphorus is vital for promoting vigorous root development, while potassium contributes to overall plant health and disease resistance. Mixing the fertilizer into the soil at the bottom of the planting hole ensures that the nutrients are available to the new roots as they begin to grow.
In addition to the initial feeding at planting time, an annual application of fertilizer in the spring can greatly benefit your tulips, particularly if you want them to return year after year. The ideal time for this supplemental feeding is just as the shoots are beginning to emerge from the soil. Use the same type of low-nitrogen, high-phosphorus bulb food, and lightly scratch it into the surface of the soil around the plants, being careful not to damage the emerging foliage. This spring feeding provides a boost of nutrients to support the current season’s flower development and helps the bulb in the critical energy-storage phase that follows.
It is very important to avoid using fertilizers that are high in nitrogen. While nitrogen is essential for leaf growth, an excess of it can cause several problems for tulips. It can lead to the development of lush, soft foliage that is more susceptible to fungal diseases like Tulip Fire. Furthermore, excessive nitrogen encourages the plant to put its energy into producing leaves at the expense of the bulb and flower, which can weaken the bulb over time and reduce its ability to perennialize. Stick to fertilizers specifically labeled for bulbs or use bone meal, which is a good organic source of phosphorus.
For gardeners who prefer organic methods, incorporating well-rotted compost or manure into the soil at planting time is an excellent way to provide a slow release of essential nutrients. A top-dressing of compost applied in the spring can also serve as a gentle and effective fertilizer. Compost not only feeds the plants but also improves the soil structure, water retention, and microbial activity, creating a healthier overall growing environment for your tulip bulbs. Regardless of the type of fertilizer you choose, always follow the application rates recommended on the product packaging to avoid over-fertilizing, which can be just as harmful as under-fertilizing.
More articles on this topic
Watering tulips in containers
Tulips grown in containers have different watering requirements compared to those planted in the ground. The soil in pots and containers dries out much more quickly than garden soil, so you will need to monitor them more closely. After planting the bulbs in the autumn, water the container thoroughly until you see water draining from the bottom. Throughout the winter, check the soil moisture periodically. While you want to avoid letting the container become waterlogged, you also must not allow the soil to dry out completely, as this can desiccate and kill the bulbs. The pot should be kept lightly moist.
Once spring arrives and the tulips begin to grow actively, you will need to increase the frequency of watering. Check the soil every few days by inserting your finger about an inch deep; if it feels dry at that depth, it is time to water. Water the container thoroughly until it drains from the bottom, ensuring that the entire root ball is moistened. During warm or windy weather, you may need to water your containers every day, especially when the tulips are in full bloom. Consistent watering is key to keeping the flowers looking their best and preventing the plants from becoming stressed.
It is crucial that any container used for tulips has excellent drainage. Ensure there are plenty of drainage holes at the bottom of the pot to allow excess water to escape freely. If water is allowed to sit at the bottom of the container, the bulbs will quickly rot. You can add a layer of gravel or broken pot shards to the bottom of the container before adding soil, but this is less effective than simply ensuring the potting mix itself is well-draining. Using a high-quality potting mix, perhaps with added perlite or sand, is the best way to achieve the drainage that tulips require.
The post-bloom care for container-grown tulips is just as important as for those in the garden. Continue to water the plants as long as the foliage is green. Once the leaves start to yellow and die back, you can gradually reduce and then stop watering altogether. At this point, you should move the container to a dry, shaded location for the summer. This allows the bulbs to go through their necessary dormant period in a dry environment. In the autumn, you can either repot them with fresh soil or begin watering again for the next season’s display.
Recognizing signs of improper watering
Learning to recognize the signs of both overwatering and underwatering is crucial for maintaining the health of your tulips. Overwatering is one of the most common problems and is particularly dangerous as it promotes bulb rot. The initial signs of overwatering can be subtle, but they may include the yellowing of the lower leaves (which can be confused with the natural end-of-season die-back), stunted growth, or a general lack of vigor. If you suspect overwatering, check the soil; if it is consistently soggy or waterlogged, you need to reduce your watering frequency and improve the drainage if possible.
In advanced cases of overwatering, the bulb itself will begin to rot. A rotting bulb will be soft and mushy to the touch and may have a foul odor. The plant’s stem may become weak and collapse at the base. Unfortunately, once bulb rot has set in, the plant cannot be saved. The best course of action is to remove and discard the affected bulb and the surrounding soil to prevent the spread of fungal pathogens to other plants. This highlights the importance of providing well-draining soil from the very beginning.
Underwatering, on the other hand, will also produce clear symptoms. The first sign is often wilting leaves and flower stems, especially during the warmer parts of the day. The edges of the leaves may turn brown and crispy, and the flowers may be smaller than expected or may fail to open properly. The blooming period can also be significantly shortened if the plant is under water stress. If you notice these signs, provide a deep and thorough watering immediately to rehydrate the plant.
Consistently underwatered tulips will have their overall health compromised. A lack of sufficient water during the critical post-bloom phase will prevent the bulb from storing enough energy for the next year. This can result in a “blind” bulb—one that produces leaves but no flower—in the following spring. By paying close attention to your plants and the condition of the soil, you can learn to provide the right amount of water at the right time, avoiding these common pitfalls and ensuring your tulips remain healthy and productive.
The role of soil type in watering and fertilizing
The type of soil in your garden plays a significant role in how you should approach watering and fertilizing your tulips. Sandy soils, for example, have large particles and drain very quickly. While this excellent drainage is beneficial in preventing bulb rot, it also means that both water and nutrients leach through the soil rapidly. If you have sandy soil, you will likely need to water your tulips more frequently, especially during dry periods. You may also find that applying a layer of organic mulch, such as shredded bark, can help to conserve soil moisture.
When fertilizing tulips in sandy soil, the rapid leaching of nutrients is also a consideration. A slow-release granular fertilizer incorporated at planting time is particularly effective in these conditions, as it provides a steady supply of nutrients over a longer period. You might also consider splitting your spring fertilizer application into two smaller doses—one as the shoots emerge and another just as the flower buds are forming—to ensure a continuous supply of nutrition. Amending sandy soil with compost is highly recommended, as it improves both water and nutrient retention.
Clay soils are on the opposite end of the spectrum. They consist of very fine particles, which can become compacted and lead to poor drainage. As discussed, amending heavy clay soil with organic matter is essential before planting tulips. Even with amendments, clay soils retain moisture for much longer than sandy soils, so you will need to be very careful not to overwater. Always check the soil moisture level before watering tulips planted in clay-heavy ground. The risk of bulb rot is significantly higher in these types of soils.
Loam soil is considered the ideal for gardening, as it contains a balanced mixture of sand, silt, and clay. It holds moisture well but also allows excess water to drain away, and it is typically rich in nutrients. If you are fortunate enough to have loam soil, your watering and fertilizing routine for tulips will be more straightforward. You will still need to provide supplemental water during dry spells and follow a basic fertilization program, but the soil itself provides a much more forgiving environment for the bulbs. Understanding your specific soil composition is the first step to developing a tailored and effective care regimen for your tulips.