Watering and fertilizing the clivia
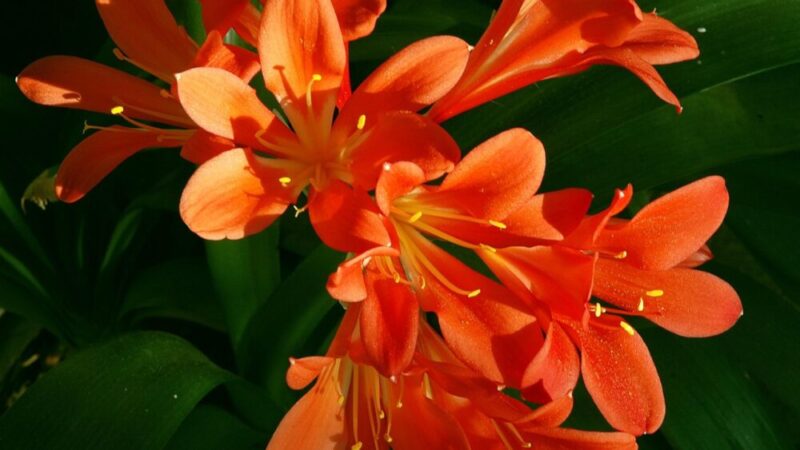
Mastering the art of watering and fertilizing is fundamental to cultivating a thriving clivia that not only survives but flourishes, rewarding you with its structural beauty and spectacular seasonal blooms. These two aspects of care are intricately linked to the plant’s natural life cycle, requiring a nuanced approach that adapts to the changing seasons. Proper watering is a delicate balance between providing sufficient moisture for its fleshy roots and preventing the dreaded, and often fatal, condition of root rot. Similarly, fertilization must be timed precisely to support active growth without disrupting the crucial winter dormancy period that is essential for flower production.
The core principle of watering a clivia is to be thorough yet infrequent. This plant is adapted to periods of dryness and is far more tolerant of being underwatered than it is of being overwatered. Before you even consider reaching for the watering can, it is imperative to check the moisture level of the soil. A reliable method is to insert your finger into the potting mix; if the top two to three inches feel dry to the touch, it is time to water. This simple tactile check prevents the common mistake of watering on a rigid schedule, which fails to account for variations in temperature, humidity, and light.
When you do water, the technique is just as important as the timing. The goal is to moisten the entire root ball evenly. To achieve this, pour water slowly and generously over the entire surface of the soil until you see it flowing freely from the drainage holes at the bottom of the pot. This not only ensures that all the roots have access to moisture but also helps to flush out any accumulated mineral salts from previous fertilizations. After a thorough watering, be sure to empty any excess water that has collected in the saucer or cachepot, as allowing the plant to sit in standing water is a direct invitation for root rot.
Fertilizing, on the other hand, is about providing targeted nutrition during the plant’s active growth phase. This period typically begins in the spring, after the plant has finished flowering, and continues through the summer months. During this time, the clivia is focused on producing new leaves and gathering energy for the next year’s performance. Using a balanced, water-soluble fertilizer is the most effective way to deliver these essential nutrients. However, it’s crucial to remember that these are not heavy feeders, and a gentle approach is always best to avoid damaging their sensitive root systems.
The golden rules of watering
The most significant threat to a clivia’s health is overwatering, a well-intentioned mistake made by many plant enthusiasts. The plant’s thick, fleshy roots are highly efficient at storing water but are also extremely susceptible to rot when kept in constantly damp or waterlogged soil. Therefore, the cardinal rule is to always allow the soil to dry out partially between waterings. This drying period is not a sign of neglect but a critical phase that allows air to penetrate the soil, providing oxygen to the roots and preventing the growth of harmful anaerobic bacteria and fungi that cause rot.
More articles on this topic
Understanding the factors that influence watering frequency is key to developing an intuitive sense of your plant’s needs. The time of year is the most significant variable; a clivia will require much more water during its active growth in the warm, bright months of spring and summer than it will during its winter rest period. The size and material of the pot also play a role, with smaller pots and porous terracotta pots drying out more quickly than larger plastic containers. Your home’s specific environment, including ambient temperature and humidity levels, will also affect how quickly the soil dries.
The quality of the water you use can make a difference in the long-term health of your plant. Tap water in many areas is treated with chlorine and may contain high levels of minerals, which can accumulate in the soil over time. This buildup can appear as a white crust on the soil surface or the pot and can eventually harm the plant’s roots. To mitigate this, you can let tap water sit in an open container for 24 hours to allow some of the chlorine to dissipate. For optimal health, however, using rainwater, distilled water, or filtered water is a superior choice.
Pay close attention to the visual cues your plant provides. The leaves of a well-hydrated clivia are firm, glossy, and upright. If you notice the leaves starting to droop or look slightly wilted, it’s a reliable sign that the plant is thirsty. Conversely, yellowing leaves, especially lower ones, combined with consistently moist soil, are a classic symptom of overwatering and potential root rot. Learning to read these signals from your plant is far more effective than adhering to a generic, one-size-fits-all watering schedule.
Understanding fertilizer types and schedules
Choosing the right fertilizer is crucial for providing your clivia with the nutrients it needs to thrive. A balanced, water-soluble fertilizer is generally the best option, as it provides a controlled dose of nutrients that are readily available to the plant’s roots. Look for a product with a balanced N-P-K ratio, such as 10-10-10 or 20-20-20. Alternatively, a fertilizer formulated for flowering houseplants, which may have a slightly higher phosphorus content (the middle number), can be beneficial for promoting robust blooms. Always read the instructions on the packaging carefully.
More articles on this topic
The timing of fertilization is absolutely critical and must be synchronized with the plant’s annual growth cycle. Begin feeding your clivia in the spring, just as new leaf growth becomes apparent or after the last flower has faded. Continue to fertilize regularly throughout the spring and summer months, which is the plant’s peak growing season. As late summer transitions into early autumn, it is essential to taper off and then completely stop fertilizing. This cessation of feeding is a key signal to the plant to slow down its growth and prepare for its necessary winter dormancy.
When it comes to clivias, less is more. Their root systems are sensitive and can be easily damaged by an excess of fertilizer salts, a condition known as fertilizer burn. To prevent this, you should always dilute the fertilizer to half the strength recommended by the manufacturer. Applying this half-strength solution every three to four weeks during the growing season is generally sufficient to meet the plant’s nutritional needs without overwhelming it. Never be tempted to give it a “strong” dose to encourage faster growth, as this will almost certainly do more harm than good.
Some growers prefer to use slow-release fertilizers, which come in the form of pellets or granules that are mixed into the soil. These products break down gradually over several months, providing a steady, low-level supply of nutrients to the plant. This can be a convenient option, as it reduces the frequency of application. If you choose this method, apply the slow-release fertilizer once in the spring as new growth begins. Be mindful not to apply too much, and remember that you will still need to cease all forms of feeding as the plant heads into its autumn rest period.
How to apply fertilizer correctly
The proper application of fertilizer is just as important as the choice of product and schedule. The most critical rule to follow is to never apply a liquid fertilizer to dry soil. When the soil is dry, the plant’s roots are more susceptible to absorbing the concentrated fertilizer salts too quickly, which can cause severe chemical burn and damage the delicate root tissues. This can set the plant back significantly and, in severe cases, can be fatal. It is a simple step to prevent a very serious problem.
The correct procedure is to first water your clivia thoroughly with plain water, just as you would during a normal watering session. Allow the water to drain completely through the pot, which serves two purposes: it fully hydrates the plant and moistens the soil, and it can help to flush out any salt residues from previous feedings. Wait for about 15 to 30 minutes after this initial watering before you proceed with applying the fertilizer. This ensures the root zone is adequately prepared to receive the nutrients safely.
Once the soil is moist, you can then apply your prepared, half-strength liquid fertilizer solution. Pour it slowly and evenly over the entire surface of the soil, just as you did with the plain water. This ensures that the fertilizer is distributed uniformly throughout the root ball, making it accessible to all parts of the root system. Avoid pouring the fertilizer directly onto the leaves or into the crown of the plant, as this can cause burns or encourage rot in the tightly packed leaf bases.
After applying the fertilizer, allow any excess solution to drain away completely from the bottom of the pot. Do not let the plant sit in a saucer full of fertilizer runoff, as this can lead to the soil becoming oversaturated and can cause the roots to absorb too many salts. By following this simple “water, wait, fertilize” routine, you can provide your clivia with the nutrition it needs for vigorous growth and stunning blooms while keeping its sensitive root system safe and healthy.
Adjusting care for the time of year
The needs of a clivia change dramatically with the seasons, and adjusting your watering and fertilizing practices accordingly is essential for its long-term health and ability to flower. Spring is a time of renewal and vigorous activity. As the plant emerges from its winter rest, often with a flower stalk already developing, you should gradually increase the frequency of watering. Once flowering is complete, new leaf growth will begin in earnest, and this is the time to start your regular fertilizing schedule, feeding the plant every few weeks to support this energy-intensive period.
Summer is the peak growing season for the clivia. With longer days and warmer temperatures, the plant will be photosynthesizing at its maximum rate and will require the most consistent moisture and nutrition of the year. Continue to water thoroughly whenever the top few inches of soil become dry and maintain your regular half-strength fertilizing routine. This is the period when the plant builds up the energy reserves in its rhizome that will be used to produce the following year’s flowers, so providing consistent care during the summer is a crucial investment in future blooms.
As autumn arrives, it signals a time of transition for the clivia. The days grow shorter and temperatures begin to cool, and the plant’s growth will naturally slow down. This is your cue to begin reducing the frequency of your watering, allowing the soil to stay dry for longer periods. More importantly, this is the time to completely stop all fertilizing. Continuing to feed the plant would only confuse it by encouraging new growth when it should be preparing for dormancy, which would jeopardize its ability to set flower buds.
Winter is the critical rest period. During this time, the clivia should be in a cool location, and its need for water will be minimal. Water should be given very sparingly, perhaps only once every four to six weeks, just to prevent the leaves from completely dehydrating and wilting. The soil should be kept mostly dry throughout this period. No fertilizer should be given under any circumstances. This combination of cool temperatures, reduced light, and dryness is the precise trigger that stimulates the plant to initiate the development of a flower stalk, setting the stage for the spectacular display to come in the spring.
Recognizing signs of trouble
Your clivia will often provide clear signals when its watering or fertilizing regimen is not right. Learning to interpret these signs is a key skill for any plant owner. One of the most common signs of overwatering is yellowing leaves, particularly the older, lower leaves on the plant. If the leaves turn yellow and the soil is consistently damp to the touch, you are almost certainly providing too much water. In advanced cases, you might also notice a musty or rotting smell coming from the soil, or the base of the plant may feel soft and mushy, indicating that root and crown rot has set in.
Conversely, an underwatered clivia will also show distinct symptoms. The leaves may start to droop and lose their natural stiffness and turgor. The tips of the leaves might begin to turn brown and crispy, and the overall plant may look dull and lackluster. While clivias are drought-tolerant, prolonged periods of dehydration will stress the plant and can inhibit its growth and flowering potential. Fortunately, a plant suffering from underwatering is usually much easier to revive than one that is overwatered; a thorough soaking will often see it perk up within a day.
Signs of fertilizer problems can also manifest in the leaves. If you notice brown, burnt-looking tips or edges on the leaves, especially after a recent feeding, it could be a sign of fertilizer burn from an overly concentrated solution or application to dry soil. A buildup of fertilizer salts in the soil can also cause a general decline in the plant’s health, stunted growth, and a reluctance to bloom. If you suspect a salt buildup, which may be visible as a white crust on the soil surface, you can flush the soil by watering it heavily with plain water, letting it drain through completely several times.
The absence of flowers on a mature clivia is often the most frustrating problem for growers, and it is almost always linked to improper care during the preceding year, particularly a lack of a proper winter rest period. If your healthy-looking plant consistently fails to bloom, it is a strong indication that it was not given the required 12-14 weeks of cool, dry conditions during the winter. Re-evaluating and strictly implementing the winter dormancy routine is the most effective way to encourage your clivia to produce its magnificent flowers.


