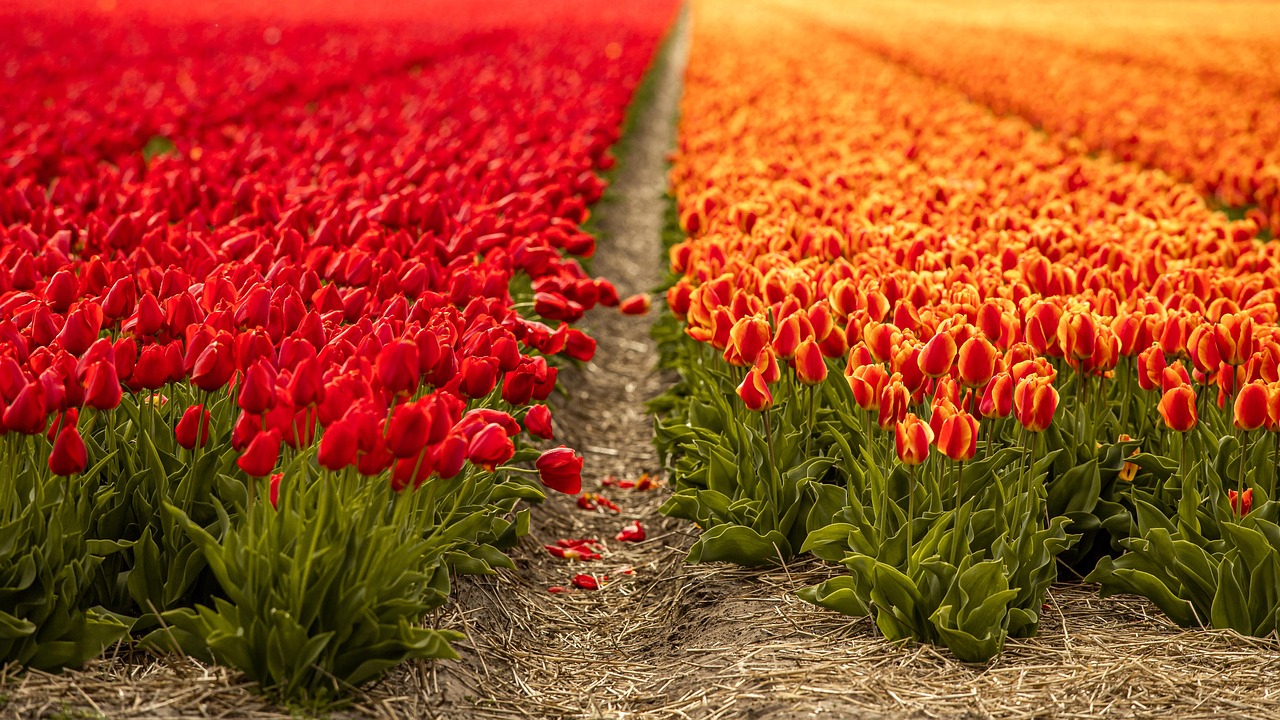
Tulips, with their vibrant colors and classic cup shape, are a beloved sign of spring in gardens worldwide. Achieving a stunning display of these beautiful flowers year after year requires an understanding of their life cycle and specific care needs. Proper care extends beyond simply planting the bulbs and waiting for them to bloom; it involves thoughtful soil preparation, attentive watering, and crucial post-blooming maintenance. By providing the right conditions, you can ensure your tulips are robust, healthy, and produce magnificent flowers. This comprehensive guide will walk you through the essential steps of tulip care, from the initial planting to ensuring their return for many seasons to come, helping you cultivate a truly breathtaking garden feature.
Cultivating healthy tulips begins long before the first leaves emerge from the soil, starting with the selection of high-quality bulbs. When purchasing tulip bulbs, look for ones that are firm, plump, and free from any signs of mold, soft spots, or significant blemishes, as these can be indicators of disease. The size of the bulb is also a crucial factor; larger bulbs generally have more stored energy and will produce larger, more vigorous flowers. It’s also wise to choose varieties that are well-suited to your specific climate zone to maximize their chances of thriving. Investing in good quality bulbs from a reputable supplier is the first and one of the most important steps towards a successful and vibrant tulip display.
The location where you plant your tulips is another critical element for their long-term health and performance. Tulips thrive in a position that receives full sun, meaning at least six hours of direct sunlight each day during their growing season in the spring. Adequate sunlight is essential for the process of photosynthesis, which allows the plant to create and store the energy it needs for the following year’s bloom. A lack of sufficient sunlight can lead to weak, spindly stems and smaller, less vibrant flowers. Therefore, selecting a sunny spot in your garden is paramount for achieving the classic, strong-stemmed, and brightly colored tulips that are so admired.
Proper soil preparation is fundamental to providing the best possible growing environment for your tulips. These bulbs require well-draining soil to prevent rot and other fungal diseases, which they are particularly susceptible to in waterlogged conditions. If you have heavy clay soil, it is essential to amend it with organic matter such as compost, peat moss, or well-rotted manure to improve its structure and drainage. The ideal soil pH for tulips is neutral to slightly acidic, typically between 6.0 and 7.0. Conducting a soil test before planting can provide valuable information and allow you to make any necessary adjustments to ensure the soil conditions are optimal for your bulbs.
Post-bloom care is crucial
Once the vibrant spectacle of the tulip blooms has faded, the care you provide is vital for ensuring their return the following year. It is essential to remove the spent flowers, a process known as deadheading, by snapping or cutting off the flower head once the petals have fallen. This action prevents the plant from expending its energy on producing seeds and instead directs that energy back down into the bulb for storage. However, you should never remove the stem or the foliage at this stage. The leaves must be allowed to continue photosynthesizing to build up the energy reserves within the bulb that are necessary for the next season’s growth and flowering.
More articles on this topic
The period after flowering is when the tulip foliage plays its most critical role in the plant’s life cycle. The green leaves absorb sunlight and convert it into the chemical energy that will be stored in the bulb over the summer and winter. It is imperative to allow the foliage to remain on the plant until it turns yellow or brown and withers naturally. This process can take approximately six to eight weeks after the blooms have faded. Although the yellowing leaves may look untidy in the garden, cutting them back prematurely will severely weaken the bulb and will likely result in a lack of flowers or very poor blooms in the following spring.
During the post-bloom period, continue to water the plants if the weather is particularly dry, but be careful not to overwater. The soil should be kept moderately moist to support the foliage as it works to replenish the bulb’s energy stores. You can cease watering once the leaves have completely yellowed and died back. This is also a good time to apply a balanced, low-nitrogen fertilizer if you haven’t already done so earlier in the season. A fertilizer that is rich in phosphorus and potassium will support strong bulb and root development, further enhancing the potential for a spectacular display next year.
After the foliage has completely died back, you can carefully remove it by gently pulling it away from the ground or cutting it at the soil level. At this point, you have a choice depending on your climate and gardening preferences. In many regions, tulip bulbs can be left in the ground to perennialize, provided the soil is well-draining and they won’t be subjected to excessive summer moisture. Alternatively, especially in areas with wet summers or for gardeners who wish to rotate their planting schemes, the bulbs can be carefully lifted from the ground, cleaned, and stored in a cool, dry, and well-ventilated location until it is time to replant them in the autumn.
Understanding the tulip life cycle
To provide the best possible care for tulips, it is immensely helpful to have a fundamental understanding of their annual life cycle. Tulips are perennial plants that grow from bulbs, which are essentially underground storage organs packed with all the nutrients and energy needed for one season’s growth. The cycle begins in the autumn when the bulbs are planted and begin to develop roots throughout the winter. This rooting period is crucial for anchoring the plant and for absorbing moisture and nutrients from the soil once spring arrives. A period of cold temperatures, known as vernalization, is also essential during the winter to trigger the biochemical processes required for flowering.
More articles on this topic
As the soil begins to warm in the spring, the tulip bulb springs to life, sending up shoots that will develop into leaves and a flower stalk. This rapid growth is fueled entirely by the energy that was stored within the bulb from the previous year. The leaves emerge first, unfolding to begin the process of photosynthesis, which will start to replenish the energy being used. Shortly after, the flower bud develops and opens, creating the beautiful display that gardeners eagerly anticipate. The duration of the bloom can vary depending on the variety and weather conditions, but it typically lasts for one to two weeks.
The post-blooming phase, as previously discussed, is a critical energy-rebuilding period for the tulip. After the flower fades, the plant’s entire focus shifts to photosynthesis through its leaves, capturing solar energy to recharge the bulb for the next year. This is why it is so critically important to leave the foliage intact until it withers naturally. All the sugars produced during this time are transported down to the bulb, where they are stored, ensuring the bulb has enough fuel to survive dormancy and produce another flower in the following spring. Failure to allow this process to complete is the most common reason for tulips failing to re-bloom.
Once the foliage has died back, the bulb enters a period of dormancy during the summer months. During this time, the bulb is essentially resting, and it is crucial that it is kept relatively dry to prevent rot. The flower for the next year actually begins to form within the bulb during this dormant period. As autumn approaches, the cycle begins anew. The cooling soil temperatures signal the bulb to start growing new roots, preparing itself for the winter ahead and the subsequent spring growth. Understanding this cyclical nature helps gardeners make informed decisions about when to plant, fertilize, and maintain their tulips for sustained beauty.
Choosing the right varieties
While general care principles apply to most tulips, selecting the right varieties for your specific garden conditions and aesthetic goals can significantly impact your success and satisfaction. Tulips are categorized into different groups based on their flowering time, flower shape, and height. These groups include Early Season, Mid-Season, and Late Season bloomers, allowing you to plan for a continuous display of color throughout the spring. For instance, you could plant Single Early tulips for the first flush of color, followed by Triumph or Darwin Hybrid tulips for the mid-spring show, and finally, Single Late or Lily-flowered tulips to extend the season.
If your goal is to have tulips that return reliably year after year with minimal effort, it is important to choose varieties known for their perennializing capabilities. Not all tulips are created equal in this regard; many of the large, flamboyant hybrids are best treated as annuals, as their performance tends to decline after the first year. Varieties such as Darwin Hybrids, Emperor (Fosteriana) tulips, and many of the smaller species or botanical tulips are renowned for their ability to naturalize and multiply over time when left undisturbed in a suitable location. Researching the characteristics of different tulip divisions will help you select bulbs that align with your long-term gardening plans.
Consider the physical characteristics of the tulips as well, such as their height and flower form, to ensure they fit into your overall garden design. Taller varieties like the Darwin Hybrids are excellent for the back of borders or for creating bold statements, while shorter Greigii or Kaufmanniana tulips are perfect for rock gardens, container plantings, or the front of beds. The flower shapes also vary dramatically, from the classic single cup to the elaborate fringed, parrot, or double peony-flowered forms. By selecting a mix of heights, forms, and colors, you can create a dynamic and visually interesting garden composition that evolves throughout the spring season.
Finally, always consider your local climate and soil conditions when making your selection. Some tulip varieties are more tolerant of warmer climates, while others require a more significant winter chill to bloom properly. Similarly, certain species tulips are better adapted to drier, rockier soils, while others prefer richer loam. Reading plant descriptions and labels carefully and consulting with local gardening resources or nurseries can provide invaluable guidance. Choosing varieties that are inherently suited to your environment is a proactive step that will make their ongoing care much easier and lead to a more rewarding and beautiful display.
Protecting tulips from pests and diseases
Even with the best care practices, tulips can sometimes fall prey to various pests and diseases that can diminish their health and beauty. One of the most common issues is Tulip Fire, a fungal disease caused by Botrytis tulipae, which results in brown spots and distorted growth on leaves and flowers. To prevent this, ensure good air circulation around your plants by spacing them correctly and avoid overhead watering. It’s also crucial to remove any infected plant material immediately to stop the spread of the fungus and to practice good garden sanitation by clearing away debris at the end of the season.
Rodents such as squirrels, chipmunks, and voles can be a significant problem, as they are fond of digging up and eating tulip bulbs. To protect your bulbs, you can plant them in wire cages or surround the planting area with a barrier of hardware cloth buried several inches deep. Planting bulbs deeper than typically recommended can also sometimes deter squirrels. Another strategy is to interplant tulips with other bulbs that rodents find distasteful, such as daffodils (Narcissus) or alliums, as their scent can act as a repellent and provide a degree of protection for your more vulnerable tulip bulbs.
Aphids are another common pest that can affect tulips, feeding on the sap of the leaves and stems and potentially transmitting viral diseases. A strong jet of water from a hose can often be enough to dislodge a small infestation. For more persistent problems, insecticidal soap or neem oil can be effective and are more environmentally friendly options than harsh chemical pesticides. Regularly inspecting your plants for early signs of pests allows you to take action before the population becomes large and difficult to control, safeguarding the health of your tulips throughout their growing season.
Viruses, such as the Tulip Breaking Virus, can also affect tulips, causing streaked or “broken” colors in the petals. While this effect was once highly prized in the 17th century during “Tulip Mania,” it is actually a sign of a disease that weakens the bulb over time. Unfortunately, there is no cure for viral infections in plants. Any tulip showing signs of a virus should be dug up and destroyed (not composted) to prevent it from spreading to other healthy plants, typically via aphids. Purchasing certified virus-free bulbs from reputable sources is the best preventative measure against introducing these diseases into your garden.
Soil and site considerations
The foundation of successful tulip cultivation lies in the careful selection and preparation of the planting site. As mentioned, well-draining soil is non-negotiable for tulips, as their bulbs are highly susceptible to rot in soggy conditions. Beyond simply amending heavy clay, consider the topography of your garden. Planting tulips on a gentle slope or in a raised bed can naturally improve drainage and prevent water from pooling around the bulbs. This is particularly important in regions that experience heavy spring rains, as it provides an extra layer of protection against the fungal diseases that thrive in damp environments.
The fertility of the soil also plays a significant role in the long-term performance of your tulips, especially for perennial varieties. While the bulb itself contains the initial energy for the first year’s bloom, replenishing the soil with nutrients is key for sustained growth. Incorporating a layer of compost or a balanced, slow-release bulb fertilizer into the soil at planting time provides a steady source of nourishment. Avoid using high-nitrogen fertilizers, as these tend to encourage lush foliage growth at the expense of the flowers and can make the bulbs more prone to disease. A focus on phosphorus and potassium will better support robust bulb and root development.
Consider the long-term context of the planting location within your garden design. Remember that after the spring flowers fade, you will be left with decaying foliage for several weeks. To mask this less-attractive phase, you can interplant your tulips with emerging perennials or annuals. As the tulips’ leaves begin to fade, the growth of companion plants like hostas, daylilies, or ferns can help to fill the space and cover the withering foliage. This strategic planting creates a seamless transition in the garden bed, maintaining visual interest from spring through summer while allowing the tulip bulbs to complete their life cycle undisturbed.
Finally, think about the pH level of your soil, which can significantly influence nutrient availability for the bulbs. Tulips generally prefer a soil pH that is neutral to slightly acidic, in the range of 6.0 to 7.0. If your soil is naturally very acidic or alkaline, it’s beneficial to amend it to bring the pH into the optimal range. You can add lime to raise the pH of acidic soil or sulfur to lower the pH of alkaline soil. Using a simple home soil testing kit can give you a clear indication of your starting point, allowing you to make targeted amendments that create the ideal chemical environment for your tulips to flourish for years to come.
Long-term perennializing strategies
For gardeners who desire a low-maintenance display of tulips that returns with vigor each spring, adopting specific long-term perennializing strategies is key. The first step, as previously noted, is selecting the right varieties, focusing on Darwin Hybrids, Emperor types, and species tulips known for their reliability. The second critical factor is planting depth. Planting these perennializing varieties slightly deeper than the standard recommendation—about 8 inches (20 cm) deep—can offer several advantages. The deeper planting helps protect the bulbs from temperature fluctuations and from accidental damage by digging, and it can also encourage them to persist longer.
Fertilization strategy is another cornerstone of successful perennializing. While the initial application of a slow-release bulb food at planting time is important, an annual feeding is necessary to replenish the nutrients used by the plant. The best time to apply this supplemental fertilizer is in early spring, just as the new shoots are beginning to emerge from the soil. Use a balanced fertilizer that is low in nitrogen and higher in phosphorus and potassium, often marketed as “bulb food.” This application provides the necessary nutrients to support strong flower production and, crucially, to help the bulb recharge after the blooming period has concluded.
Proper water management throughout the year is also vital for the long-term health of the bulbs. While tulips need adequate moisture during their spring growth and foliage-rebuilding phase, they require a relatively dry period during their summer dormancy. In climates with wet summers, the bulbs are at high risk of rotting if left in the ground. If your garden has heavy soil or you live in a rainy climate, consider lifting the bulbs after the foliage has died down and storing them for the summer. For those in climates with dry summers, leaving them in well-drained soil is perfectly acceptable and is, in fact, the easiest path to perennialization.
Finally, avoid overcrowding, which can lead to competition for resources and a decline in flowering over time. Perennializing tulips, particularly species varieties, will often multiply by producing offset bulbs. After several years, you may notice that the blooms are becoming smaller or less numerous, which is a sign that the clump has become too dense. To rejuvenate the display, you should carefully dig up the clump of bulbs in the late summer or early autumn, separate the individual bulbs, and replant them with proper spacing. This division process invigorates the plants and allows them to continue multiplying and flowering beautifully for many more years.