Pruning and trimming celery are essential practices that help maintain the health and productivity of the plant throughout its long growing season. While it might seem counterintuitive to remove parts of a plant you are trying to grow, targeted trimming can actually stimulate new growth and prevent many common problems. A professional approach to pruning involves understanding when and how to remove leaves and stalks to optimize the plant’s energy. By mastering these techniques, you can ensure that your celery remains vibrant and produces the highest quality harvest.
One of the primary reasons for trimming celery is to improve air circulation around the base of the plant. As the leaves grow large and dense, they can trap moisture and create a humid microclimate that is perfect for fungal diseases. By removing the older, lower leaves, you allow the wind to move more freely through the rows, keeping the stalks dry and healthy. This simple act of maintenance is a professional way to reduce the need for fungicides and other chemical treatments.
Trimming also allows you to remove any leaves that show signs of damage from pests or disease before the problem can spread. If you see a leaf with spots or one that has been heavily chewed by insects, it is best to prune it off immediately. This “sanitary pruning” keeps the plant’s energy focused on its healthy parts and reduces the overall pest pressure in your garden. Regular inspection and quick action with your pruners are the hallmarks of an expert gardener.
Furthermore, pruning can be used to manage the size and shape of the plant, especially in smaller garden spaces or containers. If a plant is becoming too broad and crowding its neighbors, a light trimming can help keep it within its allocated space. This ensures that every plant in your garden has access to the light and air it needs to thrive. Professional growers understand that a tidy garden is often a more productive one.
Thinning for optimal spacing
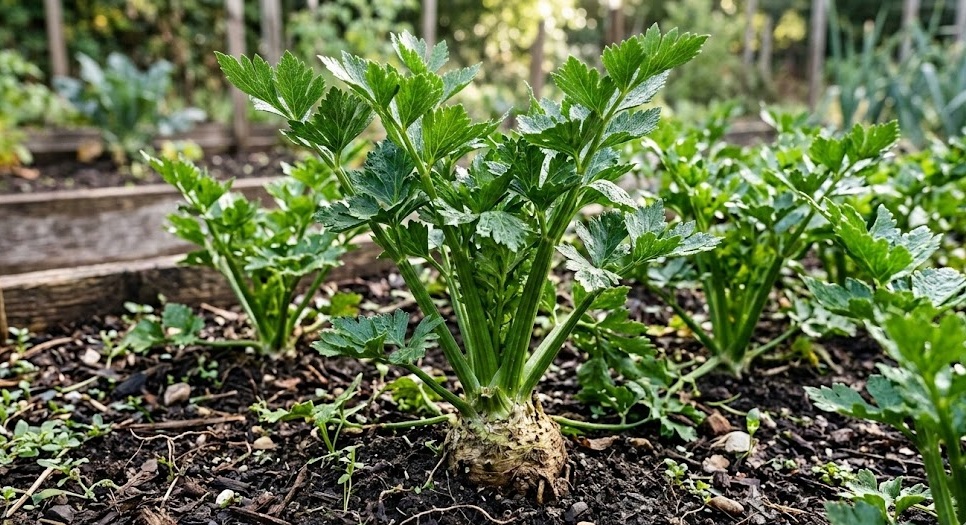
Thinning is the first type of pruning you will perform, and it happens when the plants are still quite small. If you have sown seeds directly in the ground, you will likely have several seedlings growing very close to each other. You must remove the smaller, weaker ones to leave only the strongest plant every twenty to thirty centimeters. This ensures that the remaining plants don’t have to compete for water and nutrients as they grow larger.
More articles on this topic
The best way to thin celery is to use a small pair of scissors to snip the unwanted seedlings at the soil line. Pulling them out by the roots can disturb the delicate root systems of the plants you want to keep, which can slow down their growth. This precise, professional method protects the health of the remaining crop while achieving the necessary spacing. It is a critical step that should never be skipped if you want large, healthy stalks.
As the plants continue to grow, you may find that some of the outer stalks are not developing as well as the central ones. You can thin these out during the season to provide more room for the heart of the celery to expand. This focused growth often results in a more compact and desirable plant at harvest time. Understanding which parts of the plant to keep and which to remove is a skill that comes with experience and observation.
Thinning also provides an opportunity to check the health of the root zone and the general soil conditions. If you notice that the seedlings in one area are struggling, it might indicate an issue with drainage or nutrient levels. This early feedback allows you to make adjustments to your care routine before the entire crop is affected. Professional gardening is as much about observation and adjustment as it is about the physical tasks themselves.
Leaf removal and sanitary pruning
Removing the oldest leaves at the base of the celery plant is a task that should be performed every few weeks. These leaves are the most likely to turn yellow or become damaged, and they often provide a bridge for soil-borne diseases to reach the rest of the plant. By keeping the base of the stalks clean, you create a much more sanitary environment for the celery to grow. Use a sharp, clean knife or pruners to make a clean cut as close to the main stalk as possible.
More articles on this topic
When performing sanitary pruning, it is important to dispose of the removed leaves far away from your garden or in a hot compost pile. If you leave diseased foliage on the ground, the fungal spores or insect eggs can easily find their way back to your healthy plants. A professional grower always maintains a clean workspace to prevent the accidental spread of problems. This attention to detail is what separates a successful harvest from a disappointing one.
You can also trim the tops of the leaves if they become too heavy and cause the stalks to splay outwards. This helps the plant maintain an upright posture, which is better for air circulation and makes the stalks easier to blanch later on. Be careful not to remove too much of the foliage, as the leaves are still needed for photosynthesis. A light “haircut” is usually all that is required to keep the plant structurally sound.
If you notice any stalks that are starting to crack or look hollow, these should also be removed. These physical defects can be a sign of environmental stress or nutrient deficiencies, and they will not improve as the plant matures. Removing them allows the plant to redirect its resources into the healthy stalks that remain. This selective pruning ensures that your final harvest is composed only of the best quality produce.
Harvesting-related trimming and preparation
As you approach the final harvest, you may want to do one last major trimming to prepare the plants for the kitchen. This involves removing any remaining small or damaged outer stalks that you don’t intend to eat. This makes the final bunch of celery look more professional and much easier to clean and store. You can use these trimmings in soups or stocks, so nothing goes to waste in a sustainable household.
If you are harvesting individual stalks rather than the whole plant, you should always take from the outside and leave the central heart to continue growing. This “cut and come again” method is a professional way to extend your harvest over many weeks. Always use a sharp tool to ensure a clean cut that will heal quickly without attracting pests. This approach allows you to enjoy fresh celery whenever you need it without harvesting the entire crop at once.
After the final harvest, you may need to trim the roots and the very tops of the leaves before placing the celery in storage. Removing the excess foliage reduces the rate of moisture loss and helps the stalks stay crisp for longer. A professional presentation of your harvest is a great way to show off the hard work you have put in throughout the season. Proper trimming is the final step in the journey from seed to table.
Finally, remember that pruning is a tool to help the plant, not a way to punish it. Always work gently and with respect for the plant’s natural growth patterns. If you are unsure whether to remove a certain part, it is usually better to wait and observe for a few more days. With practice, you will develop a professional intuition for exactly how much trimming your celery needs to be its very best.