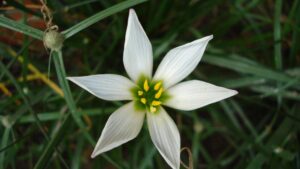
The terms “pruning” and “cutting back” can sometimes cause confusion for tulip growers, as these plants do not require the kind of shaping or size-reduction pruning that shrubs and trees do. However, the timely removal of certain parts of the plant is a critical maintenance practice that directly influences the health and future flowering performance of the bulb. Knowing precisely what to cut, when to cut it, and why you are cutting it is essential for directing the plant’s energy towards the most important task: storing resources for the next year’s bloom. This guide will detail the correct procedures for cutting back tulips to ensure their longevity and vigor.
The single most important “pruning” task for a tulip grower is the process of deadheading, which is the removal of the flower once it has finished blooming. As the petals begin to fade and fall, the plant’s natural objective is to shift its energy towards producing seeds in the ovary located at the base of the flower. This seed production process requires a significant amount of the plant’s energy reserves. By removing the spent flower, you interrupt this process and prevent the plant from wasting its valuable resources on making seeds, which are generally not needed for garden cultivation.
To deadhead a tulip correctly, you can simply snap off the faded flower head along with the small swelling at its base (the ovary) using your fingers. Alternatively, you can use a pair of clean scissors or pruners to make a neat cut. It is important to remove only the flower head and its short stem. You must leave the main flower stalk and all the leaves completely intact. These remaining parts of the plant are vital and must be allowed to continue their work. This simple act of deadheading is a crucial step in encouraging the tulip to perennialize and return with strong blooms the following year.
The energy that is saved by preventing seed formation is redirected down through the stem and into the bulb. The bulb acts as a storage organ, and after flowering, its primary job is to replenish all the energy it expended on producing the leaves and flower in the spring. Deadheading effectively tells the plant to focus all its remaining efforts on this critical task of recharging the bulb. This results in a larger, healthier bulb that is much more likely to produce a flower in the subsequent season. For hybrid tulips that are less inclined to perennialize, deadheading can significantly improve their chances of returning for a second or third year.
It is important to perform deadheading promptly after the flower has faded. The longer you leave the spent bloom on the stalk, the more energy the plant will divert towards the developing seed pod. Make it a regular habit to walk through your garden and remove the finished flowers as you see them. This small investment of time pays large dividends in the long-term health and performance of your tulip collection. It is a simple yet profoundly effective technique for conserving the plant’s energy for future displays.
More articles on this topic
The importance of the foliage
After deadheading, the most critical rule for tulip care is to allow the foliage—the leaves and the main stem—to remain on the plant until it has turned completely yellow or brown and withered on its own. It can be tempting to cut back the leaves once they start to look untidy, but doing so is extremely detrimental to the health of the bulb. The green leaves are the plant’s solar panels, and they are responsible for photosynthesis, the process of converting sunlight into the sugars that will be stored as food in the bulb. Cutting the foliage back prematurely is akin to starving the bulb.
The period after flowering, which typically lasts for about six to eight weeks, is when the vast majority of this energy storage takes place. During this time, the leaves are working hard to manufacture the fuel that will sustain the bulb through its summer dormancy and provide the power for next spring’s growth. If you remove the leaves while they are still green, you cut off the bulb’s only source of energy production. This will almost certainly result in a very weak plant the following year, which may only produce leaves (a “blind” bulb) or may not emerge from the soil at all.
As the foliage completes its work, it will naturally begin to senesce, or die back. You will see the leaves turn from green to yellow and then to brown as the plant reabsorbs mobile nutrients and the chlorophyll breaks down. This is the visual cue that the process of recharging the bulb is complete. You must wait until the leaves have fully yellowed or browned and can be pulled away from the ground with a gentle tug. At this stage, it is safe to remove the dead foliage to tidy up the garden bed.
To deal with the untidy appearance of the dying leaves, you can employ some strategic garden design. Interplanting tulips with emerging summer perennials, such as hostas, daylilies, or hardy geraniums, is an excellent solution. As the foliage of these companion plants grows, it can help to hide the fading tulip leaves from view. Some gardeners are tempted to braid or tie the tulip leaves together to make them look neater, but this practice is not recommended as it can reduce the amount of leaf surface area exposed to the sun and may inhibit the energy storage process. It is best to simply let them be until they have fully died back.
More articles on this topic
Cutting tulips for floral arrangements
Tulips make magnificent cut flowers, and many people grow them specifically for this purpose. When cutting tulips for a vase, there are a few guidelines you can follow to maximize their vase life while minimizing the impact on the bulb’s health. The best time to cut the flowers is in the morning when they are fully hydrated. Look for flowers that are still in a tight bud but are showing full color. These will open indoors and last much longer than flowers that are already fully opened in the garden.
When you make the cut, use a sharp, clean knife or pruners and try to leave as much of the foliage on the plant in the garden as possible. The ideal method is to cut the stem but leave at least two or three of the large lower leaves attached to the remaining portion of the plant. These leaves will still be able to photosynthesize and send some energy back to the bulb. While cutting the flower will inevitably reduce the amount of energy the bulb can store compared to leaving it untouched, preserving some foliage gives the bulb a fighting chance to recover and potentially bloom again.
If you are growing tulips in a dedicated cutting garden and plan to treat them as annuals (replacing them each year), then you can cut the stems as long as you like, right down to the base. This is a common practice for commercial flower farmers and for gardeners who prioritize long stems for arrangements over the perennial performance of the bulb. However, if your goal is to have the tulips return the following year, the “leave-the-leaves” rule is very important to follow.
Once you have cut the tulips, you can prolong their life in the vase by recutting the stems underwater at an angle and removing any leaves that would be below the waterline in the vase. Place them in a clean vase with fresh, cool water. Tulips are known for continuing to grow in the vase, and they will often bend and curve towards a light source, creating elegant, dynamic arrangements. Changing the water daily will also help to keep them looking their best for as long as possible.