Pruning and cutting back grape hyacinth is a task that requires a delicate balance between maintaining garden aesthetics and protecting the long-term health of the bulbs. While these plants do not require the structural pruning that shrubs or trees do, managing their fading foliage and spent flowers is a key part of professional garden maintenance. You must understand the biological purpose of each plant part to know exactly when and how to intervene with your shears. A professional approach to “deadheading” and cleanup ensures that your garden looks tidy while the bulbs remain vigorous and productive.
The most important rule in pruning these spring bulbs is to never remove the green leaves until they have completely yellowed and withered naturally. These leaves are the primary source of energy for the bulb, producing the sugars that will be stored for next year’s growth and flowering. If you cut the leaves back too early while they are still green, you are effectively starving the bulb and weakening its future performance. Many gardeners find the fading leaves unsightly, but a professional knows that this “ugly” phase is a vital part of the plant’s lifecycle.
Deadheading, which is the removal of the spent flower spikes, is a task that can be performed as soon as the blue florets have turned brown and withered. This prevents the plant from diverting its energy into the production of seeds, allowing it to focus all its resources back into the bulb itself. While some gardeners enjoy the look of the maturing seed pods or want the plants to self-seed, others prefer the cleaner look of a deadheaded bed. This decision depends on your overall goals for the garden and whether you want the colony to expand naturally or remain contained.
When you do decide to cut back the foliage or the flower stalks, you should always use clean, sharp tools to ensure a tidy cut. Ragged or crushed stems can become entry points for pathogens and can detract from the overall appearance of the garden. A professional gardener keeps a dedicated pair of small snips or garden scissors just for these delicate tasks. By following a thoughtful and scientifically-backed pruning routine, you can maintain the perfect balance between a beautiful landscape and a healthy plant population.
Techniques for deadheading flowers
To deadhead the flower spikes correctly, you should follow the stem down to the point where it emerges from the foliage and make a clean cut there. Avoid simply pulling the stems, as this can sometimes dislodge the small bulbs or damage the surrounding leaves. If you have a large colony, you can use a pair of hedge shears to quickly trim back the spent flowers, provided you are careful not to cut the green leaves. This task is best done on a dry day to ensure that the cut ends can dry and seal quickly, reducing the risk of infection.
More articles on this topic
If your goal is to allow the plants to naturalize and spread throughout your garden, you should skip the deadheading process entirely. The seed pods will eventually split open and drop their small, black seeds onto the soil surface, where they will germinate in the coming seasons. This “hands-off” approach creates a more wild and organic look that is often favored in woodland or meadow-style gardens. You can choose to deadhead some areas while leaving others to go to seed, giving you the best of both worlds in terms of control and natural expansion.
Removing the spent flowers also improves the air circulation within the plant cluster, which can help prevent the development of mold or mildew during damp spring weather. A dense mat of decaying flower parts can trap moisture against the base of the leaves, creating an ideal environment for various fungal pathogens. By cleaning up the spent blooms, you are not only improving the aesthetics but also performing a valuable preventative maintenance task. Professional garden management is often about these small, cumulative actions that promote overall plant health.
After deadheading, you might notice that the remaining foliage looks a bit more prominent and can be used to provide a lush, green backdrop for other emerging perennials. This green phase can last for several weeks after the flowers have gone, providing a valuable groundcover that suppresses weeds and keeps the soil cool. Treat this foliage with respect and continue to provide water if the weather is particularly dry. Your patience during this time will be rewarded with a much stronger and more beautiful floral display in the following spring.
Managing the end-of-season foliage
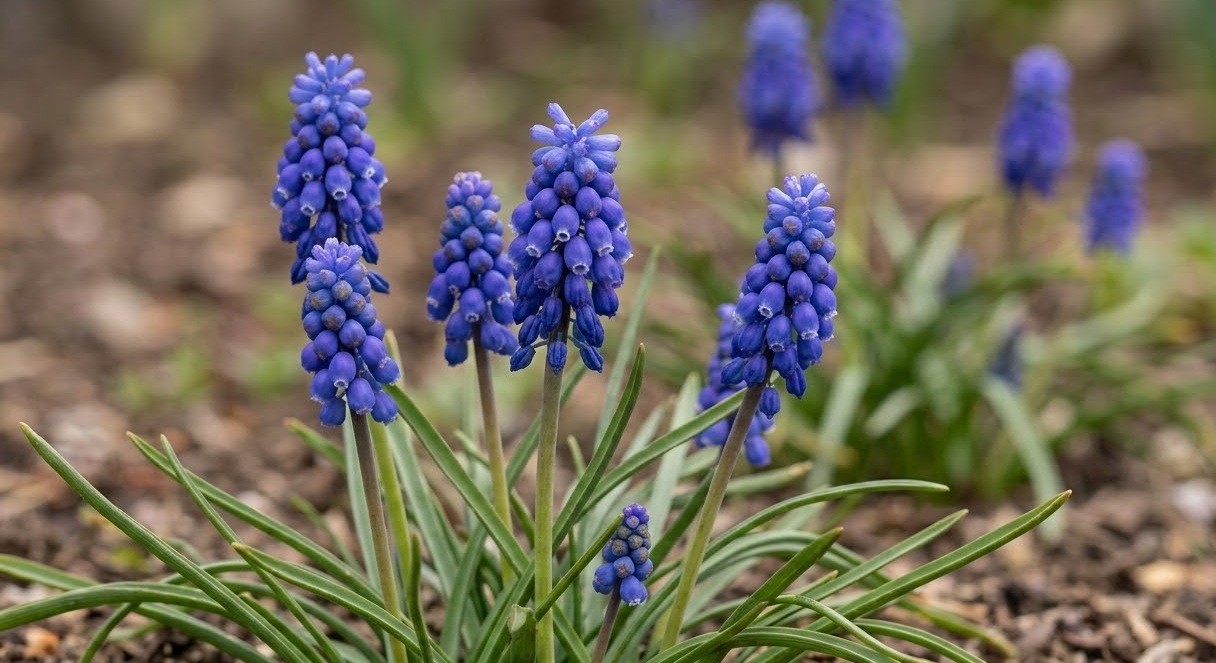
As the temperatures rise in late spring and early summer, the leaves of the grape hyacinth will naturally begin to lose their vibrant green color and turn yellow. This is a clear signal from the plant that it has finished its work for the year and is transferring its remaining resources down into the bulb. During this phase, you can gently “comb” through the plants to remove any completely brown and dry leaves that pull away easily with no resistance. However, if a leaf is still firmly attached, it is not yet ready to be removed and should be left alone for a few more days.
More articles on this topic
Some gardeners use the “braiding” or “knotting” technique to tidy up the fading leaves, but professional horticulturists generally advise against this practice. Tying the leaves together can reduce the surface area available for photosynthesis and can restrict the movement of nutrients within the plant tissues. It can also create pockets of moisture that encourage rot at the base of the foliage. The best approach is to let the leaves lie naturally and perhaps plant other perennials nearby that will grow up and hide the yellowing leaves from view.
Once the foliage has completely turned brown and is as dry as parchment, it can be easily removed by hand or with a quick pass of a lawnmower or trimmer. At this stage, the bulb is fully dormant and safe beneath the soil, and the dead leaves no longer serve any biological purpose. Removing this debris helps keep the garden bed looking tidy and removes potential hiding spots for pests like slugs and snails over the summer. A clean bed also makes it easier to apply a summer mulch or to plant annuals in the gaps between the bulbs.
If you are growing these bulbs in a lawn, the same rules apply regarding the timing of the first mow of the season. You should wait until the bulb foliage has completely withered before you bring out the mower to restore the turf’s neat appearance. This might mean leaving a small patch of “long” grass in the middle of your lawn for a few weeks, but the spectacular spring display is well worth this minor inconvenience. A professional landscape incorporates these natural rhythms into the overall maintenance schedule.
Professional tools and timing
The timing of your pruning tasks is often dictated by the weather and the specific microclimate of your garden. In a warm, sunny spring, the foliage may mature and die back much faster than in a cool, cloudy year. You should be flexible and ready to act when the plants give you the signal, rather than sticking to a rigid date on the calendar. Observing the subtle changes in leaf texture and color is a skill that distinguishes an expert gardener from a novice.
When it comes to tools, always ensure that your shears or scissors are sharp and sterilized before you begin your work. You can use a simple solution of rubbing alcohol to wipe down the blades between different sections of the garden to prevent the spread of any potential diseases. High-quality tools with ergonomic handles will make the task much more enjoyable, especially if you have hundreds of bulbs to maintain. Investing in good equipment is a hallmark of a professional approach to any horticultural endeavor.
For large-scale maintenance in public parks or estates, professional groundskeepers sometimes use specialized equipment like string trimmers with soft lines to clear the dead foliage. This is a very efficient way to handle large areas of naturalized bulbs once they have entered full dormancy. However, for a domestic garden, the more precise and personal approach of hand-pruning is usually preferred to ensure no accidental damage to surrounding plants. Taking pride in the precision of your work is part of the joy of gardening.
In conclusion, pruning and cutting back these bulbs is a simple but vital part of the gardening year that requires patience and a bit of scientific understanding. By allowing the foliage to mature naturally and removing only the spent parts at the right time, you are ensuring the long-term success of your horticultural investment. These small but important steps keep your garden looking its best while supporting the natural resilience of the grape hyacinth. With these professional tips, your spring garden will remain a source of beauty and pride for many years to come.