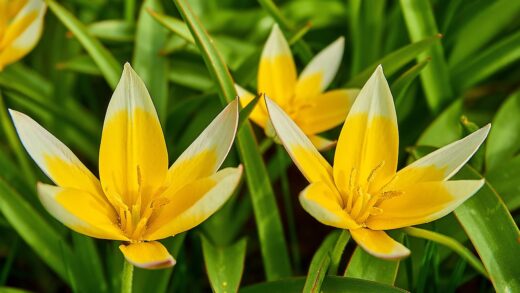
Planting and propagation of the regal pelargonium

Successfully establishing a regal pelargonium begins long before the plant is placed in its pot; it starts with the careful selection of a healthy specimen and the meticulous preparation of its new home. When choosing a plant from a nursery or garden centre, look for one with a compact, bushy form and vibrant green leaves, avoiding any that appear leggy, yellowed, or show signs of pests or disease. Once you have your plant, the next crucial step is choosing the right container, which must have ample drainage holes to prevent water from accumulating around the roots. The size should be appropriate for the current root ball, providing just enough room for growth without being so large that the excess soil stays wet for extended periods, a condition that can lead to fatal root rot.
The foundation for a thriving plant is the soil it grows in, and for regal pelargoniums, the potting medium must be exceptionally well-draining and aerated. A high-quality, peat-based potting mix is a good base, but it should be amended to improve its structure. Incorporating materials like perlite, coarse sand, or fine grit at a ratio of approximately one part amendment to three parts potting mix will create the ideal consistency. This custom blend ensures that water can pass through freely while retaining just enough moisture and allowing oxygen to reach the roots, which is critical for their health and function. Never use dense garden soil, as it compacts easily and holds far too much water for this sensitive species.
The timing of planting or repotting is also an important consideration that aligns with the plant’s natural growth cycle. The best time to undertake this task is typically in the late summer or early autumn, after the main flowering season has concluded. This timing allows the plant to establish its roots in the new soil during a less stressful period, preparing it for the winter dormancy and the subsequent burst of growth in the spring. Repotting in the spring just before flowering can shock the plant and may disrupt or delay the bloom cycle, so it is generally best avoided unless absolutely necessary.
Before you begin the planting process, gather all your materials: the selected pot, your custom soil mix, and the plant itself. Ensure the pot is clean to prevent the transfer of any soil-borne diseases. It can be helpful to place a small piece of mesh or a coffee filter over the drainage hole to prevent soil from washing out while still allowing water to escape. Having everything prepared in advance makes the planting process smooth and efficient, minimizing the amount of time the plant’s delicate roots are exposed to the air and reducing the overall stress on the plant.
The step-by-step planting process
The first step in the physical act of planting is to carefully remove the regal pelargonium from its nursery pot. To do this, gently tip the pot on its side and squeeze it lightly to loosen the soil from the edges. Support the base of the plant’s stems with one hand while sliding the pot off with the other; you should never pull the plant out by its stems, as this can cause significant damage. If the plant is resistant, a few firm taps on the bottom of the pot should help to release the root ball. This careful handling ensures the transition to its new home is as stress-free as possible.
More articles on this topic
Once the plant is free from its container, take a moment to inspect the root ball. It is common for nursery-grown plants to be slightly root-bound, with roots circling the bottom of the pot. If this is the case, it is very important to gently tease out and loosen these circling roots with your fingers. This encourages the roots to grow outwards into the new soil rather than continuing to grow in a tight, constricted pattern. At this time, you can also trim away any roots that appear brown, soft, or dead, using clean, sharp scissors or pruners.
Now, place a layer of your prepared potting mix in the bottom of the new container and position the plant in the center. The top of the root ball should sit about 2-3 cm (1 inch) below the rim of the pot to allow space for watering. Adjust the amount of soil at the bottom until the plant is at the correct depth. It is crucial not to plant it any deeper than it was in its original pot, as burying the stem can lead to stem rot. Ensure the plant is sitting upright and centered before you proceed to the next step.
With the plant held in place, begin backfilling around the root ball with your fresh potting mix, gently firming it down as you go to eliminate any large air pockets. Be careful not to compact the soil too tightly, as this would defeat the purpose of creating a well-aerated medium. Once the pot is filled, water the plant thoroughly until water runs freely from the drainage hole. This initial watering helps to settle the soil around the roots. After this, place the newly potted plant in a location with bright, indirect light and allow the soil to begin to dry out before watering again.
Propagation through stem cuttings
Propagation from stem cuttings is the most reliable and common method for creating new regal pelargonium plants, allowing you to produce genetically identical copies of a favourite variety. This technique is not only cost-effective but also a very rewarding aspect of gardening. The ideal time to take cuttings is in the late summer or early autumn, at the same time you would be doing the annual pruning. This timing is advantageous because the plant’s growth is mature and semi-hardened, which makes for more successful rooting, and you can simply use the healthy stems you have pruned off the mother plant.
More articles on this topic
The success of your propagation effort starts with the selection of appropriate material. Look for healthy, vigorous stems that are free from any signs of pests, diseases, or flowers. The ideal cutting should be a tip cutting, taken from the end of a stem, and should be about 10-15 cm (4-6 inches) in length. It is important to choose stems that are not too soft and new, nor too old and woody. A stem that is firm but still flexible is perfect, as it contains enough stored energy to produce new roots while not being too tough for them to emerge.
Once you have selected a suitable stem, the next step is to prepare the cutting itself. Using a clean, sharp knife or razor blade, make a clean cut just below a leaf node (the point where a leaf joins the stem). Then, carefully remove the leaves from the lower half of the cutting, as any leaves left below the soil level would simply rot. It is also a common practice to remove any large, mature leaves from the top portion of the cutting by cutting them in half to reduce water loss through transpiration while the cutting is trying to form roots.
After preparing the cutting, it is advisable to allow it to “cure” for a few hours in a dry, shady place. This allows a callus to form over the cut end, which can help to prevent the cutting from rotting when it is placed in the rooting medium. While not strictly necessary for pelargoniums, many gardeners find this step increases their success rate. At this stage, you can also choose to dip the callused end of the cutting into a rooting hormone powder. This can help to stimulate faster and more robust root development, although regal pelargoniums often root quite well without it.
Rooting and growing new plants
Once your cuttings are prepared, the next stage is to place them into a suitable rooting medium where they will develop their new root systems. A light, well-draining mix is essential. You can create an excellent rooting medium by combining equal parts of perlite and peat moss or coir. Fill a small, clean pot or a seed tray with this mixture and moisten it lightly. Then, using a pencil or a dibber, make small holes in the medium and insert the base of each cutting into a hole, ensuring the lower nodes are below the surface. Gently firm the medium around the base of the cutting to provide support.
Creating the right environment is crucial for encouraging root formation. Place the pot of cuttings in a warm location that receives bright, indirect light but is out of direct sunlight, which could scorch and dehydrate them. Maintaining a certain level of humidity around the cuttings can also be beneficial. You can achieve this by loosely placing a clear plastic bag over the pot, propped up with sticks to ensure it doesn’t touch the leaves, or by using a propagator with a lid. It is important to vent the cover for a short time each day to allow for fresh air exchange and to prevent the buildup of mould.
Patience is key during the rooting process, which can take anywhere from three to six weeks, depending on the conditions. You can check for root development by giving a cutting a very gentle tug; if you feel resistance, it is a good sign that roots have formed. Avoid the temptation to pull the cuttings out to check for roots, as this can damage the delicate new growth. During this time, keep the rooting medium lightly moist but never waterlogged. Overwatering is the quickest way to cause cuttings to rot before they have a chance to root.
Once the cuttings have developed a healthy root system—often visible through the drainage holes of the pot—they are ready to be transplanted into their own individual pots. Carefully remove each rooted cutting from the rooting tray and plant it into a small pot filled with the standard, well-draining potting mix you would use for a mature plant. Treat these new young plants gently, providing them with the same conditions as an adult regal pelargonium. Water them in well and then continue to care for them, watching as they grow into new, beautiful flowering plants.
📷Velq1958, CC BY-SA 3.0, via Wikimedia Commons