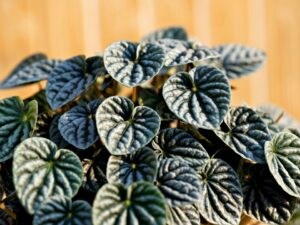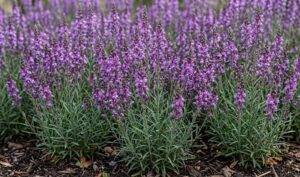
The successful establishment of a new perennial in your garden begins with a well-conceived plan for planting and future expansion. You must consider the long-term needs of the species and how it will interact with the existing environment over many growing seasons. Proper planting techniques ensure that the root system has the best possible start, which is the key to a healthy and resilient adult plant. This article provides a professional overview of the critical steps involved in getting these beautiful plants started and how to multiply them for a more extensive landscape display.
Selecting the right location is the most important decision you will make during the planting process. You should look for a spot that offers the ideal balance of light and moisture, taking into account the specific climate of your region. Soil preparation is another vital step that cannot be overlooked if you want your new additions to thrive from the very beginning. By investing time and effort in the initial stages, you set the foundation for a garden that will bring joy for many years with minimal intervention.
Understanding the various methods of propagation allows you to expand your garden collection without the need for additional purchases. You can choose between division, which is the most common and reliable method, or growing from seed for a more diverse genetic population. Each technique has its own set of requirements and timing that you must follow carefully to achieve the best results. Professional horticulturists often use a combination of these methods to maintain a dynamic and evolving landscape throughout their careers.
As you embark on your planting and propagation journey, remember that patience and observation are your most valuable tools. You will learn more from direct experience in your own garden than from any textbook or guide, as every site has its own unique characteristics. Take the time to notice how the plants respond to different handling techniques and environmental conditions as they establish themselves. This hands-on knowledge will eventually turn you into an expert in the propagation and cultivation of this versatile perennial.
Site selection and preparation
The first step in any planting project is to thoroughly evaluate the environmental conditions of your chosen site. You should observe the movement of the sun across the area throughout the day to ensure it meets the specific light requirements of the species. Consider the drainage patterns of the land, especially during heavy rains, to avoid placing your new plants in areas where water tends to pool. A site that offers a mix of morning sun and afternoon shade is often the most desirable for maintaining the quality of the foliage.
More articles on this topic
Soil analysis is a critical part of site preparation that tells you exactly what kind of amendments may be necessary. You should check the texture of the earth to determine if it is too heavy with clay or too porous with sand, both of which can be corrected with organic matter. Testing the pH level will also help you understand if the soil is too acidic or alkaline for optimal nutrient uptake. Based on these findings, you can work in compost, aged manure, or other soil conditioners to create a fertile and well-structured environment.
Preparing the actual planting holes is a task that requires precision and a focus on future root development. You should dig a hole that is significantly wider than the current root ball but no deeper than the plant was growing in its previous container. Loosening the soil at the bottom and sides of the hole will make it easier for young roots to penetrate the surrounding earth. This preparation ensures that the plant can quickly establish a strong anchor and begin absorbing water and nutrients from the larger garden bed.
Before you put the plants in the ground, you should consider the overall layout and spacing of your garden design. You must allow enough room for each clump to reach its mature size without becoming overcrowded or shading out its neighbors. Mapping out the positions with small markers or by setting the pots in place allows you to visualize the final result and make any necessary adjustments. Proper spacing at the time of planting is much easier than moving established perennials later because they have grown too large for their space.
The planting process
Once your site is prepared, the actual act of planting should be done with care to minimize stress on the young perennial. You should gently remove the plant from its pot, being careful not to damage the stems or the delicate root system. If the roots have become tightly coiled around the inside of the container, you should lightly tease them outward to encourage horizontal growth. This simple step is vital for ensuring the plant doesn’t continue to grow in a restricted, circular pattern once it is in the ground.
More articles on this topic
Place the plant in the center of the prepared hole and ensure that the top of the root crown is level with the surrounding soil surface. You should then backfill the hole with the amended soil, firming it gently with your hands to remove any large air pockets. Avoid using your feet to pack the soil down, as this can cause excessive compaction and damage the fragile new roots. The goal is to create a stable environment where the roots are in direct contact with the soil but can still breathe and expand.
Immediately after planting, you must provide a thorough watering to settle the soil and hydrate the roots. You should apply the water slowly so that it soaks deep into the ground rather than running off the surface. This initial deep watering is the most important hydration the plant will receive during its establishment phase. It helps to close any remaining air gaps and ensures that the root system is fully integrated with the moisture levels of the surrounding earth.
Finally, you should apply a layer of organic mulch around the base of the new plant, making sure to keep it away from the direct contact with the stems. You can use wood chips, shredded bark, or compost to help maintain consistent moisture and temperature in the root zone. This mulch layer acts as a protective blanket, reducing the impact of heavy rain and preventing the surface from drying out too quickly in the sun. Regular monitoring over the next few weeks will help you ensure that the plant is settling in well and starting to produce new growth.
Division and root management
Dividing established clumps is the most efficient way to create new plants while also rejuvenating older specimens in your garden. You should ideally perform this task in early spring or early autumn when the weather is mild and the plant is not under heat stress. Using a sharp spade or a garden fork, you can lift the entire clump out of the ground with as much of the root system intact as possible. This process might seem aggressive, but it is actually a beneficial practice for the long-term health of many perennial species.
Once the clump is lifted, you can use a sharp knife or your hands to separate it into smaller sections, each with its own set of roots and healthy shoots. You should discard the old, woody center of the plant and keep the vigorous outer portions for replanting. This selection process ensures that your new plants will have the best start and will grow into healthy, productive clumps. Each division should be large enough to survive on its own but small enough to fit comfortably into its new location.
Replanting the divisions should follow the same professional guidelines as planting a new nursery-grown specimen. You should work quickly to prevent the exposed roots from drying out in the air or sun during the division process. Keep the new sections in a shaded area and cover them with a damp cloth if you cannot replant them immediately. Treating these divisions with care will significantly increase their survival rate and the speed at which they establish themselves in the new garden beds.
Monitoring the newly divided plants is essential during the first few months as they recover from the trauma of being moved. You will need to water them more frequently than established plants, as their smaller root systems are less capable of finding deep moisture. Watch for signs of new leaf production, which is the best indicator that the roots have begun to grow into the surrounding soil. Within a season or two, these small divisions will grow into full-sized clumps that are ready to contribute to the beauty of your landscape.
Propagation from seed
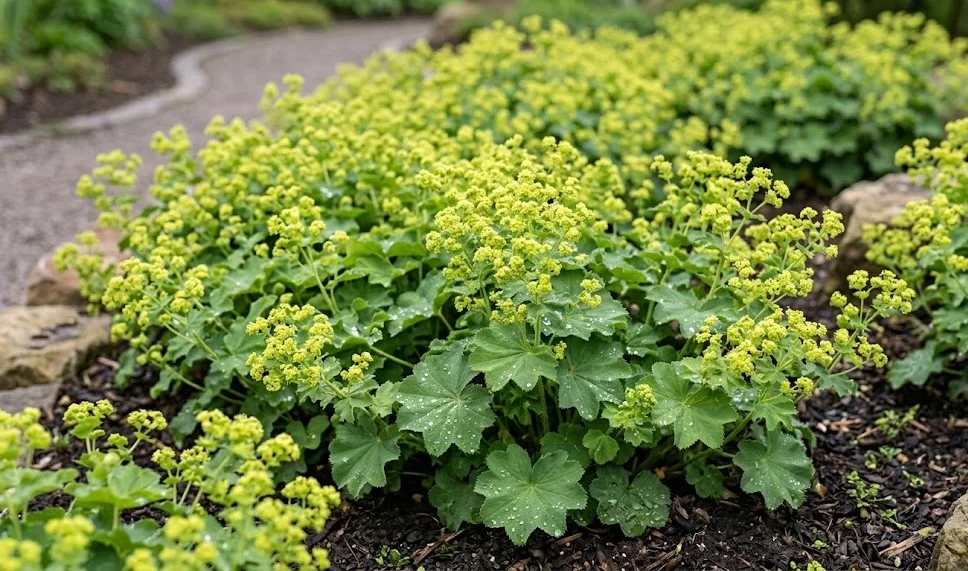
Growing the lady’s mantle from seed is a rewarding project for those who enjoy the entire lifecycle of a plant from its very beginning. You can collect seeds from your own plants in late summer once the flower heads have turned brown and dry. It is important to store the seeds in a cool, dry place until you are ready to sow them, which is typically in late autumn or early spring. This natural timing mimics the plant’s own reproductive cycle and often leads to the highest germination rates.
The seeds require a period of cold temperatures, known as stratification, to break their dormancy and prepare them for growth. You can achieve this by sowing the seeds directly into prepared outdoor beds in the autumn, allowing the winter weather to handle the cooling process naturally. Alternatively, you can place the seeds in a moist medium in your refrigerator for several weeks before sowing them in a controlled environment indoors. Both methods are effective, but the outdoor approach is often simpler for those with limited indoor space.
When sowing the seeds, you should just lightly press them into the surface of the soil rather than burying them deeply. They require a certain amount of light to trigger germination, so a thin covering of fine grit or vermiculite is all that is necessary. You must keep the soil consistently moist but not waterlogged during the germination period, which can take several weeks. Once the seedlings have developed their first set of true leaves, they are ready to be handled and potentially moved to larger containers or a nursery bed.
Caring for young seedlings requires a gentle touch and protection from extreme weather and hungry garden pests. You should gradually acclimate them to outdoor conditions through a process called hardening off before planting them in their final positions. This prevents transplant shock and ensures that the young plants are strong enough to handle the challenges of the open garden. Although it takes longer than division, propagation from seed allows you to produce a large number of plants for mass plantings or to share with other gardening enthusiasts.