The process of establishing this biennial in the garden begins with a clear understanding of its seed-based life cycle. Successful propagation relies on timing the sowing correctly to allow the plant to complete its first year of vegetative growth. Whether you choose to sow directly into the soil or start seeds in containers, the goal is to develop a strong root system. Professional gardeners often emphasize the importance of site selection during the planting phase to ensure long-term success.
Starting seeds indoors can provide a head start, but direct sowing is often more effective for this species. If sowing directly, the best time is during the late spring or early summer months when the soil has warmed. The seeds are relatively large and easy to handle, making them ideal for precise placement in the garden bed. A shallow depth of about one centimeter is sufficient to protect the seed while allowing it to reach the surface.
If starting in pots, use a high-quality seed starting mix that provides excellent drainage and a fine texture. Place two or three seeds in each cell to ensure a high germination rate across the entire tray. Keep the medium consistently moist and place the containers in a bright location out of direct, scorching sunlight. Once the seedlings have developed their first set of true leaves, they can be thinned to one per pot.
The transition from the nursery pot to the garden bed is a critical moment in the plant’s development. Hardening off the young plants by gradually exposing them to outdoor conditions prevents transplant shock. Choose a cloudy day or late afternoon for the actual planting to reduce the stress caused by the sun. Ensuring the root ball is level with the surrounding soil prevents issues with stem rot or drying out.
Selecting the ideal planting site
Site selection is the most important decision a gardener makes when introducing this plant to the landscape. It thrives best in locations that offer dappled shade or partial sun, mimicking its natural woodland habitat. Full sun is tolerable in cooler climates, but in hot regions, some afternoon shade prevents the leaves from wilting. The site should also be protected from heavy winds that could damage the tall flower spikes in the second year.
More articles on this topic
The soil at the chosen site must be well-drained to ensure the health of the biennial’s taproot. Locations where water tends to pool after a rainstorm should be avoided or improved with significant amounts of organic matter. A site with fertile, loamy soil will produce the most vigorous plants and the largest, most impressive seed pods. If the soil is naturally poor, working in some well-rotted manure before planting provides a much-needed nutrient boost.
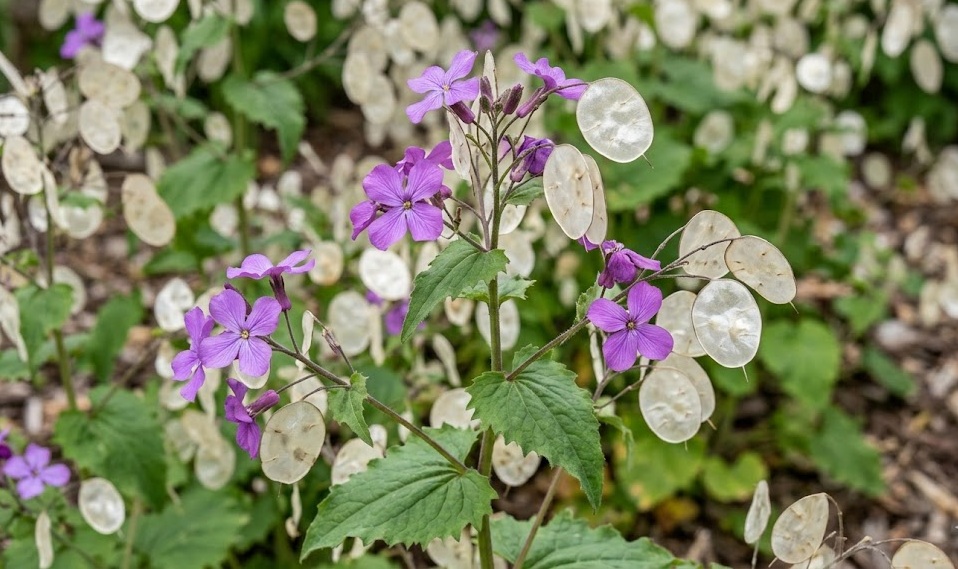
Consider the visual impact of the site when the plants reach their full height in the second year. They look particularly effective when planted at the back of a border or in a dedicated wildflower area. Because the seed pods are translucent, placing them where they can be backlit by the sun creates a stunning effect. Thinking ahead about the plant’s mature size helps prevent overcrowding with neighboring species.
The proximity to other plants also plays a role in the health and propagation of the colony. Giving the plants enough space ensures that air can circulate freely, which is vital for preventing common fungal issues. It also leaves room for the seeds to fall and germinate naturally in the following seasons. A well-chosen site allows the plant to become a permanent, self-sustaining feature of the garden with minimal intervention.
Methods of seed propagation
Direct sowing into the garden is the traditional and often most successful method of propagation for these plants. Prepare the soil by removing any weeds and raking the surface to a fine tilth to ensure good seed-to-soil contact. Space the seeds or rows about thirty centimeters apart to allow for the spread of the mature rosettes. Watering the area gently after sowing helps settle the seeds into their new environment.
More articles on this topic
For those who prefer more control, sowing in a dedicated nursery bed is an excellent alternative. This allows the gardener to monitor the young seedlings closely and protect them from pests like slugs and snails. Once the plants have reached a sturdy size in the autumn, they can be moved to their final flowering positions. This method is particularly useful if the main garden beds are currently full of summer-blooming annuals.
Collecting seeds from existing plants is a rewarding way to expand a collection or share with other gardeners. Wait until the seed pods are fully dry and the outer layers are brittle and easy to remove. The seeds are found attached to the central silver membrane and are usually dark brown or black when mature. Store the collected seeds in a cool, dry place in a paper envelope until you are ready to sow them.
Self-seeding is the most effortless form of propagation and is highly recommended for a natural look. If you leave the dried stems standing in the garden, the pods will eventually open and release their seeds. These seeds will naturally find their way into cracks and crevices, often resulting in the most vigorous plants. Managing these volunteers involves simply thinning them out if they become too dense in a particular spot.
Transplanting and establishing seedlings
When moving young plants, it is essential to minimize disturbance to the developing taproot. Use a hand trowel to dig a hole that is slightly larger than the root ball to allow for easy placement. If the plant is in a pot, turn it upside down and tap the bottom gently to release the plant without pulling on the stem. Place the seedling in the hole and firm the soil around it to remove any large air pockets.
Watering immediately after transplanting helps the roots make contact with the new soil and reduces stress. It is beneficial to provide a light mulch around the base of the new transplants to retain moisture and suppress weeds. Monitor the plants closely for the first two weeks, ensuring they do not dry out during this critical establishment phase. If the weather is particularly hot, temporary shading might be necessary to help them settle in.
The spacing of the plants during the establishment phase dictates the quality of the future floral display. Plants that are too close together will compete for light and nutrients, leading to weaker stems and smaller pods. A distance of at least thirty to forty centimeters between individuals is generally recommended for optimal growth. This space also makes it easier to clean up the garden and manage the plants throughout their lifecycle.
Establishing a routine for checking the health of the newly planted seedlings is a hallmark of a professional gardener. Look for signs of new growth as an indicator that the roots have successfully taken hold in the new location. Any plants that appear stunted or diseased should be removed promptly to protect the rest of the colony. Consistent care during these early stages sets the foundation for a spectacular silver display in the following year.
Managing the nursery phase
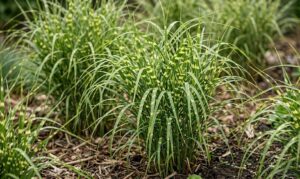
The period between germination and the onset of winter is often referred to as the nursery phase for biennials. During this time, the goal is to produce a large, healthy rosette of leaves that can store maximum energy. Frequent, shallow watering should transition to deeper, less frequent sessions as the root system expands. This encourages the plant to seek moisture deeper in the soil, making it more drought-tolerant.
Weed control is particularly important during the nursery phase when the young plants are still small. Aggressive weeds can quickly overtop the rosettes, stealing light and nutrients and potentially harboring pests. Hand weeding is the safest method to avoid damaging the shallow lateral roots of the young biennials. Keeping the area clean also improves the overall aesthetic of the garden during the non-flowering year.
Applying a balanced, liquid fertilizer once a month during the first summer can support vigorous leaf development. However, avoid over-fertilizing, as this can lead to soft, lush growth that is more attractive to aphids and other pests. The aim is steady, sturdy growth rather than a rapid surge of weak tissue. Healthy green leaves are the “solar panels” that will fuel the spectacular bloom in the coming spring.
As autumn approaches, the nursery phase concludes as the plants prepare for their winter dormancy. The rosettes should look strong and healthy, with a deep green color and no signs of significant pest damage. A final check of the spacing and a fresh layer of mulch will prepare the plants for the colder months ahead. This careful management ensures that the transition to the flowering year will be a resounding success.