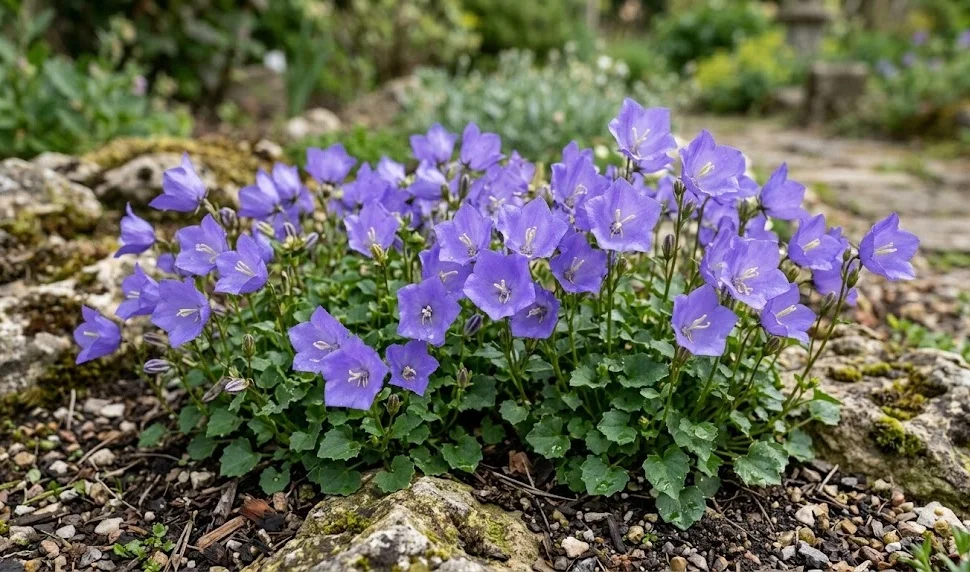
Establishing these charming perennials in your garden begins with a well-planned planting process that prioritizes soil preparation and timing. Whether you are starting from nursery-bought plants or trying your hand at propagation, success depends on understanding the plant’s basic biological requirements. These flowers are versatile and can be used in a variety of settings, from traditional borders to modern rock gardens. By following professional planting techniques, you ensure that your bellflowers have the strongest possible start in their new environment.
The best time to plant is typically in the early spring or autumn when the weather is mild and the soil is moist. Planting during these periods allows the root system to become established before the stress of extreme heat or cold. If you must plant in the summer, be prepared to provide extra shade and frequent watering until the plant settles in. Professional gardeners often prefer the autumn as it allows for root growth throughout the winter months.
Before you begin, it is essential to prepare the planting site by removing all weeds and incorporating organic matter. Dig a hole that is twice as wide as the root ball but no deeper than the container the plant is currently in. This ensures that the crown of the plant sits exactly at soil level, preventing potential rot issues. Mixing a bit of grit or perlite into the bottom of the hole can further improve drainage for these alpine-origin species.
Once the plant is in the ground, firm the soil gently around the base to remove any air pockets. Water the area thoroughly to settle the soil and provide immediate hydration to the roots. If you are planting multiple specimens, space them about twelve inches apart to allow for their natural spreading habit. This initial care sets the foundation for a healthy, long-lived plant that will reward you with years of beautiful blooms.
Sowing seeds for new growth
Starting these perennials from seed is a rewarding way to increase your garden’s population without a large financial investment. The seeds are very small and require light to germinate, so they should not be buried deep in the soil. Instead, simply press them firmly into the surface of a high-quality seed-starting mix. Keeping the soil surface consistently moist is the most important factor during this delicate early stage.
More articles on this topic
For the best results, start the seeds indoors about six to eight weeks before the last expected frost date. Use a shallow tray with drainage holes and place it in a bright location but out of direct, intense sunlight. Covering the tray with a clear plastic lid or a pane of glass can help maintain the high humidity needed for germination. You should begin to see tiny green shoots appearing within two to three weeks if temperatures are kept around twenty degrees Celsius.
Once the seedlings have developed two sets of true leaves, they can be carefully transplanted into individual small pots. This gives them more space to grow and prevents the roots from becoming tangled with their neighbors. Continue to provide bright light and keep the soil moist but not soggy as they grow larger. It is crucial to harden off the young plants by gradually exposing them to outdoor conditions over a period of ten days.
When the plants have reached a sturdy size and the danger of frost has passed, they are ready for their permanent home in the garden. Sowing seeds directly into the garden in late spring is also an option, though it requires more attention to weeding and moisture. Direct-sown plants may not bloom in their first year, as they spend their energy establishing a strong root system. Regardless of the method, growing from seed allows for a greater variety of flower colors and forms.
Dividing established clumps
Division is the most common and effective way to propagate mature specimens while also rejuvenating older plants. This process is best performed every three to four years in the early spring just as new growth begins to emerge. By breaking a large clump into several smaller pieces, you stimulate the plant to grow more vigorously. Each new section should have a healthy set of roots and several green shoots to ensure successful re-establishment.
More articles on this topic
To begin the process, use a garden fork to lift the entire plant out of the ground, being careful to keep the root ball as intact as possible. Shake off the excess soil so you can clearly see where the natural divisions occur within the root system. You can often pull the plant apart by hand, but for older, tougher clumps, a sharp garden knife may be necessary. Ensure that each division is large enough to survive on its own in the garden.
Replant the new divisions immediately into prepared soil at the same depth they were previously growing. Water them in well to help the roots reconnect with the soil and reduce transplant shock. It is often helpful to trim back any existing foliage slightly to reduce the water demand on the new root system. These new plants will typically settle in quickly and may even produce flowers later in the same season.
This method of propagation is ideal for maintaining the health of your garden and sharing plants with fellow gardeners. Because the new plants are genetically identical to the parent, you can be sure of their flower color and growth habit. Division is also a practical way to fill in gaps in your garden borders without additional cost. Regularly dividing your bellflowers keeps them looking fresh and prevents the center of the mound from dying out.
Selecting the ideal planting site
Choosing the right location is the first step toward a successful planting that requires minimal long-term intervention. These plants thrive in areas that receive at least six hours of sun each day, although they appreciate some afternoon shade in hot regions. A site with good air circulation is also important to prevent the buildup of humidity that can lead to leaf diseases. Avoid low-lying areas where water tends to collect after heavy rain, as this will lead to root rot.
The soil type at the chosen site should be well-drained and relatively fertile, though these plants can handle poorer soils if the drainage is excellent. If your garden has heavy clay, consider building a raised bed or a rock garden to provide the necessary elevation. This mimics the mountain slopes where these plants grow naturally and ensures the roots stay healthy. Observing how water moves through your garden during a rainstorm can help you identify the best spots.
Proximity to other plants is another consideration when selecting a site for your new bellflowers. They pair well with other low-growing perennials like stonecrop, creeping phlox, or various types of thyme. Ensure that larger, more aggressive plants won’t quickly grow over them and steal their light. A well-chosen site allows the bellflower to showcase its compact beauty without constant competition for resources.
Finally, think about the visual impact you want to achieve with your planting. These flowers are spectacular when used as a “spiller” in a rock wall or as a neat edging for a gravel path. Their vibrant color is most effective when planted in groups of three or five rather than as isolated individuals. Taking the time to visualize the end result will help you pick the perfect spot for your new additions.
Techniques for container planting
Planting these perennials in containers is a fantastic option for those with limited garden space or heavy soil issues. When choosing a pot, ensure it has large drainage holes at the bottom to prevent water from standing around the roots. A ceramic or terracotta pot is often a better choice than plastic as it allows for better air exchange through the walls. Fill the container with a high-quality potting mix blended with a bit of extra grit or perlite.
When placing the plant in the container, leave about an inch of space between the soil surface and the rim of the pot. This “headspace” makes it much easier to water the plant without the soil washing over the sides. You can plant them alone for a clean, modern look or combine them with other alpine plants for a miniature landscape. Ensure the container is placed in a sunny spot where it can be easily monitored for its moisture needs.
Container-grown plants require more frequent watering than those in the ground because the soil dries out much faster. During the heat of summer, you may need to water your pots every day or even twice a day. It is also a good idea to rotate the container occasionally so that all sides of the plant receive equal amounts of sunlight. This prevents the plant from becoming lopsided as it grows toward the light source.
Fertilization is also more important for container plantings since the limited amount of soil quickly becomes depleted of nutrients. Use a diluted liquid fertilizer every few weeks during the growing season to keep the foliage green and the flowers blooming. If the plant eventually outgrows its container, it can be easily divided or moved into a larger pot in the spring. Container gardening offers a flexible and controlled way to enjoy these beautiful flowers anywhere on your property.