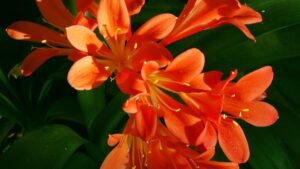
Successfully establishing these magnificent garden giants requires a deep understanding of their early development and reproductive needs. To achieve the best results, you must carefully choose between starting from seed or using vegetative methods like division. The process begins with proper soil preparation, ensuring the ground is fertile and well-drained before any planting occurs. By following professional techniques, you can ensure that your young plants develop the strong root systems necessary for their impressive floral displays.
Starting seeds indoors for early success
Growing these flowers from seed allows you to access a much wider variety of cultivars than you might find at a local nursery. Because they have a relatively long growing season, starting them indoors in late winter or early spring is highly recommended. You should use a high-quality seed-starting mix that is sterile and specifically formulated for delicate seedlings. Placing the seeds on the surface and covering them with a very thin layer of soil will provide the right conditions for germination.
One of the most important secrets to successful germination is a period of cold stratification. You can place the seeds in a damp paper towel inside a sealed plastic bag and keep them in the refrigerator for two weeks. This process mimics the natural winter conditions that trigger the seed to wake up from its dormant state. After this cold treatment, move the seeds to a warm location with a consistent temperature around fifteen to eighteen degrees.
Proper lighting is essential once the first green shoots begin to emerge from the soil. If you are growing them on a windowsill, make sure they receive plenty of bright, indirect sunlight to prevent them from becoming leggy. Many professionals prefer to use adjustable grow lights to provide a consistent sixteen hours of light per day. Keeping the light source just a few centimeters above the tops of the plants will encourage sturdy and compact growth.
Be careful not to overwater the young seedlings, as they are susceptible to a condition known as damping off. You should allow the surface of the soil to dry out slightly between waterings to prevent fungal growth. Once the seedlings have developed two sets of true leaves, you can begin feeding them with a very diluted liquid fertilizer. This early boost of nutrients helps the plants build the strength they need for the transition to the outdoor garden.
More articles on this topic
Direct sowing techniques in the garden
In regions with long springs and cool summers, you can sow the seeds directly into the garden beds. This method avoids the stress of transplanting and allows the plants to develop deep taproots from the very beginning. You should prepare the site by removing all weeds and tilling the soil to a depth of at least twenty centimeters. Adding a layer of fine compost to the surface will create a perfect nursery bed for the tiny seeds.
Timing is critical when sowing outdoors, as the seeds require cool soil temperatures to germinate effectively. Most experts suggest planting in early spring as soon as the soil can be worked or even in late autumn for spring germination. Scatter the seeds thinly across the prepared area and press them gently into the soil with your hand or a flat board. A very light covering of fine soil or vermiculite will help protect them from birds and drying out.
Consistent moisture is the key to successful outdoor germination during the first few weeks. You should use a fine mist spray to keep the area damp without washing away the small seeds or compacting the soil. If the weather becomes unexpectedly hot, providing a temporary shade cloth can help keep the soil temperature within the ideal range. Once the seedlings are a few centimeters tall, you should thin them out to ensure they have enough space to grow.
Outdoor-sown plants often catch up to those started indoors because they do not suffer from transplant shock. They tend to be more resilient and better adapted to the local environment from an early age. However, you must be vigilant about protecting young sprouts from pests like slugs and snails which find them delicious. Using organic barriers or physical protectors can save your future floral display from being eaten overnight.
More articles on this topic
Transplanting and spacing considerations
Moving your indoor-started plants to the garden requires a careful process known as hardening off. You should gradually expose the young plants to outdoor conditions over a period of seven to ten days. Start by placing them in a sheltered, shady spot for an hour and slowly increase their time in the sun and wind. This transition prevents the leaves from scorching and the stems from snapping under the pressure of the elements.
When you are ready to plant, choose a day that is overcast or cool to minimize the stress on the root system. Dig a hole that is twice as wide as the root ball and just as deep to allow for easy expansion. You can mix a handful of bone meal or a slow-release fertilizer into the bottom of the hole to provide immediate nutrition. Carefully remove the plant from its container, keeping as much soil around the roots as possible.
Place the plant in the hole at the same depth it was growing in the pot, making sure the crown is not buried. Backfill with native soil and press down firmly with your hands to remove any air pockets around the roots. Watering immediately after transplanting is essential to help the soil settle and provide hydration to the stressed plant. Adding a thin layer of mulch will help retain moisture and keep the roots cool during the first few weeks.
Spacing is one of the most common mistakes made by amateur gardeners when establishing these perennials. Because they grow so tall and wide, they need at least sixty centimeters of space between each plant. This distance allows for adequate air circulation, which is the best way to prevent common fungal diseases like powdery mildew. Proper spacing also ensures that each plant has a large enough territory from which to draw water and nutrients.
Vegetative propagation through division
Dividing established clumps is the most reliable way to produce new plants that are identical to the parent. This process should be done every three to four years to keep the plants vigorous and prevent the center of the clump from dying out. The best time for division is in early spring just as the new growth begins to poke through the soil. You will need a sharp spade or a garden fork to lift the entire root mass from the ground.
Once the clump is lifted, carefully shake off the excess soil so you can see the individual growing points or “eyes.” You can use a sharp knife or your hands to pull the clump apart into smaller sections, each with several healthy shoots and a good portion of roots. Discard the older, woody center of the clump and keep the vigorous outer pieces for replanting. This rejuvenation process stimulates the plant to produce more blooms and healthier foliage.
Replant the new divisions immediately to prevent the roots from drying out in the air. If you cannot plant them right away, keep them in a shady spot covered with a damp burlap sack or some moist peat moss. Treat these new divisions like fresh transplants, providing them with plenty of water and a bit of protection from the midday sun. They will usually establish themselves quickly and may even produce a few flowers in their first season.
Vegetative propagation is particularly useful for maintaining specific high-performance hybrids that do not grow true from seed. It is also an excellent way to share your favorite garden plants with friends and neighbors. By mastering the art of division, you can expand your garden collection at no cost while improving the health of your existing plants. A well-divided garden is a sign of a truly experienced and dedicated horticulturalist.