Establishing a new golden dewdrop in your garden is an exciting process that requires careful planning and a bit of horticultural finesse. Whether you are starting from a tiny seed or taking cuttings from an established bush, the early stages of life are the most critical. You must create an environment that encourages rapid root development and provides protection from harsh elements. With the right techniques, you can successfully expand your garden collection and share this beautiful plant with others.
Site selection is the very first step in ensuring that your new planting will thrive for years to come. You need a location that offers the perfect balance of light and protection from strong winds. Soil quality at the planting site should be assessed and improved if necessary before the plant ever touches the ground. Taking the time to prepare the site properly will save you a great deal of trouble in the future.
The timing of your planting or propagation efforts can significantly influence the success rate of the project. Spring is generally considered the ideal season as the warming soil encourages active biological processes. This gives the young plant a full growing season to establish itself before the challenges of winter arrive. Professional gardeners always look to the calendar to synchronize their activities with the natural cycles of the earth.
Once the plant is in the ground or the cutting has taken root, consistent monitoring is essential. Young plants do not have the extensive root systems of mature specimens and are much more vulnerable to drying out. You should be prepared to provide extra water and perhaps a bit of temporary shade during the first few weeks. This transition period is when the plant’s future health and vigor are determined.
Sowing seeds for successful growth
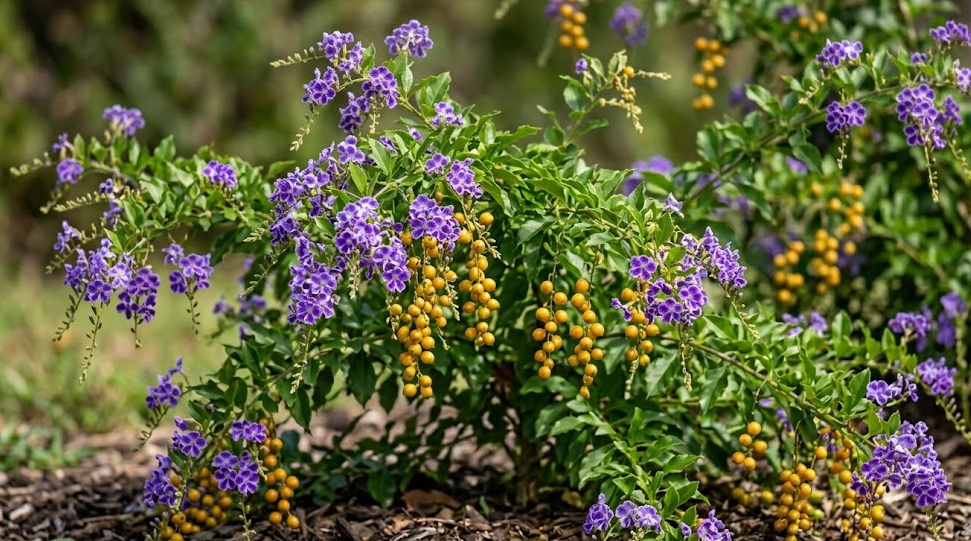
Starting from seed is a patient way to grow this plant and offers the chance to observe every stage of its life cycle. You should collect the golden berries once they are fully ripe and have begun to shrivel slightly. Inside, you will find several small seeds that need to be cleaned and dried before they are ready for planting. This process requires a delicate touch to avoid damaging the internal embryos.
More articles on this topic
A high-quality seed-starting mix is essential for providing the right balance of aeration and moisture. You should sow the seeds just below the surface and keep the soil consistently warm to trigger germination. A heat mat can be a very helpful tool for maintaining the steady temperature required for success. Patience is key, as it may take several weeks for the first green shoots to break through the soil.
Once the seedlings have emerged, they need plenty of bright light to prevent them from becoming leggy and weak. You can use artificial grow lights if natural sunlight is not sufficient in your indoor space. As the young plants grow, you should gradually introduce them to more intense light to toughen up their tissues. This hardening-off process is vital for their survival when they eventually move outdoors.
Thinning out the seedlings ensures that only the strongest individuals are allowed to continue their journey. It can be difficult to remove healthy-looking plants, but it is necessary to prevent overcrowding and competition for resources. Each young plant needs its own space to develop a robust root system and a sturdy stem. This selective process leads to a much higher quality of mature plants in the long run.
Master the art of stem cuttings
Taking stem cuttings is one of the most reliable ways to propagate this plant while ensuring the new offspring is identical to the parent. You should look for semi-hardwood stems that are firm but still possess a bit of green flexibility. The best time to take these cuttings is in the early morning when the plant is fully hydrated. This simple step can significantly increase the chances of successful rooting.
More articles on this topic
The cuttings should be approximately four to six inches long and have several sets of leaves removed from the bottom half. You should make a clean, diagonal cut just below a leaf node to maximize the surface area for root growth. Dipping the end in a rooting hormone can provide an extra boost, though it is not strictly necessary for this species. Once prepared, the cutting should be placed immediately into a moist rooting medium.
A humid environment is essential for keeping the cutting alive until it can grow its own roots to absorb water. You can create a mini-greenhouse effect by covering the pot with a clear plastic bag or a dome. This traps moisture and prevents the leaves from wilting due to excessive transpiration. It is a delicate balance of keeping things moist without causing the stem to rot in the soil.
After a few weeks, you can gently tug on the cutting to check for resistance, which indicates that roots have begun to form. Once the root system is well-established, the plant can be moved into a larger container with standard potting soil. This transition should be done carefully to avoid shocking the young plant during its move. Successful propagation from cuttings is a hallmark of an experienced and resourceful gardener.
Proper transplanting techniques
When it comes time to move your plant into its permanent home, the hole you dig should be twice as wide as the root ball. This creates a zone of loose soil that the new roots can easily penetrate as they begin to expand. You should avoid planting too deeply, as the crown of the plant should remain at the same level as the soil surface. Proper depth is essential for preventing stem rot and ensuring healthy gas exchange for the roots.
Mixing some organic compost into the backfill soil provides a slow-release source of nutrients for the establishing plant. You should avoid using heavy synthetic fertilizers immediately after transplanting, as this can burn the sensitive new roots. The goal is to encourage a strong foundation rather than rapid top growth in the first few weeks. A healthy root system is the most important asset for a newly transplanted shrub.
Watering the plant thoroughly immediately after transplanting helps settle the soil around the roots and removes air pockets. You should apply water slowly so that it can soak deep into the ground rather than running off the surface. Mulching around the base of the plant will help retain this moisture and suppress competing weeds. This simple layer of protection acts as a buffer against temperature fluctuations in the soil.
Support might be necessary for taller specimens to prevent them from being blown over by strong winds while they are still anchoring. You can use soft ties and sturdy stakes to provide this temporary stability without damaging the bark. As the plant becomes more established, these supports should be removed to allow the stem to strengthen naturally. Monitoring the transplant’s progress over the next several months is the final step in a successful planting project.
Optimizing the rooting environment
The success of any propagation project depends heavily on the quality of the environment you provide for the new roots. Temperature, moisture, and aeration must all be kept within a specific range to encourage biological activity. A medium that is too wet will suffocate the roots, while one that is too dry will cause them to wither and die. Finding the middle ground is the primary challenge for any gardener working with young plants.
Sterility is another important factor when you are dealing with vulnerable cuttings or young seedlings. Using clean pots and fresh growing media reduces the risk of introducing pathogens that could kill the new growth. You should also ensure that the water you use is clean and free from any harmful chemicals or excessive salts. A clean start is one of the best ways to ensure a high success rate in your nursery area.
Light quality also plays a role in how well a plant establishes its root system after planting. While a mature plant might love full sun, a newly transplanted one might benefit from a little temporary shade. This reduces the stress on the foliage and allows the plant to focus its energy on underground development. Gradually increasing the light exposure over several days is the safest way to acclimate the plant to its new home.
Finally, remember that different varieties of this plant may have slightly different requirements for successful propagation. Keeping detailed records of what works and what doesn’t will help you refine your techniques over time. Each season offers a new opportunity to learn more about the specific needs of your plants. Professional horticulture is a constant process of observation, experimentation, and refinement.