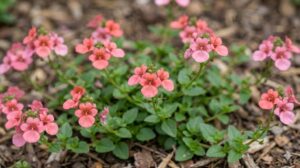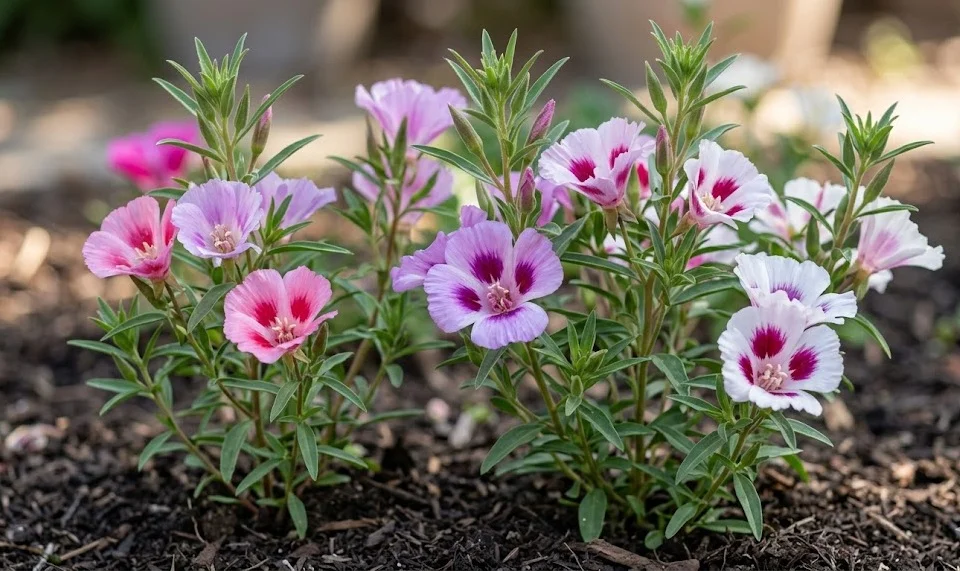
Starting your journey with godetia begins with a clear understanding of its preference for direct sowing and its dislike for having its roots disturbed. You will find the most success when you place the seeds directly into the garden soil where they are intended to bloom for the rest of the season. This method avoids the common pitfalls of transplant shock which can often set back the development of these sensitive annuals. By preparing the site carefully and timing your actions with the warming of the spring soil, you set the stage for a spectacular floral display.
Seed collection and storage
Collecting seeds from your own garden is a rewarding way to ensure a continuous supply of your favorite flower varieties for the coming years. You should wait until the flowering season has ended and the seed pods have turned a dry, tan color on the plant. Carefully cutting these pods and placing them in a paper bag allows any remaining moisture to evaporate naturally in a cool, dry place. Once the pods are completely brittle, you can gently shake out the small, dark seeds and separate them from any chaff.
Proper storage is essential for maintaining the viability of the seeds until the next planting window arrives. You should keep the cleaned seeds in a paper envelope or a glass jar that is kept in a dark, temperature-controlled environment. Labeling each container with the variety name and the date of collection helps you keep track of your inventory. Avoid storing seeds in plastic bags for long periods, as trapped moisture can lead to mold or premature decay.
Testing the germination rate of your stored seeds can save you time and effort when the spring season finally rolls around. You can do this by placing a few seeds between damp paper towels and keeping them in a warm spot for a few days. If the majority of the seeds sprout, you can be confident that your collection is healthy and ready for the garden. This small step ensures that you are not wasting space in your flower beds with seeds that are no longer productive.
Understanding the lifespan of the seeds helps you manage your garden planning more effectively over several years. While many seeds remain viable for two or three seasons, fresh seeds usually offer the most vigorous growth and the highest success rates. You should aim to refresh your seed stock every few years to maintain the genetic strength and beauty of the plants. Sharing surplus seeds with fellow gardening enthusiasts is a great way to spread the joy of growing these beautiful flowers.
More articles on this topic
Sowing techniques and timing
Timing your sowing perfectly with the local climate is the secret to getting a head start on a beautiful summer garden. You should wait until the danger of hard frost has passed and the soil has begun to lose its winter chill. In many regions, this means planting in the mid to late spring when the days are consistently bright and the air is warming up. Sowing too early in cold, wet ground can lead to the seeds rotting before they have a chance to germinate.
Preparing the surface of the soil is the first physical step you take when you are ready to plant your seeds. You should rake the area until it is fine and crumbly, removing any large stones or clumps of old vegetation that might block the emerging sprouts. The seeds of this species are quite small, so they do not need to be buried deeply to grow successfully. Simply scattering them over the surface and pressing them lightly into the dirt with the palm of your hand is usually sufficient.
Maintaining consistent moisture during the initial period after sowing is critical for triggering the germination process. You should use a fine mist or a gentle spray to water the area so that you do not wash the small seeds away. The soil should remain damp but not waterlogged as the seeds begin to swell and break through their outer coatings. Checking the area daily and providing a light watering during dry spells will keep the process moving forward smoothly.
Marking the rows or patches where you have sown the seeds prevents you from accidentally weeding out the young seedlings. You can use simple wooden stakes or small labels to identify the different varieties you have planted across the bed. As the first green shoots appear, they can often look very similar to common garden weeds, so these markers are invaluable. Once the plants develop their true leaves, they become much easier to identify and care for as part of your intentional garden.
More articles on this topic
Germination conditions
The physical environment surrounding the seeds plays a major role in how quickly and evenly they begin to grow. You should ensure that the planting site receives plenty of natural light, as this often helps stimulate the hormones needed for sprouting. While some seeds prefer total darkness, these specific annuals do best when they can sense the brightness of the spring sun. If your garden is particularly shaded, you may find that the germination process takes a bit longer than expected.
Soil temperature is another key factor that you must monitor to ensure the best possible results for your planting efforts. You should ideally wait until the ground has reached a steady temperature that feels warm to the touch. If the soil remains too cold, the seeds may stay dormant for an extended period, increasing the risk of them being eaten by birds or insects. Using a soil thermometer can provide you with precise data if you want to be truly scientific about your gardening.
Oxygen availability within the soil structure is often overlooked but is essential for the metabolic processes of the growing seed. You should avoid compacting the dirt after sowing, as this can squeeze out the tiny air pockets that the roots need to breathe. A light, airy soil allows the delicate emerging structures to push through to the surface with minimal resistance. This ease of movement helps the seedlings establish themselves more quickly and with greater overall strength.
Protecting the sowing site from heavy rain or strong winds can prevent the seeds from being displaced or buried too deeply. You might consider using a light horticultural fleece to cover the area during the first week or two of the germination process. This thin material allows light and water to pass through while providing a buffer against the harshest elements of nature. Once the seedlings are firmly rooted and showing their first leaves, you can remove the protection and let them grow freely.
Transplanting and spacing
If you have started your plants in containers, you must be extremely gentle when it comes time to move them into the garden. You should wait until the seedlings have at least two sets of true leaves and a sturdy stem before attempting any relocation. Preparing the planting holes in advance ensures that the roots are exposed to the air for the shortest time possible. Keeping as much of the original soil around the root ball as you can will help minimize the shock of the transition.
Proper spacing between the plants is vital for ensuring that each one has enough room to reach its full size and beauty. You should research the specific variety you are growing to determine its expected width at maturity. Leaving about six to ten inches between individual plants generally provides enough space for good air circulation and light penetration. Crowding the plants too closely together can lead to competition for nutrients and a higher risk of foliage issues.
Thinning out direct-sown seedlings is a necessary task that requires a bit of discipline from the gardener. You should identify the strongest and healthiest sprouts in each patch and remove the smaller, weaker ones surrounding them. While it may feel difficult to pull up potential flowers, this process ensures that the remaining plants have the resources they need to thrive. Using a small pair of scissors to snip the extra seedlings at the soil line is often safer than pulling them out by the roots.
Watering the plants immediately after transplanting or thinning helps to settle the soil around the roots and reduces stress. You should provide a deep, gentle soak that reaches the bottom of the planting hole to encourage deep root growth. Monitoring the new additions closely for the first few days will allow you to provide extra care if they show any signs of wilting. With a little bit of patience and attention, your young plants will soon establish themselves and begin their rapid summer growth.