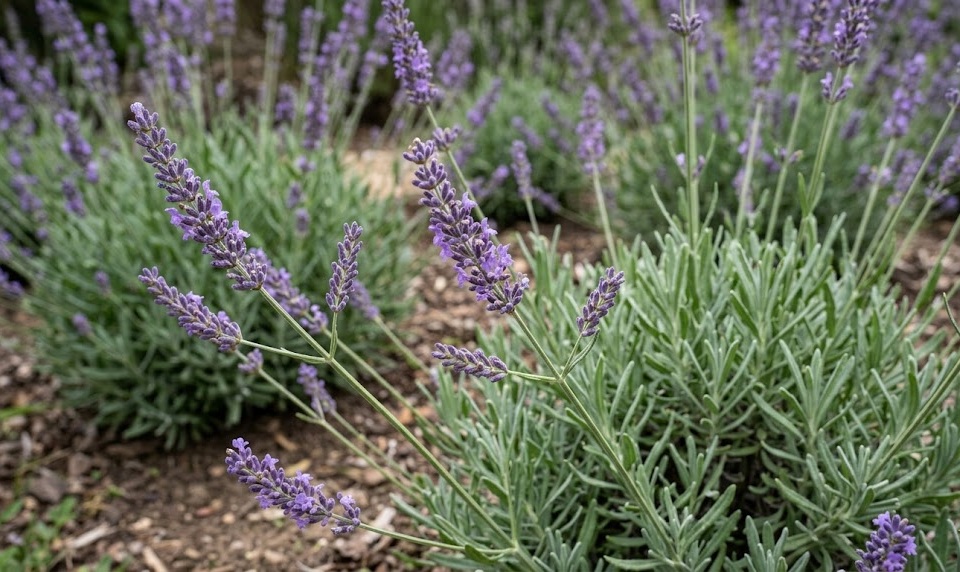
The process of establishing english lavender begins with a strategic approach to planting and the careful selection of propagation methods to ensure genetic consistency. This robust hybrid is highly valued for its vigor and adaptability, but it still requires a specific set of conditions to transition successfully from a young cutting to a mature shrub. Understanding the timing of these activities is essential for taking advantage of natural growth cycles and avoiding environmental stressors. By mastering both the initial planting and the art of propagation, gardeners can expand their collection with confidence and precision.
Successful planting starts with selecting a location that provides at least six to eight hours of direct sunlight each day. The soil must be well-draining, as the lavender root system is highly sensitive to the lack of oxygen associated with waterlogged ground. If the natural soil is heavy or rich in clay, it is often necessary to incorporate sand or fine gravel to improve the texture before introducing the plant. Creating a slight mound for each lavender can also help elevate the root crown above any potential standing water during heavy rain.
The best time to plant lavender is typically in the early spring after the danger of a hard frost has passed but before the intense heat of summer arrives. This allows the root system to become established in the relatively cool, moist soil of the spring months. In milder climates, autumn planting is also an option, provided the plants have enough time to settle in before the winter dormancy begins. Regardless of the season, a newly planted lavender requires consistent monitoring to ensure it does not dry out completely while its roots are still localized.
When placing the lavender in the ground, the depth of the hole should be just enough to accommodate the root ball without burying the stem too deeply. The area around the base of the plant should be kept clear of organic mulch, which can trap moisture and cause the stem to rot. Instead, a light layer of inorganic material like crushed stone or pebbles can help suppress weeds while keeping the environment dry. Providing enough space between plants is also vital to ensure that each individual has access to sufficient air and light as it matures.
Site preparation and soil optimization
Before the first lavender plant ever touches the ground, the soil must be thoroughly prepared to meet the specific requirements of this Mediterranean species. Clearing the area of aggressive perennial weeds and grasses is the first step in reducing future competition for nutrients and water. It is often beneficial to dig the area to a depth of at least twelve inches to break up any compacted layers that might impede root growth. This initial effort ensures that the lavender has a soft, aerated medium in which to expand its delicate roots.
More articles on this topic
Improving the drainage of the site is a non-negotiable requirement for long-term success with english lavender. In areas with naturally heavy soil, digging in large quantities of horticultural grit or sharp sand is the most effective way to change the soil structure. Some professionals also recommend adding a small amount of lime at this stage if the soil is naturally acidic, aiming for a neutral to slightly alkaline pH. The goal is to create a “lean” soil that mimics the rocky, mineral-rich environments where lavender naturally thrives.
The layout of the planting site should take into account the mature size of the lavender to avoid overcrowding as the shrubs grow. For most varieties of the english lavender hybrid, a spacing of at least twenty-four to thirty inches between plants is recommended. This gap allows for the necessary air circulation that prevents fungal diseases and ensures that the lower branches receive enough sunlight. Planning the rows to run in a north-south direction can also help maximize the exposure to the sun throughout the day.
Water management should be considered during the site preparation phase, especially if an irrigation system is being installed. While lavender is drought-tolerant once established, young plants need a reliable source of water during their first growing season. Drip irrigation is often preferred over overhead sprinklers because it delivers water directly to the soil, keeping the foliage dry and reducing the risk of disease. Setting up these systems before planting ensures that the moisture can be delivered precisely where it is needed most.
Propagation through softwood and hardwood cuttings
Taking cuttings is the most common and effective way to propagate english lavender, as it ensures that the new plants are genetically identical to the parent. Softwood cuttings are typically taken in the late spring or early summer from the new, non-flowering growth of the season. These cuttings root quickly because the plant is in a state of active growth and the tissue is still flexible and full of energy. A professional tip is to take the cuttings in the early morning when the plant is fully hydrated and the stems are most turgid.
More articles on this topic
The preparation of the cutting involves removing the lower leaves and making a clean cut just below a node where the leaves were attached. Dipping the end of the stem into a rooting hormone can help speed up the process, although lavender often roots well even without artificial assistance. The cuttings should be placed into a well-draining potting mix, such as a combination of perlite and peat or coconut coir. Maintaining a high level of humidity around the cuttings while keeping the medium only slightly moist is the key to preventing them from wilting.
Hardwood cuttings offer another opportunity for propagation, usually taken in the late autumn or winter when the plant is dormant. These cuttings are made from the more mature, woody stems and take longer to root than softwood cuttings, but they are often more resilient once they do. Because they are dormant, they do not require the same level of humidity and can be overwintered in a cold frame or unheated greenhouse. By the time spring arrives, many of these cuttings will have developed a sufficient root system to be potted up or planted out.
Monitoring the progress of the cuttings requires patience, as it can take several weeks for the first roots to appear. Tugging very gently on the cutting can tell you if roots are starting to take hold, as you will feel a slight resistance. Once the root system is well-developed, the young plants should be gradually acclimated to the outdoor environment through a process known as hardening off. This transition prevents transplant shock and ensures that the new lavender is strong enough to handle the direct sun and wind.
Growing lavender from seeds and division
While less common than cuttings, growing english lavender from seeds is a rewarding challenge for those who wish to see the entire life cycle of the plant. It is important to note that seeds may not always produce plants that are identical to the parent, as lavender can cross-pollinate easily. To improve germination rates, many growers use a process called cold stratification, which mimics the winter conditions the seeds would experience in the wild. This involves placing the seeds in a moist medium in the refrigerator for several weeks before sowing them in a warm environment.
Lavender seeds are quite small and should only be covered with a very thin layer of soil or vermiculite, as they require some light to germinate. The soil should be kept consistently moist but never soggy, and a heating mat can be used to maintain a steady temperature of around 70 degrees Fahrenheit. Germination can be slow and irregular, sometimes taking up to a month for the first sprouts to appear. Once the seedlings have several sets of true leaves, they can be carefully transplanted into individual pots to continue their growth.
Division is another method of propagation, though it is generally less successful with lavender than with other perennials because of the plant’s woody nature. It is best attempted with younger plants that have multiple stems emerging from the ground rather than a single thick trunk. In the early spring, the plant can be carefully lifted and the root ball split into smaller sections, ensuring that each piece has a good amount of roots and green foliage. These divisions must be replanted immediately and watered thoroughly to help them recover from the stress of being moved.
Each of these propagation methods has its own advantages depending on the goals of the gardener and the resources available. Seeds allow for the possibility of discovering new variations, while cuttings provide a reliable way to mass-produce a favorite variety. Division is a quick way to gain a few extra plants, provided the parent plant is suitable for the process. By experimenting with all three techniques, a grower can gain a comprehensive understanding of how lavender reproduces and thrives in different conditions.
Successful transplanting and early establishment
The transition from a nursery pot to the permanent garden location is a critical moment in the life of an english lavender plant. To minimize stress, the transplanting should ideally take place on a cloudy day or in the late afternoon when the sun is less intense. Before removing the plant from its container, it is helpful to water it thoroughly so that the root ball stays together during the move. If the roots have become “pot-bound” and are circling the inside of the container, gently teasing them outward will help them grow into the surrounding soil.
After the lavender is placed in the hole and the soil is firmed around it, an initial deep watering is necessary to settle the ground and remove any air pockets. For the first few weeks, the moisture level in the soil should be checked daily, as the young roots cannot yet reach water deep in the ground. However, it is equally important to let the surface of the soil dry out between waterings to prevent the development of crown rot. A balance of consistent but careful hydration is the key to a successful start.
During the first year of growth, the primary goal is root development rather than the production of flowers. Many professionals recommend removing any flower spikes that appear during this initial season to allow the plant to focus all its energy on its structural growth. While it may be disappointing to miss the first bloom, this practice results in a much stronger and more productive plant in the years to follow. A light pruning in the late summer can also help encourage a bushy, compact shape from the very beginning.
Establishing a new lavender planting is a long-term investment that requires patience and steady attention during the early stages. Once the plants have survived their first winter and begun to grow vigorously in their second spring, they become much more self-sufficient and drought-tolerant. The effort put into site preparation, careful planting, and initial care will be rewarded with a stunning and fragrant landscape that lasts for a decade or more. Watching a small cutting grow into a magnificent flowering shrub is one of the most satisfying experiences in horticulture.