The process of planting and propagating the bird’s-nest fern is a fascinating journey into the life cycle of one of the most unique epiphytic species. Unlike many common houseplants that can be easily grown from simple stem cuttings, this fern requires a more specialized approach due to its distinct biology. Successful establishment begins with choosing the right environment and understanding how the plant’s root system interacts with its substrate. Whether you are starting with a young nursery plant or attempting to grow new ones from spores, precision and patience are your most valuable tools.
Selecting the appropriate container and medium
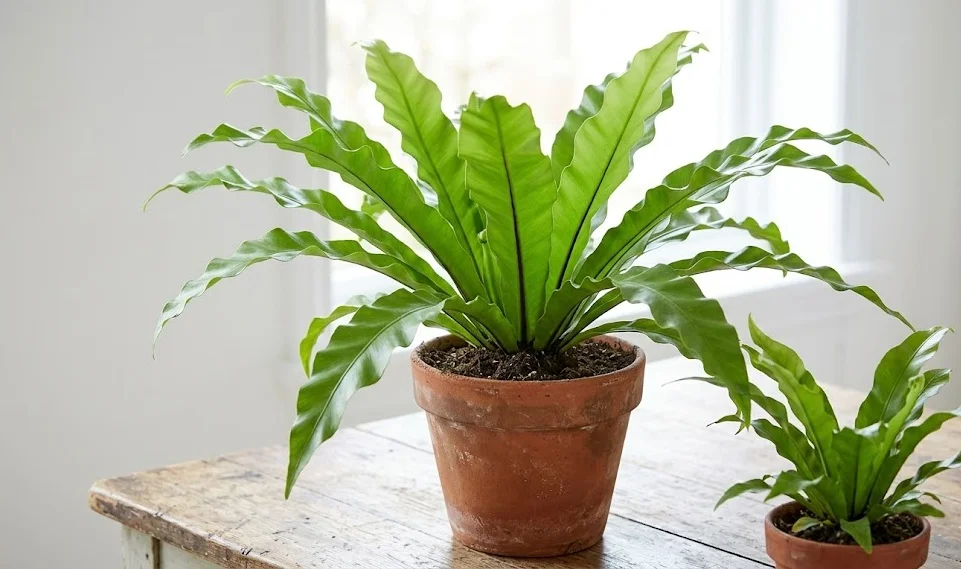
When you are ready to plant your bird’s-nest fern, the choice of container is the first critical decision you will face as a gardener. These ferns have a relatively small and shallow root system compared to the size of their impressive foliage, so a deep pot is rarely necessary. A wider, shallower pot provides better stability for the spreading fronds and allows for more effective air circulation around the root zone. Ensure that the vessel has ample drainage holes to prevent the accumulation of stagnant water at the base.
The potting medium must be specifically tailored to meet the needs of an epiphyte that naturally lives on tree bark. A heavy, peat-based potting soil will quickly become compacted and suffocate the roots, leading to health issues and slow growth. Instead, create a mixture of high-quality orchid bark, coarse perlite, and a small amount of coco coir or chopped sphagnum moss. This combination creates a structure that stays moist enough to hydrate the plant while allowing oxygen to reach the roots at all times.
Before placing the plant in its new home, it is a good idea to moisten the potting medium slightly to help it settle around the roots. This prevents the delicate root hairs from being shocked by a completely dry environment immediately after the transition. Avoid packing the soil down too tightly with your hands, as the goal is to maintain a loose and airy texture within the pot. The natural weight of the plant and the first watering will usually be enough to secure the specimen in its place.
Consider the material of the pot as it relates to your local environment and your personal watering habits as an indoor gardener. Terracotta is excellent for its breathability but may require more frequent watering because it wicks moisture away from the soil. Plastic or glazed ceramic pots retain moisture for much longer, which can be helpful in dry climates but increases the risk of overwatering if you aren’t careful. Choose a style that complements your interior decor while still serving the primary biological needs of your bird’s-nest fern.
More articles on this topic
Best practices for repotting and transition
Repotting a bird’s-nest fern should only be done when it is strictly necessary, as these plants generally dislike having their roots disturbed. Most specimens will only need a larger container every two to three years, or when the roots have completely filled the current pot. The best time to undertake this task is during the early spring when the plant is just beginning its active growth cycle. This timing allows the fern to recover quickly and establish itself in the new medium before the heat of summer arrives.
When removing the plant from its old pot, be extremely gentle to avoid snapping the brittle fronds or damaging the sensitive central nest. If the plant is stuck, you can run a thin knife around the inside edge of the pot to loosen the root ball from the sides. Once the plant is free, inspect the roots for any signs of rot or disease, trimming away any mushy or dark sections with sterilized shears. This is also the perfect time to gently shake away some of the old, depleted soil before placing the plant in its new home.
Set the plant in the new container so that the base of the rosette sits at the same level it was in the previous pot. Burying the central crown too deeply can lead to crown rot, while planting it too high may cause the plant to become unstable and wobbly. Fill in the gaps around the edges with your prepared potting mix, tapping the sides of the pot to help the medium settle into any air pockets. Do not press down on the center of the plant, as this area is incredibly sensitive to physical pressure.
After the repotting process is complete, give the plant a thorough watering to settle the soil and provide immediate hydration to the roots. Place the fern in a shaded, humid spot for a few days to recover from the stress of the move before returning it to its usual location. Avoid fertilizing for at least a month after repotting to allow the roots to heal and adapt to the fresh nutrients in the new soil. With proper care during this transition, your bird’s-nest fern will soon reward you with a flush of vibrant new growth.
More articles on this topic
Mastering the technique of spore propagation
Propagating a bird’s-nest fern from spores is a challenging but deeply rewarding endeavor for any dedicated horticulturalist. Unlike flowering plants that produce seeds, ferns utilize microscopic spores that are found in the sori on the underside of mature fronds. You will recognize these as brown, linear patches that appear as the plant reaches reproductive maturity. Timing is essential, as the spores must be collected when they are ripe but before they have all been released into the air.
To collect the spores, place a mature frond with dark sori over a piece of clean white paper for twenty-four hours in a room without drafts. You will eventually see a fine brown dust on the paper, which is the collection of thousands of individual spores ready for planting. Prepare a small container with a sterilized, finely textured starting medium, such as sifted peat moss or a dedicated seed-starting mix. Lightly mist the surface of the soil so that it is damp but not soaking wet before you begin the sowing process.
Carefully dust the collected spores over the surface of the soil, ensuring an even distribution as much as possible. Do not cover the spores with more soil, as they require light and direct contact with the moist surface to trigger the germination process. Cover the container with a clear plastic lid or a piece of glass to create a mini-greenhouse environment with extremely high humidity. Place the setup in a warm spot with bright, indirect light and wait patiently for the first signs of life to appear on the soil surface.
The first stage of growth will look like a thin layer of green moss or small heart-shaped structures called prothalli. This is the gametophyte stage, where fertilization occurs in the presence of a thin film of water on the surface of the plant. After several weeks or even months, tiny true fern fronds will begin to emerge from the prothalli, signaling the start of the sporophyte stage. Once the young ferns are large enough to handle, they can be carefully transplanted into individual small pots to continue their journey.
Alternative strategies and common pitfalls
While spore propagation is the most natural method, some gardeners attempt to divide very large, mature specimens that have developed multiple centers. This process is inherently risky because the bird’s-nest fern does not naturally form easy-to-separate clumps like some other fern varieties. If you choose to attempt division, use a very sharp, sterilized knife to cut through the root mass while keeping as much of the root system intact as possible. Each section must have its own healthy portion of the central rosette and a functional set of roots to survive independently.
One of the most common pitfalls in planting is using a pot that is far too large for the current size of the fern’s root ball. An oversized container holds much more water than the plant can consume, leading to cold, wet soil that quickly encourages root rot. It is always better to step up the pot size gradually, moving to a container that is only a few centimeters larger in diameter than the old one. This measured approach keeps the soil-to-root ratio balanced and ensures the health of the plant throughout its growth.
Environmental consistency is also vital during the early stages of a young fern’s life, as they are much more sensitive than established adults. Small plants have less stored energy and smaller root systems, making them less resilient to drying out or being exposed to intense light. Providing a stable environment with high humidity will significantly increase the survival rate of your propagated ferns. Many enthusiasts use cloches or specialized growing cabinets to maintain the perfect conditions for their developing nursery stock.
Finally, always remember that propagation is a game of numbers and patience, and not every attempt will be successful. Even professional growers experience losses when working with delicate spores or stressful divisions. Don’t be discouraged if your first few tries don’t yield a forest of new ferns; instead, use each experience to refine your technique and understanding. The satisfaction of seeing a tiny green sprout grow into a magnificent architectural bird’s-nest fern is well worth the effort and dedication.