Starting a new garden project with this elegant perennial requires a clear understanding of its early life stages and growth requirements. Planting and propagation are the most critical phases, as they determine the strength and longevity of the plant’s future development. Whether you are an experienced horticulturist or a passionate hobbyist, getting these initial steps right will make all the difference in your success. A professional approach to these tasks ensures that each new addition to your landscape has the best possible start.
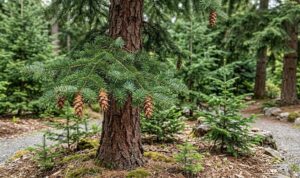
Before you even dig a hole, you must carefully evaluate the environmental conditions of your intended planting site. This species thrives in locations that offer plenty of moisture and a good amount of daily sunlight to fuel its growth. You should look for areas where the soil does not dry out quickly, such as near a pond or in a naturally damp part of the yard. Planning your garden layout with these needs in mind will save you a lot of time and effort in the future.
The quality of your nursery stock or seeds is the next important factor to consider before you begin the planting process. Always choose healthy-looking plants with strong stems and vibrant green foliage, avoiding any that show signs of stress or disease. If you are starting from seed, ensure they come from a reputable source to guarantee a high germination rate. High-quality starting materials are the best investment you can make for a beautiful and thriving garden display.
Timing is everything when it comes to successful planting and propagation in a temperate climate. The best windows for these activities are usually the early spring or the early autumn when temperatures are mild. Planting during these times allows the roots to settle into their new home without the stress of extreme heat or cold. By following a seasonal schedule, you align your gardening activities with the natural rhythms of the plant’s life cycle.
Selecting the perfect site
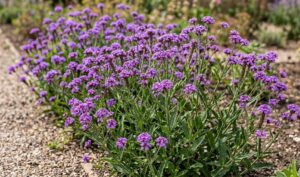
Sunlight is a primary driver of growth for this perennial, so finding a spot with adequate exposure is a top priority. While it can handle a bit of afternoon shade, it will produce the best and most vibrant flowers in full sun. Too much shade can lead to leggy growth and fewer flower spikes, which diminishes the plant’s overall impact. Observe how the shadows move across your garden throughout the day to find the most luminous locations.
More articles on this topic
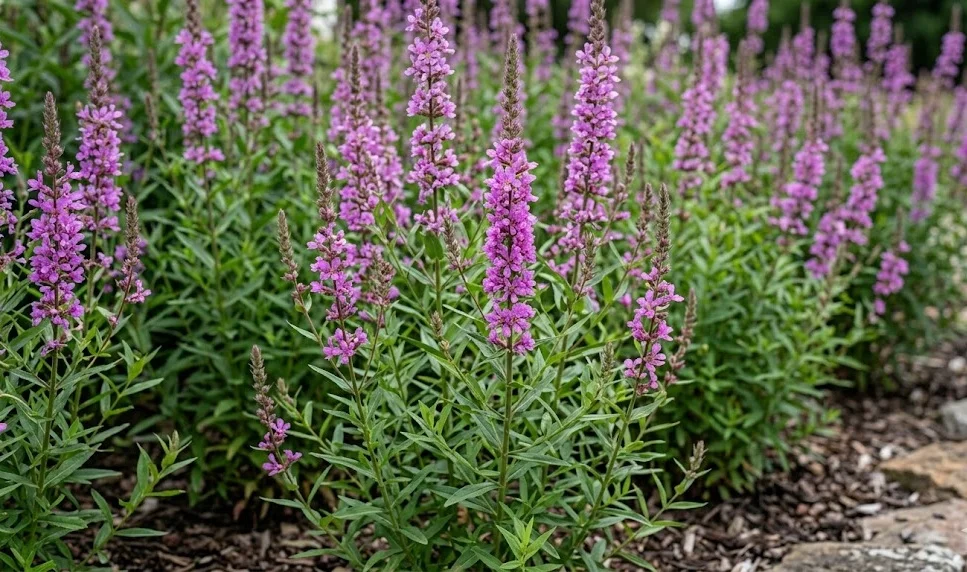
Soil moisture is equally important, as this plant is naturally adapted to damp environments like meadows and riverbanks. If your chosen site tends to dry out during the summer, you will need to commit to a regular and thorough irrigation schedule. Alternatively, you can improve the soil’s water-holding capacity by mixing in plenty of organic matter before you plant. Finding the right balance between light and moisture is the secret to a happy and healthy wand loosestrife.
Air circulation is an often-overlooked factor that plays a significant role in preventing common foliage problems later in the season. You should avoid planting in stagnant corners where the air does not move freely around the stems and leaves. Proper spacing between plants is the easiest way to ensure that each one has enough room to breathe and grow. A professional garden design always takes into account the mature size of each plant to avoid overcrowding issues.
Accessibility is a final practical consideration when choosing where to place your new perennial additions. You will want to be able to reach the plants easily for tasks like watering, mulching, and the eventual deadheading of spent flowers. Placing them near a garden path or within easy reach of a hose will make your maintenance routine much more enjoyable. Think about how the plants will look from your favorite viewing spots, such as a patio or a window.
Professional planting techniques
When it is time to put your plants in the ground, start by digging a hole that is twice as wide as the root ball. This gives the roots plenty of loosened soil to grow into as they begin to expand in their new environment. You should avoid digging a hole that is too deep, as the crown of the plant should be level with the soil surface. Proper hole preparation is a simple step that has a major impact on how quickly the plant becomes established.
More articles on this topic
Mixing a bit of high-quality compost into the bottom of the planting hole provides an immediate boost of nutrients for the young plant. This organic material also helps to improve the structure of the soil, making it easier for the roots to penetrate. You can also add a small amount of slow-release fertilizer if your soil is particularly poor in minerals. These small additions create a nutrient-rich “welcome mat” that encourages rapid and healthy root development.
Gently remove the plant from its container and take a moment to inspect the roots for any signs of being pot-bound. If the roots are circling tightly, you can lightly tease them outward to encourage them to grow into the surrounding soil. Place the plant in the center of the hole and fill it back in with a mixture of native soil and compost. Firm the soil down gently with your hands to remove any large air pockets that could dry out the roots.
Immediately after planting, give the area a deep and thorough watering to settle the soil around the root system. This initial hydration is critical for helping the plant recover from the stress of being moved and starting its new life. You should continue to water frequently for the first few weeks, especially if the weather is warm and dry. Applying a layer of mulch around the base will help to keep that vital moisture where it belongs.
Propagation by seed
Growing wand loosestrife from seed is an economical and rewarding way to produce a large number of plants for your garden. You can collect your own seeds from existing plants in late summer once the seed pods have turned brown and dry. Store them in a cool, dry place until you are ready to start them, which is usually in the late winter or early spring. Starting your own seeds gives you complete control over the growing process from the very beginning.
To get a head start on the growing season, you can sow the seeds indoors in trays filled with a high-quality seed-starting mix. The seeds are quite small, so they only need a very light covering of soil or can even be pressed gently into the surface. Keep the trays in a warm, bright location and ensure the soil remains consistently moist but not soaking wet. With the right conditions, you should see the first tiny green shoots appearing within a couple of weeks.
Once the seedlings have developed their first set of true leaves, they can be carefully moved into individual pots to continue growing. This step gives each young plant its own space and prevents the roots from becoming tangled with their neighbors. Continue to provide plenty of light and keep the soil moist as the plants grow larger and stronger. Hardening off the seedlings by gradually exposing them to outdoor conditions is essential before they are moved to the garden.
Direct sowing into the garden is also an option if you prefer a more natural and less labor-intensive approach to propagation. You can scatter the seeds in a prepared bed in the autumn, allowing them to go through a natural winter cooling period. This process, known as cold stratification, can help to improve the germination rates for many types of perennial seeds. Mark the area clearly so you do not accidentally pull up the young seedlings when you are weeding in the spring.
Propagation by division
Division is the most reliable method for creating exact copies of your favorite plants while also revitalizing older clumps. The best time to divide wand loosestrife is in the early spring just as the new growth is starting to show. You should lift the entire root ball out of the ground using a sturdy garden fork or a sharp spade. Working carefully will minimize damage to the root system and ensure that each division has a healthy start.
Using a sharp knife or your spade, cut the root ball into several smaller sections, making sure each one has plenty of roots and a few shoots. You can often simply pull the clump apart by hand if the soil is loose and the plant is not too old. This process of splitting the plant encourages new growth and prevents the center of the clump from becoming woody and unproductive. Division is a great way to keep your garden looking fresh and full of life year after year.
Replant the new divisions immediately into their prepared spots, following the same planting techniques as you would for a new nursery plant. It is a good idea to have your holes ready before you start the division process to keep the roots from drying out. Water the new plants thoroughly and keep a close eye on them as they begin to establish themselves in their new locations. You will be surprised at how quickly these divisions grow into full-sized, blooming plants.
This method of propagation is not only practical but also deeply satisfying as it allows you to share your garden’s success with others. Many gardeners enjoy swapping divisions with friends and neighbors to increase the variety of plants in their own landscapes. It is a sustainable and community-focused way to garden that has been practiced for generations. Regular division is a key part of long-term perennial care that ensures your garden remains vibrant and healthy.