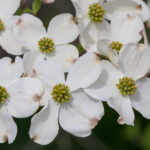
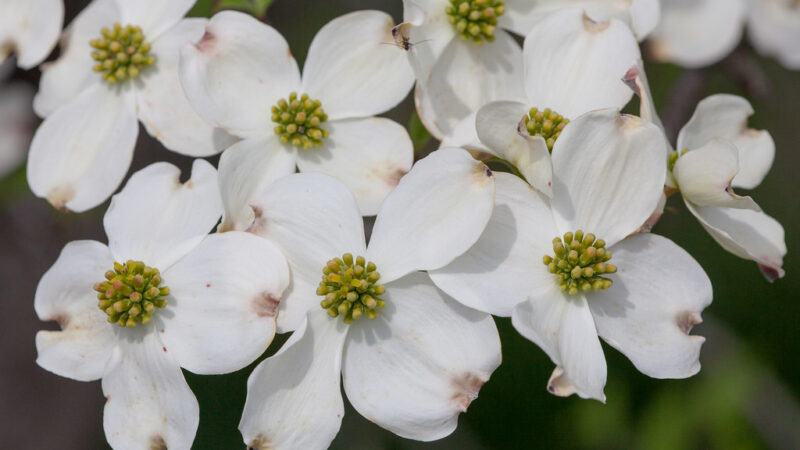
Planting and propagating the flowering dogwood
Successfully establishing a flowering dogwood begins with proper planting techniques, which create the foundation for a healthy and long-lived tree. This process involves more than simply digging a hole; it requires careful consideration of timing, soil preparation, and the handling of the young tree to minimize stress. Likewise, propagation offers a rewarding way to create new trees from an existing specimen, a practice that can be achieved through several methods, each with its own specific requirements and level of difficulty. Understanding these fundamental processes is essential for anyone wishing to cultivate this iconic ornamental tree, ensuring its graceful beauty can be enjoyed for generations.
Optimal timing and site preparation
The timing of planting is a critical factor that can significantly influence the successful establishment of a flowering dogwood. The two best windows for planting are in the spring, after the last frost has passed, and in the early autumn, at least six to eight weeks before the ground freezes. Spring planting allows the tree to utilize the entire growing season to develop its root system, while autumn planting takes advantage of the warm soil and cooler air temperatures, which reduces transplant shock and encourages root growth before the tree enters dormancy. Planting during the heat of mid-summer should be avoided, as the stress from high temperatures and potential drought can be too much for a young tree to overcome.
Once the optimal time has been chosen, thorough site preparation is paramount. This begins with selecting a location that meets the dogwood’s needs for partial shade, particularly protection from the harsh afternoon sun. The chosen spot should also have excellent drainage, as dogwoods are highly intolerant of waterlogged conditions. To assess drainage, one can dig a hole about a foot deep and fill it with water; if the water has not drained away within 12 hours, the site has poor drainage and is not suitable for a dogwood without significant modification, such as creating a raised bed or installing a French drain.
Preparing the soil itself is the next crucial step. Flowering dogwoods thrive in acidic soil that is rich in organic matter. It is highly recommended to perform a soil test to check the pH, aiming for a range between 5.5 and 6.5. If the soil is too alkaline, amendments such as elemental sulfur or sphagnum peat moss can be incorporated to lower the pH. Regardless of the initial pH, amending the soil with a generous amount of organic material like compost, aged pine bark, or leaf mold is always beneficial. This improves the soil’s structure, enhances its ability to hold moisture while still draining well, and provides a slow, steady source of nutrients for the young tree.
The final stage of preparation involves digging the planting hole. A common mistake is to dig the hole too deep and not wide enough. The hole should be excavated to be no deeper than the height of the root ball, but at least two to three times as wide. This wide, shallow basin allows the roots to grow outward into loosened, amended soil, rather than being confined within a small, compacted hole. The soil on the sides of the hole should be roughened with a shovel or fork to prevent glazing, especially in clay soils, which can create a barrier that the roots struggle to penetrate.
More articles on this topic
The planting process from start to finish
When ready to plant, the tree should be handled with care to minimize damage to the root system. If the dogwood is in a container, gently slide it out rather than pulling it by the trunk. Inspect the root ball for any circling or girdling roots, which are common in container-grown plants. If present, these roots must be addressed by carefully teasing them apart with your fingers or, if necessary, making a few vertical cuts through the outer layer of the root ball with a sharp knife. This encourages the roots to grow outward into the new soil instead of continuing to circle and potentially choke the tree later in life.
Positioning the tree in the hole correctly is vital for its long-term health. Place the root ball in the center of the prepared hole and use a straight edge, like a shovel handle, laid across the hole to check the depth. The top of the root ball should be level with or, ideally, slightly above the surrounding ground level. This practice ensures that the root flare—the point where the trunk begins to widen into the root system—remains exposed to the air after the soil settles. Burying the root flare is a leading cause of stress, disease, and failure in newly planted trees.
Once the tree is positioned correctly, begin backfilling the hole with the amended native soil. It is important to use the soil that was excavated from the hole, improved with organic matter, rather than replacing it entirely with a different soil mix. This encourages the roots to grow beyond the planting hole into the surrounding native soil. Add the soil back in stages, gently tamping it down with your hands to eliminate large air pockets. Avoid compacting the soil too firmly, as this can impede water infiltration and root growth.
After the hole has been completely backfilled, the final steps are to water the tree thoroughly and apply mulch. Create a shallow basin or “berm” of soil around the edge of the planting hole to help hold water and direct it to the root ball. Water the newly planted tree slowly and deeply, allowing the water to saturate the entire root zone. Finally, apply a two- to three-inch layer of organic mulch over the planting area, keeping it several inches away from the trunk. This mulch layer is crucial for retaining soil moisture, regulating temperature, and preventing weed competition as the young dogwood becomes established.
More articles on this topic
Propagation from softwood cuttings
Propagating flowering dogwoods from softwood cuttings is a popular and effective method for creating a new tree that is genetically identical to the parent plant. The best time to take these cuttings is in the late spring or early summer, typically May or June, when the new growth is still flexible but has begun to mature slightly. The ideal cutting should be taken from the tip of a healthy, vigorous branch; it should be firm enough not to be floppy but should still snap when bent sharply. The cuttings are best taken in the cool of the morning when the parent plant is fully hydrated.
Preparing the cuttings requires careful attention to detail to maximize the chances of success. Each cutting should be about four to six inches long and should be taken from the current season’s growth. Use a sharp, sterilized knife or pruners to make a clean cut just below a leaf node (the point where a leaf attaches to the stem). Remove the leaves from the lower half of the cutting to reduce moisture loss through transpiration. If the remaining leaves at the top are very large, they can be cut in half to further conserve moisture.
To encourage root development, the basal end of the cutting should be dipped in a rooting hormone. This powdered or liquid product contains auxins that stimulate the formation of adventitious roots. After dipping the cutting in the hormone, gently tap off any excess. The cutting is then ready to be inserted into a rooting medium. A sterile, well-draining mix, such as a combination of perlite and peat moss or coarse sand, provides the ideal environment for root formation, offering both moisture retention and excellent aeration.
Creating a humid environment is the final and most critical step for rooting softwood cuttings. Insert the prepared cuttings into a pot or tray filled with the moistened rooting medium, ensuring the leaf nodes where leaves were removed are buried. Cover the pot with a clear plastic bag or a propagation dome to maintain high humidity around the cuttings, which prevents them from wilting and drying out before they can form roots. Place the container in a warm location with bright, indirect light. It is important to check the cuttings periodically for moisture and to provide some ventilation to prevent fungal growth. Roots typically begin to form within six to eight weeks.
Growing from seed and other methods
Growing a flowering dogwood from seed is a rewarding, albeit lengthy, process that allows for the observation of the entire life cycle. The first step is to collect the bright red berries, or drupes, in the autumn as soon as they ripen. The seeds inside have a fleshy outer pulp that contains germination inhibitors, so this pulp must be removed completely. This can be done by mashing the berries and washing them in water; viable seeds will typically sink to the bottom while the pulp and non-viable seeds float.
Once cleaned, dogwood seeds require a period of cold, moist stratification to break their natural dormancy. This process mimics the natural conditions of winter. The seeds should be mixed with a moist medium like sand or peat moss, placed in a plastic bag or container, and stored in a refrigerator (at around 40°F or 4°C) for a period of 90 to 120 days. It is crucial to ensure the medium remains moist but not waterlogged throughout this period to prevent the seeds from either drying out or rotting.
After the stratification period is complete, the seeds are ready to be sown in the spring. They can be planted in pots filled with a quality seed-starting mix or directly into a prepared seedbed outdoors. The seeds should be planted about half an inch deep and the soil kept consistently moist. Germination can be slow and often erratic, sometimes taking several weeks or even months to occur. Once the seedlings have emerged and developed a few sets of true leaves, they can be carefully transplanted into individual pots to continue growing until they are large enough to be planted in their permanent location.
Beyond seeds and cuttings, other propagation methods exist, though they are less commonly used by home gardeners. Layering is one such technique, where a low-hanging branch is wounded and then buried in the soil while still attached to the parent plant. Over time, roots will form at the wounded section, and the new plant can then be severed from the parent. Grafting is another method, often used in commercial production to join a desirable cultivar (the scion) onto a sturdy rootstock. This ensures the resulting tree has the exact characteristics of the cultivar, such as a specific flower color, and can often lead to a plant that flowers at a younger age.
📷 Flickr / Szerző: David Illig / Licence: CC BY-NC-SA 2.0