Planting and propagating the clivia
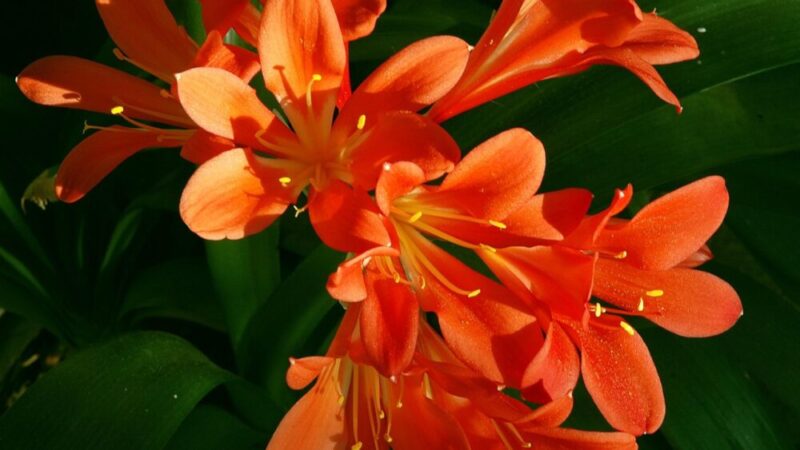
Planting a new clivia or propagating an existing one is a deeply rewarding horticultural endeavor, offering a direct way to expand a collection or share these magnificent plants with others. The process, while not overly complicated, requires a degree of care and precision to ensure success, particularly concerning the handling of the plant’s sensitive, fleshy roots. When planting a new clivia, the primary goal is to provide it with a stable and nurturing environment that mimics its natural habitat, focusing on excellent drainage and a suitable container. This initial setup is the foundation upon which the plant will build its strength for years to come, eventually rewarding the grower with its iconic, brilliant blooms.
The journey begins with the selection of the right container, a choice that has significant implications for the long-term health of the plant. A terracotta or clay pot is often recommended for clivias due to its porous nature, which allows for better air exchange and helps the soil to dry out more evenly between waterings. This characteristic is particularly beneficial in preventing the waterlogged conditions that can lead to root rot. Regardless of the material, it is absolutely essential that the pot has at least one substantial drainage hole at the bottom to allow excess water to escape freely.
Equally as important as the pot is the growing medium used to fill it. Clivias thrive in a coarse, well-aerated mix that provides exceptional drainage while still retaining some moisture. Standard potting soil is generally too dense and will hold too much water, suffocating the roots. A far better option is a commercial orchid mix or a custom blend created by combining high-quality potting soil with amendments like pine bark fines, perlite, or coarse sand. This creates a light, airy structure that allows the roots to breathe and grow without the constant threat of rot.
When you are ready to plant, the technique itself is straightforward but requires a gentle touch. Begin by placing a small amount of the prepared potting mix in the bottom of the new pot. Carefully position the clivia in the center of the pot, ensuring that the point where the leaves emerge from the base is level with or slightly above the rim of the pot. Planting it too deeply can lead to crown rot. Gradually fill in around the root ball with your potting mix, gently firming it down to eliminate any large air pockets without compacting the soil too heavily.
Choosing the right container and soil
The selection of an appropriate container is a critical first step in establishing a healthy clivia. The size of the pot is paramount; it should be just large enough to comfortably accommodate the plant’s root system with a little room for growth. A common mistake is to choose a pot that is too large, believing it will give the plant more space to expand. However, an oversized pot holds a large volume of soil that stays wet for too long after watering, creating a high-risk environment for the development of fungal diseases and root rot. A snug fit is always preferable, as clivias bloom best when they are slightly pot-bound.
More articles on this topic
The material of the pot also plays a significant role in managing moisture levels. As previously mentioned, unglazed terracotta is an excellent choice because its porous walls allow moisture and air to pass through, promoting healthier roots by preventing the soil from becoming stagnant and overly saturated. Plastic pots are also acceptable, but they are non-porous and will retain moisture for longer. If you use a plastic pot, you must be especially vigilant with your watering practices and ensure the potting mix is exceptionally well-draining to compensate.
The foundation of a thriving clivia is its potting medium, which must be tailored to its specific needs. The goal is to replicate the loose, organic-rich leaf litter of its native forest floor environment. An ideal mix for clivias should be chunky, airy, and quick-draining. You can achieve this by creating a custom blend, with a good starting recipe being one part high-quality peat-based potting soil, one part coarse orchid bark or pine bark fines, and one part perlite or coarse horticultural sand. This combination provides structure, aeration, and just the right amount of moisture retention.
Before planting, it’s a good practice to prepare the pot and soil. Ensure the pot is clean to prevent the transfer of any diseases from previous inhabitants. If you are reusing a pot, scrub it thoroughly with hot, soapy water. Some gardeners like to place a piece of mesh or a coffee filter over the drainage hole to prevent the coarse potting mix from washing out during watering. Moisten the potting mix slightly before you begin planting, as this makes it easier to handle and helps it to settle more evenly around the delicate roots.
Step-by-step guide to planting a clivia
The process of planting a clivia should be approached with patience and care to minimize stress on the plant. Begin by carefully removing the clivia from its nursery pot or original container, turning it on its side and gently squeezing the pot to loosen the root ball. Avoid pulling the plant out by its leaves, as this can cause damage. Once removed, take a moment to inspect the root system. Healthy roots should be firm, plump, and whitish-yellow in color. Using a sterile pair of scissors or pruners, carefully trim away any roots that are dark, mushy, or appear dead or damaged.
More articles on this topic
Next, prepare your chosen pot by filling the bottom third with your prepared well-draining potting mix. Create a small mound of soil in the center of the pot on which you will rest the base of the plant. This helps to ensure good contact between the roots and the soil and allows you to position the plant at the correct depth. Carefully spread the roots out over this mound, encouraging them to grow outwards into the new soil rather than continuing to circle in on themselves.
With the plant held in place, begin to backfill the pot with your potting mix, adding it around the sides of the root ball. As you add the soil, gently tap the sides of thepot to help the mix settle around the roots and eliminate any large air pockets. It is important not to compact the soil too firmly, as this would defeat the purpose of using a well-aerated mix. Continue filling until the soil level is about an inch below the rim of the pot, ensuring the base of the plant (the crown) is not buried beneath the soil surface.
After the clivia is securely planted, the final step is to water it in lightly. This initial watering helps to settle the soil further and provides the roots with the moisture they need to begin acclimating to their new environment. Do not saturate the soil completely at this stage. After this initial watering, place the newly potted plant in a location with bright, indirect light and refrain from watering again until the top few inches of the soil have dried out. Avoid fertilizing for at least a month to allow the roots time to recover and establish themselves.
Propagation through division
Propagation by division is the most common and reliable method for creating new clivia plants, and it is best performed on a mature, well-established plant that has developed multiple offshoots, or “pups.” These offshoots grow from the base of the mother plant and are essentially new, smaller plants that are still attached to the main root system. The ideal time to divide a clivia is in the spring, right after it has finished its flowering cycle, as this gives the new divisions the entire growing season to become established before winter.
To begin the process, you must first carefully remove the entire plant from its pot. This allows you to get a clear view of the root system and the points where the offshoots are attached. Gently brush or wash away some of the old potting mix to better expose the connection between the mother plant and the pups you wish to separate. Select offshoots that are of a reasonable size, ideally with at least three or four leaves of their own, as these will have the best chance of survival once they are on their own.
The actual separation requires a sharp, sterile knife or blade. Make a clean, decisive cut through the fleshy rhizome that connects the pup to the mother plant, ensuring that the division you are taking has a good portion of its own healthy roots attached. This is the most critical part of the process; a division with few or no roots is very unlikely to survive. Handle the roots with care, as they are brittle and can snap easily. Once separated, you can repot the mother plant back into its original container or a slightly smaller one, filling in with fresh potting mix.
Each new division should be planted into its own small pot, one that is just large enough to accommodate its root system. Use the same well-draining potting mix that you would for a mature clivia. Plant the division at the same depth it was growing previously, ensuring the crown is not buried. Water it sparingly and place it in a warm location with bright, indirect light. Do not be tempted to overwater the new divisions, as their small root systems are particularly vulnerable to rot. It may take a year or two for the new plant to become established enough to produce its first flowers.
Growing clivia from seed
Growing clivia from seed is a journey of patience, offering a unique and rewarding experience for the dedicated gardener, though it is a much slower process than propagation by division. The process begins with pollination, which can occur naturally if you have multiple, genetically different clivia plants flowering at the same time, or it can be done manually. To hand-pollinate, use a small, soft brush to transfer pollen from the anther of one flower to the stigma of a flower on a different plant. Successful pollination will result in the base of the flower swelling and developing into a large, berry-like seed pod, which will slowly ripen over many months, typically turning from green to a vibrant red or yellow.
Once the seed pods are fully colored and slightly soft to the touch, they are ready for harvesting. This can take anywhere from nine months to a year, so patience is absolutely essential. Carefully cut the ripe pods from the plant and break them open to reveal the large, pearly seeds inside, which are enclosed in a fleshy pulp. It is crucial to clean the seeds thoroughly, removing all of the surrounding pulp, as it contains germination inhibitors that can prevent the seeds from sprouting. Gently wash the seeds in water and peel off any remaining membrane.
Clivia seeds should be sown as fresh as possible, as they do not store well and their viability decreases rapidly. Prepare a shallow tray or pot with a sterile, well-draining seed-starting mix, such as a combination of perlite and peat moss. Lightly press the seeds into the surface of the mix, leaving a portion of each seed exposed to the light, as this can aid in germination. Do not bury the seeds completely. The seed has a small dark spot, or “eye,” from which the root will emerge; some gardeners prefer to place this eye facing downwards or sideways into the medium.
After sowing, moisten the mix gently with a fine spray and cover the container with a clear plastic dome or bag to maintain high humidity. Place the container in a warm location with bright, indirect light. Germination can be slow and erratic, taking anywhere from one to six months. During this time, ensure the medium remains consistently moist but not waterlogged. Once the seedlings have germinated and developed their first true leaf, the cover can be removed. The young plants will grow very slowly, and it can take anywhere from three to six years for a seed-grown clivia to reach maturity and produce its first flower.

