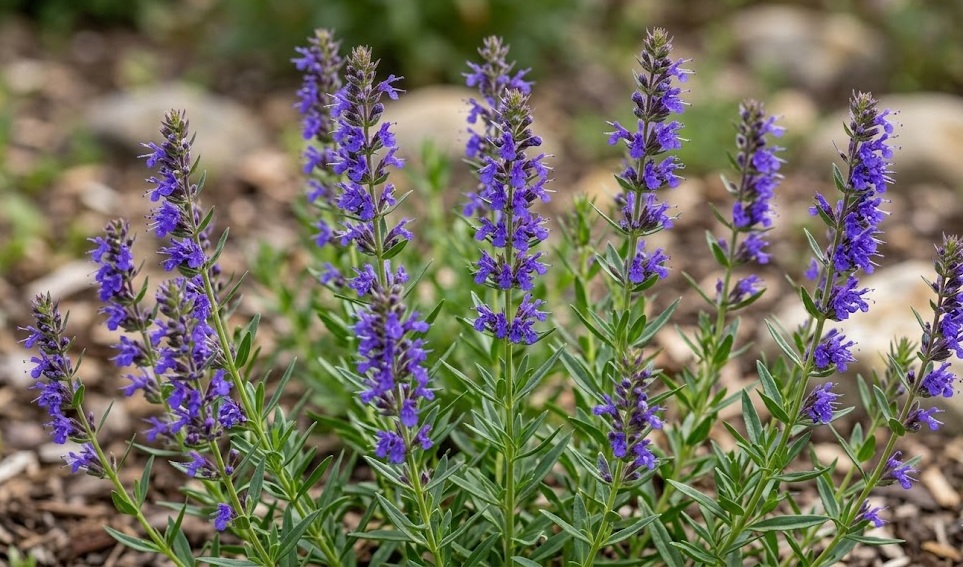
Successful establishment of a hyssop colony begins with a precise strategy for planting that respects the biological requirements of the species. This herb is remarkably versatile, yet it demands specific environmental conditions during its early stages to ensure long-term survival. Establishing a strong root system is the primary goal for any new planting, as this provides the foundation for drought resistance and winter hardiness. Careful attention to detail during the initial weeks will pay significant dividends as the plant matures and begins to produce its signature aromatic foliage.
Site selection is the first critical step in the planting process, and it cannot be overlooked if one desires professional results. Hyssop requires a location that receives full sun for the majority of the day to facilitate optimal photosynthesis and oil production. The ground must be cleared of all perennial weeds and competitive vegetation that could overshadow the young herbs. Preparing the site well in advance allows the soil to settle and creates a clean environment for the delicate roots of the new plants.
When considering the timing for planting, it is best to wait until the danger of hard frost has passed and the soil has begun to warm. In most temperate climates, this window opens in mid to late spring, providing a long growing season for the plants to become established. Planting during a period of mild, overcast weather can help reduce transplant shock and allow the herb to adjust to its new surroundings. Avoid planting during extreme heatwaves, as the high transpiration rates can quickly overwhelm a young root system.
Spacing between individual plants should be calculated based on the final expected size of the mature herb, which can reach up to sixty centimeters in width. Providing approximately forty to fifty centimeters of space between specimens ensures adequate airflow and prevents the buildup of humidity within the canopy. Crowded conditions can lead to poor light penetration and increase the risk of fungal diseases affecting the lower foliage. A well-spaced garden not only looks more professional but also promotes the health and longevity of every individual plant.
Seed starting techniques
Growing hyssop from seed is a cost-effective method that allows for the production of a large number of plants for extensive garden projects. The seeds are small and require light to germinate, so they should be sown on the surface of the growing medium or covered very lightly. Professional growers often start seeds indoors in late winter to give the plants a head start before the outdoor growing season begins. Using a high-quality, sterile seed-starting mix prevents early issues with damping-off and other soil-borne pathogens.
More articles on this topic
Maintaining a consistent temperature of around twenty degrees Celsius will encourage uniform germination within two to three weeks. A heat mat can be used to provide gentle bottom heat, which often speeds up the process and improves the overall success rate. Once the seedlings emerge, they require bright light to prevent them from becoming thin and weak as they search for a light source. A south-facing window or specialized grow lights can provide the necessary intensity for healthy, compact growth during these early weeks.
Watering seedlings must be done with extreme care to avoid disturbing the delicate roots or creating overly saturated conditions. Using a fine mist or watering from the bottom allows the medium to absorb moisture without compacting the surface around the tiny plants. As the seedlings develop their first true leaves, a very weak solution of liquid seaweed or organic fertilizer can be applied. This early boost provides the necessary minerals for building strong cellular structures and preparing the plants for the upcoming transplanting process.
Thinning the seedlings is a necessary step to ensure that the strongest individuals have enough space to develop without competition. Select the most robust plants and remove any smaller or weaker neighbors using a pair of sharp scissors to avoid disturbing the roots of the keepers. This process may seem harsh, but it is essential for producing high-quality nursery stock that will thrive once moved to the garden. Hardening off the young plants by gradually exposing them to outdoor conditions over a week is the final step before permanent planting.
Vegetative propagation methods
For those who wish to maintain the specific characteristics of a favorite hyssop specimen, vegetative propagation is the most reliable method. Softwood cuttings taken in late spring or early summer root quickly and easily under the right conditions. Select non-flowering shoots that are approximately ten centimeters long and remove the leaves from the bottom half of the stem. Using a rooting hormone can increase the success rate, although hyssop often roots well even without supplemental aids.
More articles on this topic
The prepared cuttings should be placed in a light, well-draining rooting medium such as a mix of perlite and peat moss. Keeping the environment humid by using a plastic cover or a specialized propagation chamber prevents the cuttings from wilting before roots have formed. It is important to keep the medium moist but never soggy, as excess water will cause the base of the stems to rot. Within four to six weeks, new growth should be visible, indicating that a functional root system has successfully developed.
Layering is another effective technique that takes advantage of the hyssop’s natural tendency to root where stems touch the ground. This low-stress method involves pinning a low-growing branch to the soil and covering a small section with earth. Over time, roots will emerge from the buried nodes while the branch is still receiving nutrients from the mother plant. Once the new root system is well-established, the new plant can be severed from the parent and moved to its permanent location.
Division of mature clumps is best performed in early spring as the plant is just beginning to emerge from its winter dormancy. Dig up the entire root ball and carefully separate the crown into several smaller sections, ensuring each piece has both roots and healthy buds. This process not only provides new plants but also rejuvenates the original specimen by removing older, less productive wood. Replant the divisions immediately and water them thoroughly to help settle the soil around the newly exposed roots.
Soil preparation and spacing
The physical structure of the soil must be addressed before any planting occurs to ensure that hyssop has the drainage it requires. If the native soil is heavy clay, it is highly recommended to incorporate coarse sand or fine grit to improve the macropore space. Raising the planting bed slightly above the surrounding grade can also assist with drainage in areas prone to seasonal wetness. These structural modifications are permanent and provide the best possible environment for the life of the herb.
Applying a light layer of organic compost to the surface of the soil provides a slow-release source of nutrients without overwhelming the plant. Hyssop does not require highly fertile conditions, but a baseline of organic matter supports beneficial soil biology and improves moisture retention. Work the compost into the top few centimeters of the soil to ensure it is available to the young roots as they expand. Avoid deep tilling, which can disrupt the natural soil horizons and bring dormant weed seeds to the surface.
Determining the layout of the garden requires a balance between aesthetic goals and the practical needs of the plants for space and light. Creating a grid or a staggered pattern can help maximize the use of available space while ensuring every herb has room to grow. Marking the planting holes in advance allows the gardener to visualize the final result and make adjustments before the first plant is in the ground. Consistency in spacing makes future maintenance tasks like weeding and pruning much more efficient and straightforward.
The depth at which the hyssop is planted should be identical to the depth it was growing in its original container. Burying the stem too deeply can lead to rot, while planting too shallowly may expose the sensitive upper roots to desiccation. Once the plant is in place, firm the soil gently around the base to remove any large air pockets that could dry out the roots. Finishing the process with a thorough watering settles the earth and establishes the initial hydraulic connection between the plant and the soil.