Starting a new patch of chives is one of the most rewarding projects for any gardener looking to expand their herb collection. Whether you are building a dedicated herb spiral or tucking them into a mixed vegetable bed, the process of planting and propagation is straightforward and highly successful. These versatile plants can be established through several different methods, each offering its own set of advantages for the home grower. By following professional planting techniques, you ensure that your new herbs have the best possible start in their permanent home.
Selecting the right time to begin your planting journey is the first step toward a successful harvest. In most temperate climates, the early spring months provide the ideal balance of cool temperatures and increasing daylight for young plants. You want to wait until the danger of heavy frost has passed, though chives are quite hardy and can handle a light chill. Planting during this window allows the root system to establish itself before the intense heat of the summer arrives.
If you prefer to start your garden in the late summer or early autumn, this is also a viable option for many regions. Planting in the fall gives the herbs a chance to settle in during the cooler months, often resulting in a very early and vigorous start the following spring. However, you must ensure that the plants have enough time to develop a strong root base before the ground freezes solid for the winter. Success with either timing depends on your ability to provide consistent care during the critical establishment phase.
Regardless of which propagation method you choose, the preparation of the planting site remains a universal requirement. You should choose a location that receives ample sunlight and has been cleared of any competing vegetation or large stones. Incorporating a bit of organic matter will provide the nutrients necessary for the young plants to thrive from day one. By creating a welcoming environment, you significantly increase the chances of your chives becoming a permanent and productive fixture in your garden.
Sowing techniques for success
Starting chives from seed is an economical way to grow a large number of plants, though it does require a bit more patience than using established starts. You can choose to sow the seeds directly into the garden soil or start them indoors in trays to get a head start on the season. If sowing directly, wait until the soil has warmed up to at least fifteen degrees Celsius to ensure consistent germination. Scatter the small black seeds thinly and cover them with just a quarter-inch of fine soil.
More articles on this topic
When starting seeds indoors, use a high-quality seed-starting mix that is light and well-aerated to prevent damping off. Place your trays in a warm spot with plenty of light, or use a heat mat to maintain a steady temperature for the developing embryos. You should see the first tiny green loops emerging from the soil within two to three weeks of planting. Keeping the soil surface moist but not saturated is the professional secret to achieving a high germination rate with alluer species.
Thinning your seedlings is a necessary step that many beginner gardeners find difficult to perform. If too many seeds germinate in a small area, they will compete for light and nutrients, resulting in weak and spindly plants. Once the seedlings are a few inches tall, remove the smaller ones to leave a gap of about six inches between the strongest individuals. This space allows each plant to develop into a full, healthy clump without being crowded out by its neighbors.
Transplanting indoor-grown seedlings to the garden requires a period of “hardening off” to prevent shock. Gradually expose the young plants to outdoor conditions over the course of a week, starting with just an hour or two in a sheltered spot. This process allows the cell walls of the plants to thicken and adapt to the wind and direct sunlight of the open garden. Once they are acclimated, you can move them into their final positions with confidence that they will continue to grow strongly.
Root division methods
Division is the fastest and most reliable way to propagate chives if you or a neighbor already have an established plant. This professional technique involves physically separating a large, mature clump into several smaller, independent sections. It is best performed in the early spring just as the new growth begins to show, or in the early fall after the summer heat has dissipated. Dividing your plants every few years actually improves their overall health by preventing the center of the clump from becoming congested.
More articles on this topic
To begin the process, use a garden spade or fork to lift the entire clump out of the ground, taking care to preserve as much of the root mass as possible. Shake off the excess soil so you can clearly see the structure of the individual bulbs and the interlaced root system. You can usually pull the clump apart by hand, or use a sharp knife to slice through the roots if they are particularly dense. Each new section should have at least five to ten healthy green shoots and a substantial portion of roots attached.
Replanting these divisions immediately is essential to prevent the delicate roots from drying out in the air. Dig a hole for each new section that is large enough to accommodate the roots without bending or crowding them. Place the plant at the same depth it was growing previously and firm the soil around it to remove any large air pockets. A generous watering right after planting will help the roots make good contact with the new soil and begin the recovery process.
The beauty of division is that the new plants are genetically identical to the original and will reach a harvestable size much faster than seeds. You can often begin taking light harvests from divided plants within just a few weeks of their relocation. This method is also a great way to share your garden’s bounty with friends or to fill in empty spots in other parts of your landscape. Professional gardeners value division for its efficiency and the guaranteed results it provides in maintaining a productive herb bed.
Site preparation and location
Choosing the right location for your chives is a decision that will impact their performance for many years to come. These herbs are not particularly picky, but they do have preferences that will lead to more vibrant growth and better flavor. A spot that receives full sun for at least six hours a day is ideal, although they can tolerate partial shade in hotter climates. Understanding the path of the sun through your garden during different seasons will help you pick the perfect permanent home.
The soil at your chosen site should be well-drained and relatively rich in nutrients to support the heavy leaf production expected of this herb. If your garden has heavy clay or very sandy soil, you should amend the area with compost or well-rotted manure before planting. This improves the structure of the earth, allowing it to hold onto moisture while still letting the excess drain away. Taking the time to build good soil now will save you a lot of effort in fertilizing and troubleshooting later on.
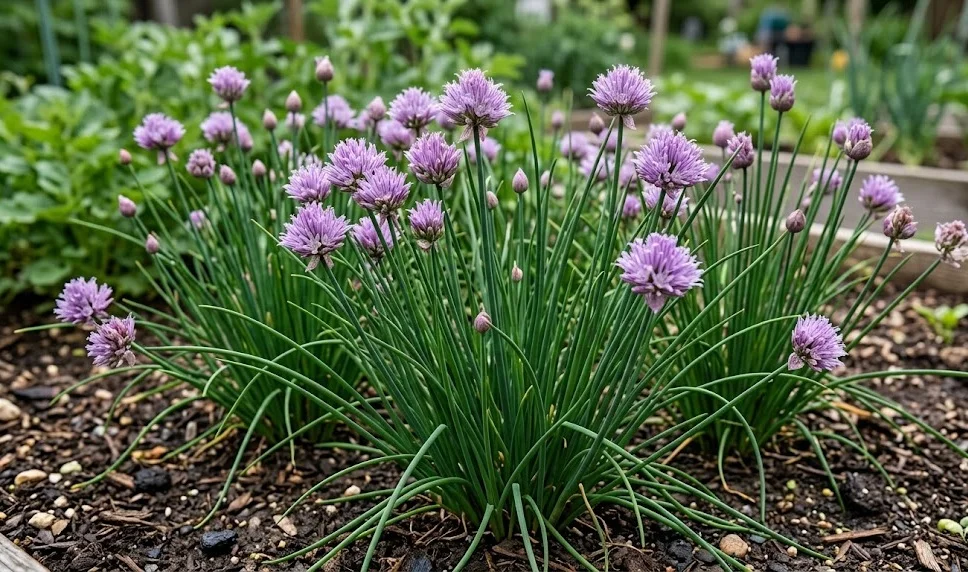
Consider the proximity of your herb bed to your kitchen or outdoor cooking area when planning the layout. Chives are a “cut and come again” herb that you will likely want to reach for frequently while preparing meals. Having them easily accessible means you are more likely to use them and keep the plants trimmed and productive. Also, think about the aesthetic role they will play, as their neat tufts and purple flowers make them excellent edging plants for pathways.
Before you put your plants in the ground, clear the area of all perennial weeds and their roots. Because chives grow in dense clumps, any grass or weeds that grow up through the center of the herb will be nearly impossible to remove without digging up the whole plant. A clean start is the professional way to ensure that your maintenance tasks remain simple and enjoyable. Once the site is prepared and the soil is ready, you can move forward with planting your seeds or divisions.
Establishing young plants
The first few weeks after planting are the most critical for the long-term success of your new herb patch. During this time, the young plants are focusing all of their energy on developing a root system that can support future leaf growth. You should monitor the soil moisture levels daily, ensuring that the ground stays consistently damp but never soggy. If the soil is allowed to dry out completely during this phase, the young plants may suffer irreversible damage or stunted growth.
Applying a thin layer of mulch around the base of the new plants can help retain moisture and keep the soil temperature stable. Be careful not to pile the mulch directly against the green stalks, as this can encourage rot in the tender stems. A light covering of straw or fine wood chips is usually sufficient to provide the protection the plants need while they are small. This simple step mimics the natural forest floor and creates a more temperate environment for the developing herbs.
Avoid the temptation to start harvesting your new chives too soon after they have been planted. While it is exciting to see the first green shoots, the plant needs all of its foliage to photosynthesize and build strength in the bulbs. Wait until the plants are at least six inches tall and have developed a thick, healthy-looking clump before you take your first few snips. Being patient in the first season will reward you with much more vigorous and productive plants in the years that follow.
Keep a close eye on the weather and provide extra protection if an unexpected heatwave or late frost occurs. New transplants are more vulnerable to environmental extremes than established plants with deep root systems. You might use a temporary shade cloth or a row cover to buffer the young herbs against the harshest elements for a few days. Professional establishment is all about providing a stable, nurturing environment so the plants can focus on their own natural development.