Preparing for the end of the growing season and ensuring that your vegetable marrow harvest is properly managed for the winter months is a final, critical step in the cultivation cycle. While the plants themselves are annuals and will not survive the first hard frost, there are several professional techniques you can use to extend your harvest and preserve your hard work. From seed saving to strategic soil preparation, the way you handle the transition into winter will set the stage for your future success. This article explores the best practices for concluding the season and preparing both your produce and your garden for the colder months ahead.
Harvest timing and storage preparation
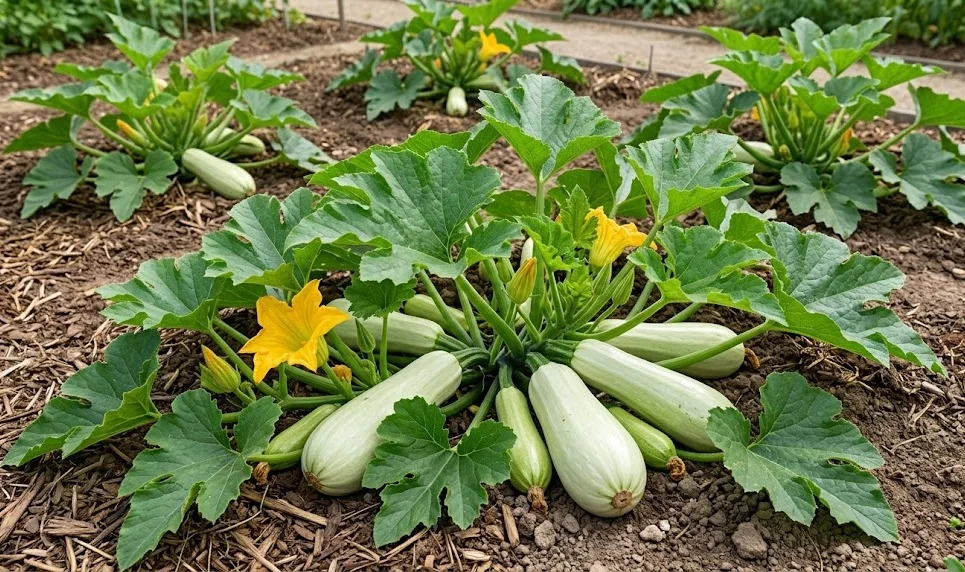
Knowing exactly when to harvest your vegetable marrows for storage is essential for ensuring they remain in good condition throughout the winter. You should aim to pick the fruits when they have reached full maturity but before the first heavy frost has a chance to damage their skin. A mature marrow will have a hard, tough rind that cannot be easily pierced with a fingernail, and the stem will often start to look dry and woody. Harvesting at this stage allows the fruit to maintain its quality and flavor for several months if kept in the correct environmental conditions.
When you are ready to harvest, use a sharp, clean pair of shears to cut the marrow from the vine, leaving at least five to ten centimeters of stem attached. You should never pull or twist the fruit off the vine, as this can damage the stem end and create an entry point for rot and decay. Handle the marrows with extreme care to avoid any bruising or scratches on the skin, as even small surface damages can significantly shorten their storage life. Treat each fruit as a valuable product that deserves careful handling from the garden to the storage shelf.
Once harvested, you should “cure” the marrows in a warm, dry place with good air circulation for about ten days to two weeks. This curing process allows the skin to harden further and any minor surface nicks to heal over, creating a more effective barrier against moisture loss and pathogens. A temperature of around 20-25 degrees Celsius is ideal for this initial stage, and you should ensure the fruits are not touching each other. Curing is a professional technique that significantly improves the long-term storage success of many types of squash and marrow.
More articles on this topic
After the curing period is complete, move the marrows to a cool, dark, and well-ventilated storage area where the temperature remains consistently between 10 and 15 degrees Celsius. Avoid storing them in a damp cellar or a place where temperatures might drop near freezing, as this will lead to rapid deterioration. Check your stored marrows regularly for any signs of soft spots or rot, and remove any affected fruits immediately to prevent the problem from spreading to the rest of the harvest. Proper storage allows you to enjoy the fruits of your labor long after the garden has been put to bed.
Seed saving for the future
Saving seeds from your best vegetable marrows is a rewarding way to preserve specific traits that work well in your garden and save money on future plantings. You should only save seeds from heirloom or open-pollinated varieties, as seeds from hybrid plants will not produce offspring that are true to the parent type. Select a healthy, productive plant and allow at least one fruit to grow past its normal eating stage until it is exceptionally large and the skin is very hard. This extra time on the vine ensures that the seeds inside are fully developed and have the best chance of successful germination.
To collect the seeds, cut the marrow open and scoop out the pulpy center into a clean bowl or bucket. You should separate the seeds from the surrounding flesh by hand or by rinsing them in a colander under cool running water until they are completely clean. Discard any seeds that are flat or appear underdeveloped, as these are unlikely to sprout in the spring. Once cleaned, spread the seeds out in a single layer on a screen or a piece of parchment paper in a well-ventilated area away from direct sunlight.
More articles on this topic
Drying the seeds thoroughly is the most important part of the saving process, as any remaining moisture can lead to mold and loss of viability during storage. You should let them dry for at least a week or until they are brittle enough to snap when bent rather than just bending. Once they are completely dry, place the seeds in a labeled envelope or a small glass jar and store them in a cool, dry, and dark location. Adding a small silica gel packet to the container can help ensure that no moisture re-enters the seeds during the winter months.
Keep careful records of which variety you saved and any specific characteristics of the parent plant that you particularly liked. This information will be incredibly helpful when you are planning your garden in the spring and want to replicate your previous successes. Seed saving is a fundamental skill of the professional gardener that connects the seasons and ensures a continuous cycle of life in the garden. By saving your own seeds, you are also contributing to the preservation of genetic diversity in our food systems.
Winter soil preparation and protection
Once the final harvest is complete and the marrow vines have been removed, your focus should shift to preparing the soil for the following year. You should avoid leaving the ground bare over the winter, as this can lead to nutrient leaching and soil erosion from wind and rain. Applying a thick layer of organic mulch or compost over the planting beds will help protect the soil structure and provide food for beneficial soil organisms. This “living mulch” acts as a blanket that keeps the earth from freezing too deeply and preserves its natural fertility.
Planting a winter cover crop is another excellent way to maintain and even improve your soil quality while the garden is dormant. You might choose to sow winter rye or hairy vetch, which will grow slowly during the colder months and can be tilled back into the earth in the spring. These crops help capture nitrogen and prevent it from being washed away by winter rains, ensuring it is available for your next crop of marrows. This professional approach to soil management is a key factor in long-term garden productivity and health.
If you have experienced significant pest or disease issues during the growing season, winter is the ideal time to take corrective action. You might consider solarizing the soil in late autumn or early spring to kill off overwintering pathogens and weed seeds using clear plastic sheeting. Alternatively, simply leaving the soil roughly turned can expose some pests to the freezing temperatures and birds, naturally reducing their numbers for the next year. Understanding the life cycles of your garden’s residents allows you to manage them more effectively through the changing seasons.
Check the structural elements of your garden, such as raised bed frames or trellises, and make any necessary repairs before the spring rush begins. You should also take this time to clean and organize your gardening tools, ensuring they are sharp and rust-free for the upcoming season. Winter is a period of rest for the garden, but it is also a time of preparation and reflection for the professional gardener. By taking care of these tasks now, you ensure a smooth and successful start when the warmth of spring finally returns.
Protecting late-season crops from frost
If you still have productive marrow plants in the garden as the first frosts approach, you can use several techniques to extend their life for a few more weeks. You should monitor the local weather forecast closely and be prepared to cover your plants with frost blankets or heavy burlap whenever a cold night is predicted. Ensure that the covers extend all the way to the ground and are weighed down to trap the earth’s natural warmth around the plants. Even a slight increase in temperature under the cover can be enough to prevent frost damage to the sensitive leaves and fruit.
Watering your plants thoroughly before a predicted frost can also provide a small amount of protection, as moist soil holds more heat than dry soil. You should avoid getting the leaves wet during this process, as any water on the foliage will freeze and cause more damage than the cold air alone. Some gardeners also use large containers of water placed near the plants, which act as thermal masses that absorb heat during the day and release it slowly at night. These simple strategies can help you squeeze every last bit of productivity out of your marrow patch.
If a particularly severe frost is expected that you cannot fully protect against, it is better to harvest all remaining fruits, even if they are slightly immature. While these smaller marrows won’t store as well as the fully mature ones, they are still perfectly edible and much better than losing them to the cold. You can use these late-season “green” marrows in a variety of dishes or preserve them through pickling or freezing. Being flexible and responsive to the weather is a vital part of professional garden management.
Once the plants have finally been claimed by the frost, remove the blackened vines promptly to prevent them from becoming a haven for pests or diseases. This final cleanup marks the official end of the growing season and allows you to transition fully into the winter phase of garden care. Reflecting on the successes and challenges of the past year will provide you with the insights needed to make the next season even better. Every winter spent in preparation leads to a more bountiful and rewarding summer in the garden.