Watering and fertilizing the amethyst hyacinth
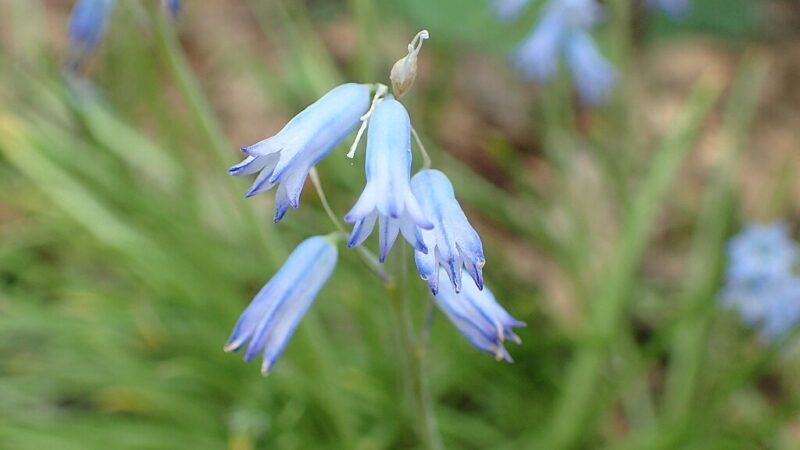
Providing the appropriate levels of moisture and nutrition is fundamental to cultivating a thriving display of Brimeura amethystina. This delicate bulbous perennial has a distinct seasonal rhythm, and its requirements for water and fertilizer change dramatically throughout its annual growth cycle. Understanding when to provide water and when to withhold it is perhaps the single most critical factor in preventing the common issue of bulb rot. Similarly, a targeted approach to fertilization, supplying nutrients at the right time and in the right proportions, will encourage robust flowering and healthy bulb development without promoting weak, disease-prone growth. Mastering these two aspects of its care will ensure the longevity and beauty of your amethyst hyacinth planting.
The principles of watering
Watering Brimeura amethystina effectively requires an understanding of its natural habitat and growth cycle. The plant’s primary need for moisture is during its active growth phase in the spring. From the moment the first green shoots emerge until the foliage begins to yellow after flowering, the soil should be kept consistently moist. This moisture fuels the development of leaves, stems, and flowers, and is crucial for the photosynthesis that builds up the bulb’s energy reserves for the following year. The goal during this period is to prevent the soil from drying out completely.
The best way to water is deeply and infrequently, rather than little and often. When the soil begins to feel dry to the touch, provide a thorough soaking that allows the water to penetrate deep into the root zone. This encourages the plant to develop a deeper, more resilient root system. Shallow, frequent watering can lead to shallow roots and can also create consistently damp surface conditions that may encourage fungal diseases. Always water the soil at the base of the plant, avoiding the foliage and flowers as much as possible to minimize the risk of disease.
The most critical shift in watering practices occurs as the plant enters dormancy. Once the flowers have faded and the leaves begin to turn yellow and wither, typically in early summer, you must dramatically reduce the amount of water provided. This signals to the bulb that it is time to enter its resting phase. Continuing to water generously at this stage is a common mistake that can easily lead to bulb rot, as the dormant bulb is not actively taking up moisture and will simply sit in wet, stagnant soil, a condition which is often fatal.
During the summer dormancy period, the bulbs require warm and dry conditions. For plants in the ground, natural rainfall is often more than sufficient, and in many climates, no supplemental watering will be needed at all. The soil should be allowed to dry out significantly. For plants grown in containers, it is crucial to move them to a location where they are shielded from summer rains, such as under the eaves of a house or in a dry, ventilated greenhouse. This dry rest is not a period of neglect but an essential requirement for the bulb’s survival and for initiating the development of the following year’s flower buds.
More articles on this topic
Fertilization strategies
Brimeura amethystina is not a heavy feeder and generally performs well in moderately fertile soil without excessive fertilization. However, a strategic application of nutrients can enhance its performance, leading to more robust growth and a better floral display. The most important time to provide fertilizer is in the early spring, just as the new growth is emerging. This is when the plant’s demand for nutrients is at its peak, as it is rapidly developing its leaves and flower stalks. A well-timed feed can give the plant the boost it needs to put on its best show.
The type of fertilizer used is crucial. A balanced, slow-release granular fertilizer formulated for bulbs is an excellent choice. Alternatively, a top-dressing of well-rotted compost and a sprinkle of bone meal can provide a gentle, natural source of nutrients. It is vital to use a fertilizer that is low in nitrogen and higher in phosphorus and potassium. High nitrogen levels encourage the growth of lush, soft foliage at the expense of flowers and can make the plant more susceptible to pests and diseases. Phosphorus is essential for strong root development, while potassium promotes overall plant vigour and flower production.
When applying granular fertilizer, be sure to sprinkle it on the soil surface around the plants, avoiding direct contact with the emerging shoots. Lightly scratch the fertilizer into the top layer of soil with a hand fork or cultivator, and then water the area well to help the nutrients start to dissolve and become available to the plant’s roots. This application should be a one-time event in the spring; there is no need to fertilize the plants again during the growing season. Over-fertilizing can do more harm than good, potentially burning the roots and upsetting the soil balance.
For plants grown in containers, the approach to fertilization needs to be slightly different. The limited volume of soil in a pot means that nutrients are depleted more quickly. In this case, a liquid fertilizer can be more effective. Starting when the shoots are a few centimetres tall, apply a half-strength liquid feed, such as a tomato fertilizer, every two to three weeks. Continue this regimen until the flowers begin to fade. As with ground-grown plants, cease all feeding as the foliage starts to die back to allow the bulb to enter its natural dormant state.
More articles on this topic
Recognizing water-related problems
One of the most common issues in cultivating Brimeura amethystina is overwatering, which manifests in several ways. The most severe consequence is bulb rot, a fungal disease that thrives in anaerobic, waterlogged conditions. If a plant fails to emerge in the spring, or if its emerging growth is yellow, stunted, and quickly collapses, bulb rot is a likely culprit. Digging up the bulb will reveal a soft, mushy, and often foul-smelling mass instead of a firm, healthy bulb. At this stage, the bulb is beyond saving and must be discarded to prevent the spread of fungal spores in the soil.
Yellowing leaves during the active growing season can also be a sign of overwatering. While leaves will naturally yellow as the plant enters dormancy, premature yellowing, especially when the soil is consistently wet, indicates that the roots are suffering. The excess water displaces oxygen in the soil, effectively drowning the roots and preventing them from taking up nutrients, which leads to the chlorotic, yellow appearance of the foliage. If you suspect overwatering, immediately cease all supplemental watering and assess the soil’s drainage, amending it if necessary for the following season.
Conversely, underwatering can also cause problems, although it is generally less fatal for the plant than overwatering. During the spring growth period, insufficient moisture can lead to stunted growth, a failure to produce flower stalks, or flowers that are small and short-lived. The leaves may appear wilted or may develop brown, crispy tips. If the soil is consistently dry during this crucial phase, the plant will not have the resources to perform well, and the bulb may not be able to store enough energy for the subsequent year, leading to a cycle of decline.
The key to avoiding these water-related problems is careful observation and a responsive approach. Do not water on a fixed schedule. Instead, check the soil moisture regularly and water only when necessary. The needs of the plant will vary depending on the weather, with warmer, windier days causing the soil to dry out more quickly. By paying close attention to both the plant’s appearance and the condition of the soil, you can provide the right amount of water at the right time, creating the perfect conditions for your amethyst hyacinths to flourish.
The role of organic matter
Incorporating organic matter into the soil is a highly beneficial practice for managing both the watering and fertilizing needs of Brimeura amethystina. Materials such as well-rotted compost, leaf mould, or composted bark serve multiple functions that create an ideal growing environment. Firstly, organic matter improves soil structure. In heavy clay soils, it helps to separate the fine particles, creating larger pores that enhance drainage and aeration. In sandy soils, it helps to bind the coarse particles together, improving the soil’s ability to retain moisture and nutrients.
This dual-action effect on moisture management is particularly valuable. The improved drainage helps to prevent the waterlogged conditions that are so detrimental to the bulbs, especially during dormancy. At the same time, the organic material acts like a sponge, holding onto a reserve of moisture that it releases to the plant’s roots as needed during the active growing season. This creates a more stable and forgiving soil environment, buffering the plant against periods of both drought and heavy rain. A soil rich in organic matter requires less frequent watering while still providing consistent moisture.
From a nutritional standpoint, organic matter is a superb slow-release fertilizer. As microorganisms in the soil break down the compost or leaf mould, they gradually release a wide range of essential nutrients and micronutrients in a form that plants can easily absorb. This provides a steady, gentle supply of food throughout the growing season, eliminating the risks of over-fertilization associated with synthetic chemical feeds. It fosters a healthy, living soil ecosystem, which in turn supports healthier, more resilient plants.
The best time to add organic matter is during the initial soil preparation before planting. Spread a generous layer, several centimetres thick, over the surface of the bed and incorporate it thoroughly into the top 20-25 centimetres of soil. You can also apply a thin layer of compost as a top-dressing or mulch around the plants each autumn. This will not only continue to enrich the soil as it breaks down over the winter but will also provide a degree of insulation for the bulbs. This simple, natural approach is one of the most effective ways to manage both watering and fertilization for long-term success.
Special considerations for containers
Cultivating Brimeura amethystina in containers requires a more attentive approach to watering and fertilizing compared to growing them in the garden. The limited volume of soil in a pot can dry out much more quickly, especially on warm or windy days. During the spring growing season, it is essential to monitor the moisture level of the potting mix daily. Water thoroughly whenever the top inch of the mix feels dry to the touch. Ensure that water flows freely from the drainage holes at the bottom of the pot, which confirms that the entire root ball has been moistened and that drainage is adequate.
The shift to dormancy is just as critical for container plants. Once the foliage begins to die back, watering must be stopped almost entirely. The key challenge is to protect the dormant bulbs from moisture. The easiest way to achieve this is by moving the entire container to a location where it will not be exposed to rain, such as a garage, shed, or a spot under the eaves. This ensures the potting mix can dry out completely and remain dry throughout the summer, providing the necessary resting period for the bulbs.
Nutrient management is also more intensive in containers. The potting mix contains a finite supply of nutrients that will be depleted by the plant during its growth phase. Regular feeding is therefore necessary to replenish this supply. From the time the shoots emerge until the flowers fade, apply a balanced liquid fertilizer diluted to half-strength every two to three weeks. A feed formulated for tomatoes or flowering plants, which is typically higher in potassium, is an excellent choice for promoting strong blooms and healthy bulb development.
Every couple of years, it is advisable to repot your Brimeura amethystina. This provides an opportunity to refresh the potting medium, which can become compacted and lose its structure over time. It is also the perfect time to divide the bulbs, which tend to multiply more quickly in the confines of a pot. The best time to repot is in the late summer or early autumn, during the dormant period. Gently remove the bulb cluster from the pot, separate the individual bulbs, and replant them in fresh, gritty, well-draining compost. This regular renewal will keep your container displays healthy and vibrant.
📷: Krzysztof Ziarnek, Kenraiz, CC BY-SA 4.0, via Wikimedia Commons


