Successful establishment of this hardy shrub begins with a well-planned planting process that takes the specific needs of the species into account. Whether you are looking to create a natural hedge or a single ornamental feature, the initial steps you take will define the plant’s future. Proper propagation techniques also allow you to expand your collection or share this beautiful plant with other enthusiasts in your community. Understanding the mechanics of how this plant grows and reproduces is essential for any professional gardener or agricultural specialist.
Choosing the right time of year to plant is the first critical decision you will make in the process. Most experts recommend planting in the early spring or late autumn when the plant is in a semi-dormant or dormant state. During these periods, the temperatures are cooler, which reduces the rate of transpiration and allows the roots to settle in without heat stress. If you must plant during the summer, you will need to be extremely diligent about providing consistent and deep irrigation.
Site preparation involves more than just digging a hole in the ground; it requires an assessment of the entire planting area. You should clear the site of any aggressive weeds or grasses that might compete with the young shrub for water and nutrients. Loosening the soil in a wide radius around the planting spot will help the new roots spread out horizontally with ease. If the native soil is particularly poor, this is the best time to incorporate organic amendments to provide a nutrient boost.
The physical act of planting should be done with care to avoid damaging the delicate root system or the main stems. You should dig a hole that is twice as wide as the root ball but no deeper than the height of the container. Placing the plant too deep in the ground can lead to stem rot and other issues that might eventually kill the shrub. Once the plant is in place, backfill the hole with the original soil and firm it down gently to remove any large air pockets.
Propagation through softwood and hardwood cuttings
One of the most effective ways to create new coralberry plants is by taking cuttings from an established, healthy specimen. Softwood cuttings are typically taken in the late spring or early summer when the new growth is still flexible but starting to mature. You should select stems that are healthy and free from any signs of disease or pest damage to ensure the best results. These cuttings root relatively quickly when kept in a high-humidity environment with consistent bottom heat.
More articles on this topic
Hardwood cuttings are another professional option and are usually taken during the winter months when the plant is fully dormant. These stems are much firmer and contain more stored energy, which helps them survive the rooting process without leaves. You should cut sections of stem that are about six to eight inches long and include several leaf nodes. Placing these cuttings in a well-drained medium and keeping them in a sheltered spot will lead to new growth by the following spring.
Using a rooting hormone can significantly increase the success rate of your cuttings by stimulating faster cell division at the base of the stem. While not strictly necessary for this hardy species, it provides an extra layer of insurance, especially for beginners. You should dip the cut end into the hormone powder or liquid before inserting it into the propagation medium. Keeping the medium consistently moist but not waterlogged is the most important factor during the first few weeks of the rooting process.
Once the cuttings have developed a strong root system, they need to be hardened off before they can be moved into the garden. This involves gradually exposing the young plants to outdoor conditions, including direct sunlight and wind, over a period of several weeks. Skipping this step can lead to transplant shock, which often results in the death of the new plants. A professional approach to propagation requires patience and careful monitoring as the young shrubs transition to their permanent homes.
Division as a method for rapid expansion
Division is a fast and reliable propagation method that takes advantage of the shrub’s natural habit of spreading through underground runners. This technique is best performed in the early spring before the plant has fully leafed out for the new season. You should use a sharp spade to lift a portion of the plant, ensuring that you include both stems and a healthy section of the root system. This method produces plants that are already a significant size and will establish themselves very quickly in a new location.
More articles on this topic
When dividing an older shrub, it is important to select the most vigorous sections from the outer edges of the original plant. The center of an old coralberry can sometimes become woody and less productive over time, so the younger growth is preferred. After you have separated the division, you should replant it immediately to prevent the roots from drying out in the air. Water the new division thoroughly to settle the soil and help it recover from the physical stress of being moved.
Managing the parent plant after division is also a key part of the professional propagation process. You should fill in any holes left by the removal of the divisions with fresh soil and compost to encourage the original shrub to fill back in. Adding a bit of extra water and fertilizer will help the parent plant recover its strength and continue growing vigorously. This method allows you to maintain the health of your existing landscape while simultaneously creating new plants for other areas.
Divisions are particularly useful for creating low-maintenance groundcovers or stabilizing slopes where erosion is a concern. Because the new plants already have a developed root system, they can begin holding the soil together much faster than seeds or small cuttings. You can space the divisions about two or three feet apart to allow them room to grow and eventually knit together. This strategy is widely used in large-scale agricultural and landscaping projects due to its efficiency and high success rate.
Growing coralberry from seeds
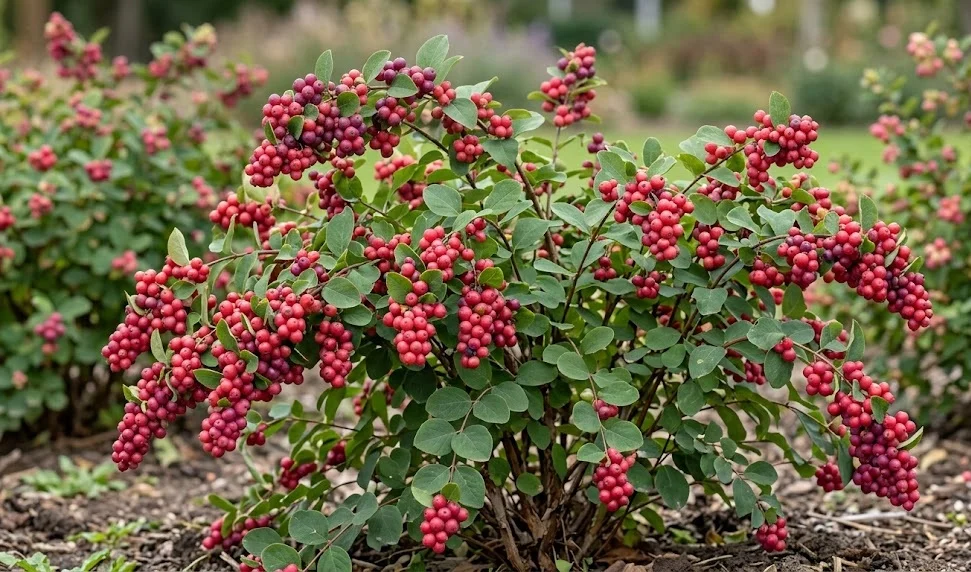
While less common than vegetative propagation, growing this shrub from seeds is a rewarding process for patient gardeners and plant breeders. The seeds are found inside the colorful berries and must be harvested once the fruit is fully ripe in the late autumn. You will need to remove the fleshy pulp from the seeds before they can be processed for planting. This is often done by mashing the berries and rinsing the seeds through a fine mesh sieve under cold running water.
Coralberry seeds require a period of cold stratification to break their natural dormancy and prepare them for germination. In nature, this happens during the winter months when the seeds are buried under snow and cold soil. You can mimic this process by placing the cleaned seeds in a moist medium and storing them in a refrigerator for several months. Without this cold treatment, the seeds are unlikely to sprout, as they will believe it is still the middle of winter.
Once the stratification period is complete, the seeds can be sown into flats or pots filled with a high-quality seed-starting mix. Place the containers in a bright, warm location and keep the soil consistently moist until the first green shoots appear. Germination can be slow and uneven, so do not be discouraged if it takes several weeks for all the seeds to sprout. As the seedlings grow, they will need plenty of light and a gentle liquid fertilizer to help them develop strong stems and leaves.
Growing from seed allows for more genetic diversity in your garden, which can lead to plants that are better adapted to your specific local conditions. Each seedling is a unique individual that may show slight variations in berry color, leaf shape, or growth habit. While it takes longer to produce a mature plant this way, the sense of accomplishment is much greater for many horticultural enthusiasts. Professional nurseries often use seed propagation to select for new and improved varieties of ornamental shrubs.