Successful establishment of this ornamental shrub begins with a thorough understanding of the planting process and propagation techniques. Whether you are starting with a young sapling or trying to create new plants from an existing one, precision is required. By following professional guidelines, you can ensure that your specimens have the best possible start in their new environment. This article explores the essential steps to expanding your garden collection effectively.
The timing of your planting activities can significantly influence the survival rate and growth speed of the shrub. In most temperate regions, the best windows for planting are during the mild weather of spring or autumn. These periods allow the roots to settle in without the stress of extreme heat or deep frost. Planning your garden work around these natural cycles is a fundamental skill for any dedicated grower.
Preparation is the key to minimizing transplant shock and ensuring rapid establishment in the open ground. You should have all your tools and soil amendments ready before you remove the plant from its container. A quick transition reduces the amount of time the roots are exposed to the air and light. Taking the time to prepare properly will save you from having to replace struggling plants later.
Propagation offers a rewarding way to increase the number of shrubs in your landscape without significant cost. You can choose between several methods, including growing from seeds or taking professional-grade cuttings. Each technique requires patience and a specific set of environmental conditions to be successful. Mastering these methods will allow you to share your favorite plants with others or create a cohesive garden theme.
Selecting the perfect location
The first step in planting is finding a spot that meets all the biological requirements of the species. You should look for an area that receives plenty of natural light but is protected from the harshest winds. A location with good air circulation will help keep the foliage dry and reduce the risk of common issues. Consider how the site changes throughout the day and across the different seasons.
More articles on this topic
Proximity to other plants and structures will affect how the shrub grows and how much maintenance it requires. You should avoid planting too close to walls or fences where the soil might be permanently dry or shadowed. Give the shrub enough room to reach its mature width without being crowded by its neighbors. Thinking ahead will prevent the need for drastic pruning or relocation in a few years.
Soil drainage at the chosen site must be tested to ensure it can handle heavy rainfall without flooding. You can dig a small hole and fill it with water to see how quickly it disappears into the ground. If the water sits for several hours, you may need to choose a different location or build a raised bed. Proper drainage is non-negotiable for the long-term health of the root system.
Accessibility for maintenance tasks like watering and pruning should also be a factor in your decision. You will need to reach all sides of the plant easily to ensure it receives uniform care throughout the year. If the shrub is buried deep in a border, you might find it difficult to provide the attention it needs. A well-placed plant is not only healthier but also much easier for you to enjoy.
Step by step planting guide
Once you have selected the site, you should dig a hole that is at least twice as wide as the root ball. This ensures that the surrounding soil is loose enough for the new roots to penetrate easily. The depth of the hole should be exactly the same as the container the plant came in. Planting too deep can suffocate the stem, while planting too shallow can cause the roots to dry out.
More articles on this topic
Before placing the shrub in the hole, you should gently loosen any roots that have started to circle the pot. This encourages them to grow outwards into the new soil rather than continuing to grow in a tight spiral. You can add a small amount of organic fertilizer to the bottom of the hole to give the plant a boost. Handling the specimen with care during this stage prevents unnecessary damage to the structure.
As you backfill the hole with soil, you should firm it down gently with your hands to remove any large air pockets. Do not use your feet to pack the earth, as this can compress the soil too much and hinder root growth. You can create a small basin of soil around the base of the plant to help direct water toward the roots. This simple structure is very effective during the first few weeks of establishment.
Immediately after planting, you must water the shrub thoroughly to settle the soil and provide much-needed hydration. This first watering is the most important one the plant will ever receive in your garden. You should also apply a layer of mulch to help keep the moisture in and the weeds out. Following these steps carefully will ensure that your new addition thrives from the very first day.
Propagation from fresh seeds
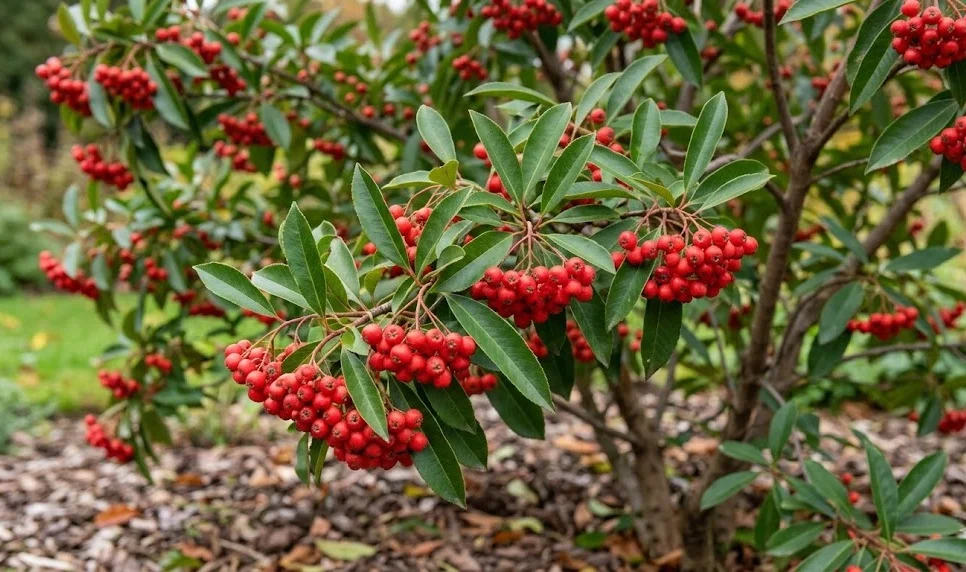
Growing this species from seeds is a slow but fascinating process that requires a great deal of patience. You should collect the berries when they are fully ripe, which usually happens in the late autumn months. The seeds must be extracted from the fleshy fruit and cleaned thoroughly before they can be planted. This method allows you to produce a large number of plants if you have the time and space.
Cold stratification is often necessary to break the dormancy of the seeds and encourage them to germinate. You can mimic natural winter conditions by placing the seeds in a moist medium in the refrigerator for several weeks. This process signals to the seed that the cold season has passed and it is time to start growing. Without this step, germination rates can be very low and inconsistent.
Once the stratification period is over, you should sow the seeds in a high-quality seed-starting mix. Keep the containers in a warm, bright location but away from direct, intense sunlight that could dry them out. You must maintain consistent moisture levels in the soil without making it soggy or waterlogged. Watching the first tiny leaves emerge is one of the most rewarding moments for any gardener.
When the seedlings have developed several sets of true leaves, they can be moved into individual pots. You should continue to grow them in a protected environment until they are strong enough to handle outdoor conditions. This process can take a year or more, so do not be discouraged by the slow pace of growth. Eventually, you will have robust young plants ready to be placed in their permanent garden home.
Growing from semi ripe cuttings
Taking cuttings is a faster and more reliable way to propagate this shrub than growing it from seeds. You should select healthy, semi-ripe wood from the current season’s growth during the mid-summer months. The cuttings should be about ten to fifteen centimeters long and taken from the tips of the branches. This method ensures that the new plants will be identical to the parent specimen in every way.
Remove the leaves from the lower half of the cutting to reduce moisture loss and expose the nodes. You can dip the cut end into a rooting hormone to speed up the development of the new root system. Insert the cuttings into a pot filled with a well-draining mix of peat and perlite or sand. Providing a humid environment, perhaps by covering the pot with a plastic bag, will help them survive.
Place the cuttings in a bright spot but out of direct sunlight to prevent them from overheating. You should check the moisture levels regularly and mist the foliage to keep the humidity high around the stems. Within a few weeks, the cuttings should start to produce roots and show signs of new leaf growth. Tug gently on the stem to see if there is any resistance, which indicates that roots have formed.
Once the root system is well-established, you can begin to acclimate the new plants to the outside air. Gradually increase their exposure over a period of a week or two to prevent shock. These young shrubs can then be moved into larger pots or directly into a prepared area of the garden. Using cuttings allows you to quickly expand your hedge or create a beautiful new border.