The successful establishment of mountain clematis begins with a thoughtful approach to the initial planting phase and an understanding of its reproductive potential. As one of the most vigorous climbers in the temperate garden, this species requires a strong start to handle its rapid transition from a nursery pot to a sprawling landscape feature. Proper site preparation and the correct timing are the primary factors that dictate whether the plant will thrive or struggle in its new home. By following expert guidelines for planting and propagation, any gardener can ensure a lifetime of beautiful spring blossoms.
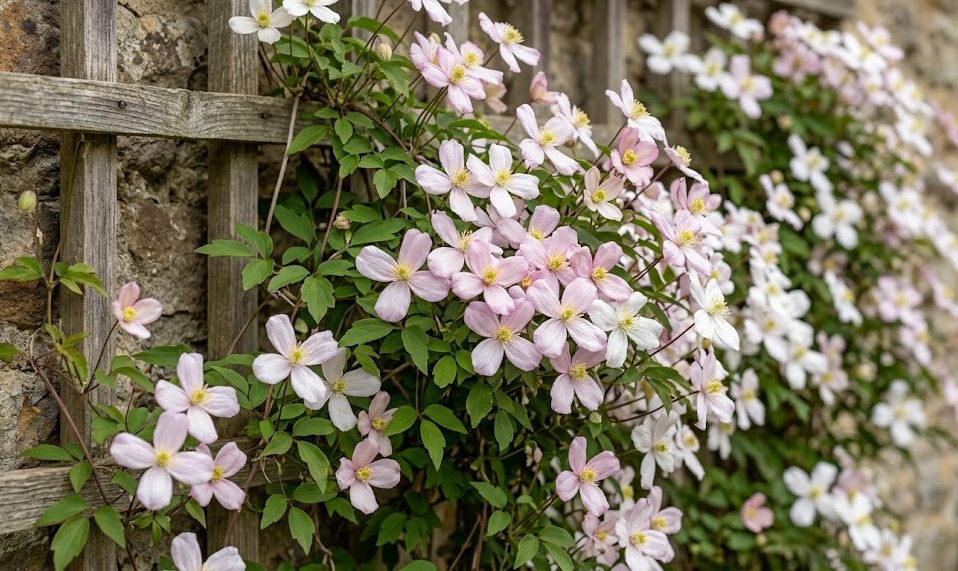
Selecting the right location is the most critical decision a gardener makes before the plant even leaves its container. This climber needs a spot where it can stretch its limbs, often reaching heights of eight to ten meters depending on the specific cultivar. The ideal site offers full sun for the foliage but provides a cool, shaded environment for the root zone to prevent heat stress. You should also consider the structural integrity of the support system, as a mature mountain clematis can become quite heavy over time.
Before digging the hole, it is essential to enrich the existing soil with high-quality organic matter such as well-rotted manure or garden compost. This species prefers a soil that is moisture-retentive yet well-drained, avoiding areas where water tends to sit after a heavy rain. If your garden has heavy clay, incorporating grit or sharp sand can significantly improve the drainage and prevent root rot. Taking the time to prepare a large planting area, rather than just a small hole, encourages the roots to spread outward and stabilize the plant.
The timing of planting is typically best in either the early autumn or the early spring when the soil is workable and temperatures are moderate. Planting in autumn allows the root system to establish itself in the warm soil before the winter dormancy sets in, giving it a head start for the spring. Spring planting is also effective, provided that the gardener is diligent about watering during the first summer of growth. Regardless of the season, avoiding the extreme heat of mid-summer or the frozen ground of winter is standard professional practice.
Professional planting techniques
When you are ready to place the mountain clematis in the ground, the depth at which it is planted is a subject of much discussion among experts. Many professionals recommend planting the root ball about five to ten centimeters deeper than it was in its original nursery pot. This technique encourages the development of dormant buds below the soil line, which can provide a backup source of growth if the upper stems are damaged. It is a simple insurance policy that helps the plant recover from severe frost or mechanical injury in the future.
More articles on this topic
The planting hole should be at least twice as wide as the root ball to allow for easy root penetration into the surrounding soil. As you backfill the hole, gently firm the soil around the roots to remove any large air pockets that could cause the roots to dry out. It is often helpful to add a handful of bone meal or a specialized mycorrhizal fungi supplement to the planting hole to boost root development. Watering the plant thoroughly immediately after planting is non-negotiable, as it helps settle the soil and provides instant hydration.
Providing immediate support is vital for young mountain clematis plants to prevent their thin stems from snapping in the wind. You should install a small bamboo cane or a temporary piece of netting to guide the plant toward its permanent support structure. Gently tying the stems with a soft material ensures they stay on track without being constricted as they grow in diameter. This initial guidance helps the plant establish a clear path for growth and prevents it from sprawling along the ground where it is vulnerable.
Mulching the newly planted climber is the final step in a professional installation and provides multiple long-term benefits. A thick layer of bark mulch or compost around the base helps maintain the “cool feet” that all clematis varieties crave. This mulch layer also suppresses weeds that would otherwise compete with the young plant for water and nutrients. Be careful to keep the mulch a few centimeters away from the actual stem to prevent moisture-induced rot at the crown.
Propagation through softwood cuttings
For those who wish to expand their collection or share this beautiful plant with friends, taking softwood cuttings is a highly effective method. This process is best performed in early to mid-summer when the plant is actively growing and the stems are still flexible. You should select healthy, non-flowering shoots that are about the thickness of a pencil for the best chance of success. Using a sharp, sterilized knife or pruning shears is essential to make clean cuts that heal quickly and do not introduce pathogens.
More articles on this topic
Each cutting should be approximately ten to fifteen centimeters long and contain at least two sets of leaves. The bottom cut should be made just below a node, which is the point where the leaves join the stem, as this is where the highest concentration of rooting hormones is found. Remove the lower leaves to reduce moisture loss and expose the nodes that will eventually produce roots. Some gardeners find that dipping the base of the cutting in a rooting hormone powder or gel can significantly speed up the process.
The prepared cuttings should be placed in a pot filled with a free-draining propagation mix, such as a combination of peat-free compost and perlite. It is important to keep the cuttings in a humid environment, which can be achieved by covering the pot with a clear plastic bag or placing it in a heated propagator. Keep the pot in a bright spot but away from direct sunlight, which could scorch the tender cuttings before they have roots. Checking the moisture levels daily ensures that the medium stays damp but not waterlogged, which would cause the stems to rot.
Rooting typically takes between four and six weeks, at which point you may notice new growth appearing at the tips of the cuttings. Once the roots are well-established and visible through the drainage holes, the young plants can be potted up into individual containers. It is wise to grow these new plants in a sheltered nursery area for their first year before planting them out in their permanent positions. This patience allows the root system to become strong enough to handle the challenges of the open garden.
Layering and seed propagation
Layering is perhaps the simplest and most reliable way to propagate mountain clematis, as it allows the new plant to remain attached to the parent for support. This method involves bending a low-growing, flexible stem down to the ground and burying a portion of it in the soil. You should gently wound the underside of the stem where it will be buried to encourage the formation of roots at that point. Pinning the stem securely with a U-shaped wire or a heavy stone ensures it stays in constant contact with the moist earth.
This process is usually started in the spring or early summer and left undisturbed for at least one full growing season. By the following spring, the buried section should have developed its own independent root system and can be severed from the mother plant. This “new” plant is already quite large and well-adjusted to the local environment, making its survival rate very high. Layering is an excellent choice for gardeners who want a foolproof method that requires very little specialized equipment or daily maintenance.
Propagation from seed is also possible, although it requires much more patience and the resulting plants may not be identical to the parent. The seeds of mountain clematis are often found in attractive, feathery seed heads that persist on the plant after the flowers have faded. Collect the seeds when they turn brown and dry, and sow them in a cold frame or a dedicated seed bed in the autumn. Some seeds may germinate within a few months, while others can take a year or more to show signs of life.
Growing from seed is a rewarding way to discover new variations in flower color or leaf shape, although it is less common for commercial production. The young seedlings are quite delicate and must be protected from slugs, snails, and harsh weather during their first few months. Once they have developed a few sets of true leaves, they can be moved into small pots and treated like any other young clematis. While it takes longer to achieve a flowering-sized plant, the sense of accomplishment from growing a climber from seed is unparalleled.