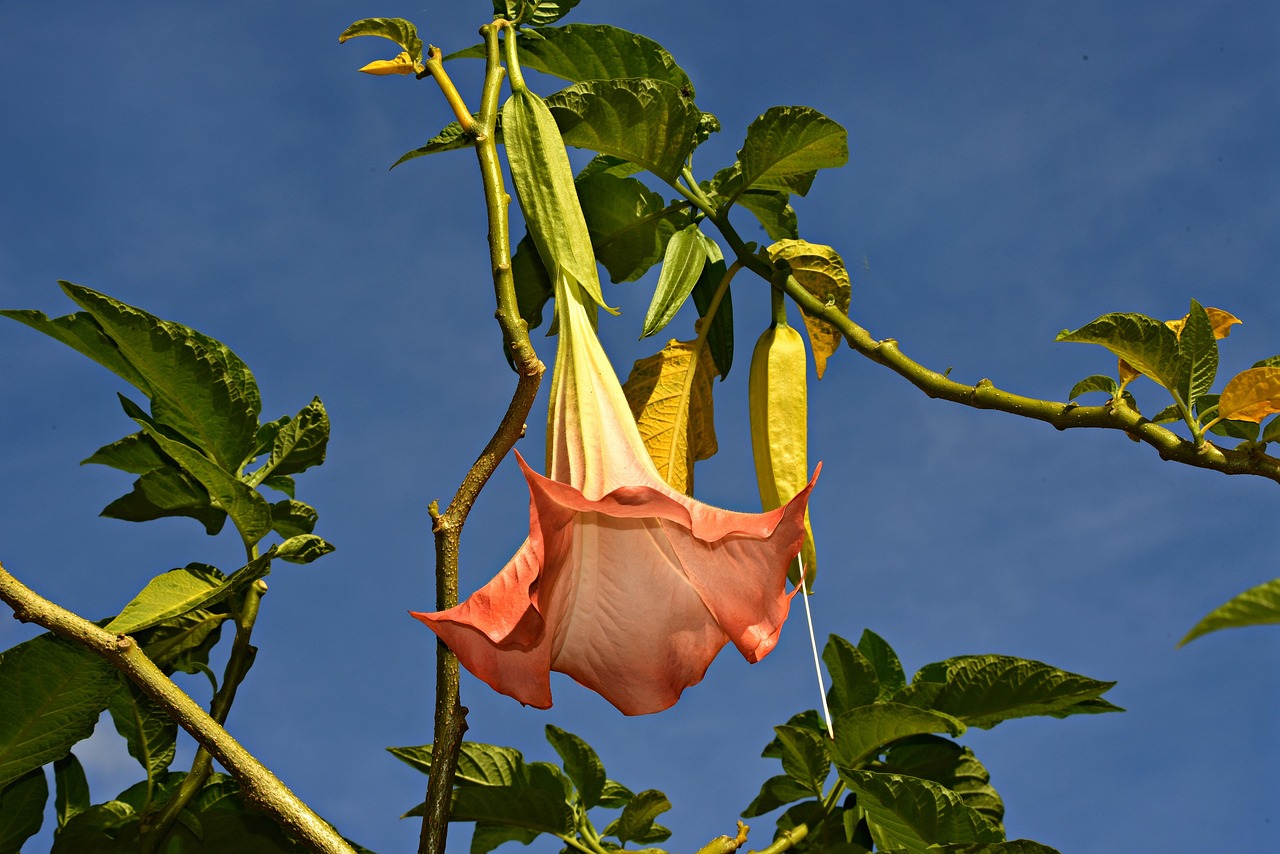
For gardeners in climates with freezing winter temperatures, successfully overwintering Brugmansia is a crucial and rewarding challenge. These subtropical beauties are not frost-tolerant, and exposure to even a light frost can damage their foliage, while a hard freeze will kill the plant back to its roots, or entirely if the ground freezes. Therefore, developing a reliable overwintering strategy is essential for preserving a prized specimen from one year to the next. The process involves a careful transition from the garden to a protected indoor location, providing minimal but specific care during the dormant months, and then reawakening the plant in the spring. Mastering this annual cycle allows gardeners in cooler regions to cultivate these magnificent plants and enjoy their spectacular blooms year after year.
The primary goal of overwintering is to keep the plant’s root system and main woody structure alive and dormant until the next growing season. This does not mean trying to keep the plant in active growth throughout the winter, which would require a large, heated greenhouse with supplemental lighting and is impractical for most home gardeners. Instead, the aim is to induce a state of dormancy by providing cool temperatures and reduced light and water. In this state, the plant’s metabolic processes slow down dramatically, allowing it to conserve energy until conditions are favorable for growth to resume. A cool, dark basement, an unheated but frost-free garage, or a dormant greenhouse are all common locations for this purpose.
Preparation for the overwintering period begins in the autumn, well before the first expected frost date. This involves gradually reducing the frequency of watering and ceasing all fertilization to signal to the plant that the growing season is coming to an end. This helps to harden off the existing growth, making it more resilient. Just before moving the plant indoors, it is typically pruned back significantly. This not only makes the large plant more manageable to move and store but also reduces the amount of foliage the roots need to support during dormancy and helps to remove any lingering pests.
Once spring arrives and the danger of frost has passed, the process is reversed. The plant is gradually reintroduced to warmer temperatures, brighter light, and more frequent watering to gently break its dormancy. This reawakening process must be gradual to avoid shocking the plant. With the right care, the dormant stems will soon begin to sprout new leaves, and the plant will embark on another season of vigorous growth. This successful transition from dormancy back to active growth is the true mark of successful overwintering.
Preparing the plant for dormancy
The transition into winter dormancy should be a gradual process that begins in early to mid-autumn. The first step is to alter the feeding and watering regimen. All fertilization should be stopped approximately four to six weeks before the anticipated first frost date. This signals the end of the growing season and discourages the production of new, tender growth that would be particularly vulnerable to cold damage. Continuing to feed the plant late into the season can hinder its ability to enter a proper dormant state.
More articles on this topic
At the same time, the frequency of watering should be gradually reduced. While the plant should not be allowed to dry out completely while it is still actively photosynthesizing, reducing moisture levels in the soil helps to slow down its metabolic processes. This tapering of water mimics the natural transition from a wet season to a dry season that many subtropical plants experience. It helps the plant to begin hardening off its stems in preparation for the move indoors and the prolonged period of reduced water availability.
A crucial step before moving the plant to its winter quarters is a thorough pest inspection and treatment. Indoor conditions, with their warmth and often dry air, can be an ideal breeding ground for pests like spider mites, aphids, and whiteflies. It is much easier to treat the plant for pests while it is still outdoors. Inspect all parts of the plant, especially the undersides of leaves, and treat any infestations with insecticidal soap or horticultural oil. A preventative spray is often a good idea even if no active pests are visible, as eggs and nymphs can be difficult to detect.
The final step in preparation is a significant pruning. For plants that will be stored dormant in a dark location, it is common to remove most, if not all, of the remaining leaves. The branches are then pruned back by about one-third to one-half, creating a more compact and manageable plant for storage. This hard pruning reduces the plant’s water needs during dormancy and removes potential hiding spots for pests. The goal is to be left with a strong, woody framework from which new growth will emerge in the spring.
Choosing the right overwintering location
The choice of overwintering location is critical and depends on the desired state of the plant during the winter. The most common method is to store the plant in a fully dormant state. This requires a location that is cool, dark, and, most importantly, remains frost-free. An unheated basement, a crawl space, or an attached garage that stays consistently between 2 and 10 degrees Celsius is ideal. In these conditions, the plant will drop all its leaves and cease growth, entering a deep state of dormancy where its need for light and water is minimal. This is often the most practical method for large specimens.
More articles on this topic
Another option is to overwinter the plant in a semi-dormant state in a location that is cool but receives some light. A cool sunroom, an enclosed porch, or a frost-free greenhouse that remains between 7 and 12 degrees Celsius can work well. In these conditions, the plant may retain some of its leaves or even produce a small amount of weak, spindly growth over the winter. It will require slightly more frequent watering than a fully dormant plant to keep the soil from drying out completely. This method can sometimes give the plant a slight head start in the spring, but it also increases the risk of pest problems.
For gardeners with a heated greenhouse or a very bright sunroom, it is theoretically possible to keep the Brugmansia in active growth throughout the winter. This requires maintaining warm temperatures, consistently above 15 degrees Celsius, and providing very bright light, often with supplemental grow lights, to compensate for the short winter days. The plant will need to be watered and fertilized regularly, though at a reduced rate compared to summer. This approach is the most resource-intensive and challenging, and it is generally not necessary unless the goal is year-round flowering.
Regardless of the location chosen, good air circulation is beneficial. Stagnant, damp air can promote the growth of mold or mildew on the dormant stems or the soil surface. If possible, using a small fan on a low setting for a few hours a day can help to keep the air moving and reduce the risk of fungal issues. The chosen location should also be one where the plant will not be frequently disturbed and where any minor water spills will not cause damage.
Care during the dormant period
Caring for a Brugmansia during its winter dormancy is primarily a matter of careful neglect. The single biggest mistake gardeners make is overwatering. A dormant plant with no leaves has an extremely low rate of transpiration and therefore uses very little water. The soil should be allowed to become quite dry to the touch between waterings. The goal is simply to provide just enough moisture to prevent the root ball and the woody stems from completely desiccating. For a fully dormant plant in a cool, dark location, this might mean watering as little as once a month or even less frequently.
Monitoring the plant’s condition throughout the winter is important. A periodic check every few weeks is sufficient. During these checks, inspect the stems for any signs of rot or disease, which would appear as soft, mushy, or discolored areas. Any such affected branches should be immediately pruned back to healthy wood to prevent the problem from spreading. Also, check the soil moisture. An easy way to gauge the need for water is to lift the pot; if it feels exceptionally light, it is time for a small amount of water.
It is crucial to withhold all fertilizer during the entire dormant period. Fertilizing a dormant plant is not only wasteful but also harmful. The plant is not in a state to utilize the nutrients, and adding them to the cold, damp soil can lead to a buildup of mineral salts that can burn and damage the inactive roots. Feeding should only resume in the spring once the plant is moved back into a warmer, brighter location and begins to show signs of new growth.
As late winter approaches, there may be some signs of premature sprouting, especially if temperatures in the storage area begin to fluctuate. Small, pale shoots may begin to emerge from the dormant stems. This is generally not a cause for concern. These shoots will likely remain small and weak until the plant is exposed to proper light and warmth. They are simply an indication that the plant has survived the winter and is ready to resume growth when conditions become favorable.
Reawakening Brugmansia in the spring
The process of reawakening the Brugmansia should begin approximately six to eight weeks before the last expected frost date in your region. The first step is to bring the dormant plant out of its dark storage and into a location with bright, indirect light and warmer temperatures. A basement with a window, a garage with some natural light, or an indoor room is a suitable transitional space. This initial change in environment signals the end of dormancy.
At this time, perform any necessary spring pruning. Inspect the plant for any stems that may have died back or become damaged over the winter; these should be pruned back to green, healthy wood. This is also the time to do any final shaping of the plant’s framework before new growth begins in earnest. After pruning, give the plant its first thorough watering of the season. Water deeply until it runs out of the drainage holes to ensure the entire root ball is rehydrated. This initial soaking is often enough to trigger the dormant buds to begin swelling.
Once the first signs of new leaf growth appear, it is time to resume a regular, but gentle, care routine. Begin watering consistently, allowing the top layer of soil to dry slightly between applications. Introduce a half-strength solution of a balanced liquid fertilizer to provide the nutrients needed to fuel the initial flush of growth. As the new leaves expand and the growth rate increases, the frequency of watering and the concentration of fertilizer can be gradually increased.
The final step is to acclimatize the plant to outdoor conditions, a process known as ‘hardening off’. This must be done gradually to prevent shock. Start by placing the plant outdoors in a shady, protected spot for just an hour or two on a mild day. Over the course of one to two weeks, gradually increase the amount of time the plant spends outside and slowly expose it to more direct sunlight. Once the danger of frost has definitively passed, and the plant has fully adjusted to the outdoor environment, it can be moved to its final summer location to begin another season of spectacular display.
For those of us in Zone 7, the transition to dormancy is a delicate process that requires precise timing. I have found that reducing nitrogen-rich fertilizers as early as late August helps the plant begin its natural hardening-off phase. Many hobbyists make the mistake of keeping the soil too moist during the dark winter months, which inevitably leads to root rot in Brugmansia. I prefer the “dark dormancy” method in a cool basement held consistently between 4 and 10 degrees Celsius. In this state, the plant needs very little water—just enough to keep the trunk from shriveling. It is also worth noting that any remaining foliage should be stripped to prevent fungal issues and pest hiding spots. This approach has allowed my specimens to reach over two meters in height year after year.
Thank you for the specific temperature range, Dr. Vaughn, as I was always unsure if my garage was getting too cold. Last year, I lost a beautiful ‘Charles Grimaldi’ because the temperature dipped near freezing for several days. I noticed you mentioned stripping the foliage entirely before storage. Does this significantly reduce the risk of spider mite outbreaks when the plant is brought back out in the spring? I’ve struggled with those pests every May once the pots are moved back to the patio. Your advice on reducing nitrogen in August is also a great tip I will implement immediately.
If you don’t have the space to bring a massive pot inside, I highly recommend taking “insurance” cuttings in October. Even a 20-centimeter semi-hardwood cutting will root easily in water on a sunny windowsill. This provides a safety net just in case the parent plant doesn’t survive the winter storage. I find that these younger plants often grow with more vigor once the soil warms up in June. However, they won’t reach the same flowering potential as a mature, woody specimen in their first year. It is a trade-off, but one that ensures you never lose a specific cultivar entirely.
I live in a region where we get very hard freezes, so I treat my Brugmansia as a container plant exclusively. I’ve noticed that the timing of moving them back outside is just as critical as the overwintering itself. Even if the air temperature is warm, cold soil can shock the root system and delay blooming by weeks. I wait until the night temperatures are consistently above 12 degrees Celsius before leaving them out overnight. Last year, I was too impatient and the leaves turned yellow and dropped immediately. Patience is truly the most difficult part of the overwintering strategy.