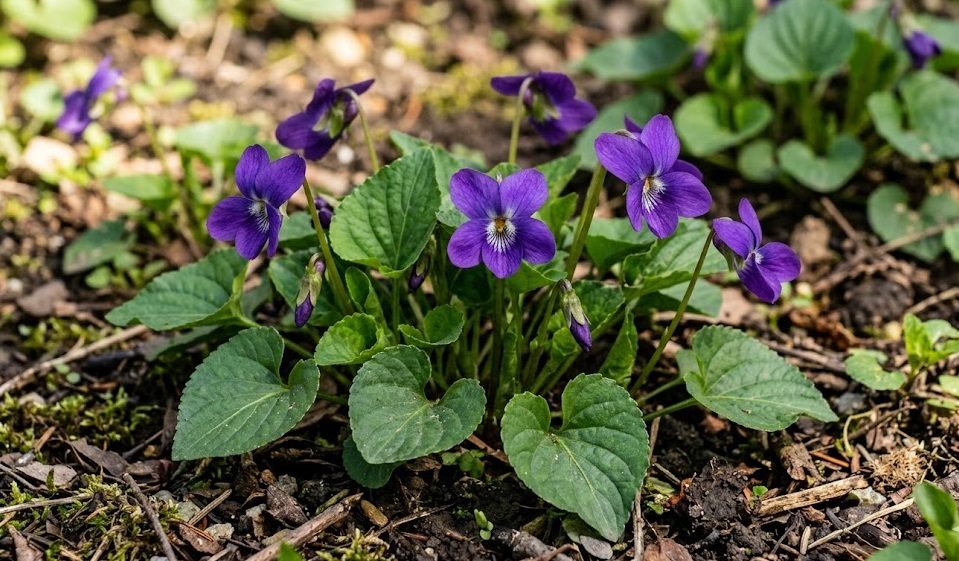
Proper hydration and nutrition are the twin pillars of a successful gardening strategy for the common blue violet. While these plants are adapted to the fluctuating conditions of a natural forest, they perform much better in a garden setting when their needs are met consistently. You must learn to read the subtle signs the plant gives when it is thirsty or lacking in essential minerals to maintain its lush appearance. By developing a routine that balances these two factors, you can enjoy a vibrant carpet of green and purple throughout the entire growing season.
Hydration needs across different seasons
During the peak of the spring growing season, the common blue violet requires a steady supply of moisture to support its rapid development. You should aim to keep the soil surface feeling damp to the touch, which usually means watering once or twice a week if there is no rain. The plants are most active during this time, producing both the early flowers and the lush foliage that will last all summer. Consistent moisture now will lead to a much more resilient plant when the hotter months finally arrive.
As summer temperatures rise, the water requirements of your violets will increase significantly, especially if they are in a sunnier location. You will notice the leaves beginning to droop or lose their shine if the soil becomes too dry for an extended period. To prevent heat stress, it is best to water deeply early in the morning, allowing the moisture to soak down to the root zone before the sun is high. If the plants are growing under large trees, remember that the tree roots will also be competing for the same water.
In the autumn, you can gradually reduce the frequency of watering as the plant’s growth slows down and the air becomes cooler. However, you should not let the soil dry out completely, as the roots are still preparing for the winter dormancy period. A final deep watering before the first hard freeze can be very beneficial, especially in regions with dry winters. This ensures that the plant has enough internal hydration to survive the drying effects of cold winter winds.
Winter watering is generally unnecessary in most climates, especially if there is regular snow or rain to keep the ground moist. However, if you live in a region with very dry winters and no snow cover, an occasional watering during a warm spell can prevent the rhizomes from desiccating. You should only water when the ground is not frozen, as the water needs to be able to penetrate the soil to reach the roots. This minimal attention during the “off-season” can lead to a much stronger emergence when spring returns.
More articles on this topic
Watering techniques for healthy roots
The method you use to deliver water can be just as important as the amount of water you provide to your plants. You should always try to water at the base of the plant rather than spraying the leaves from above. This practice keeps the foliage dry, which is the best way to prevent the development of fungal diseases like powdery mildew or leaf spot. Using a soaker hose or a drip irrigation system is an excellent way to deliver water directly to the soil where it is needed most.
Deep watering is far more effective than frequent shallow sprinkling, as it encourages the roots to grow deeper into the soil. When roots are concentrated near the surface, they are much more vulnerable to heat and drought during the summer months. You should apply enough water to saturate the soil to a depth of at least four to six inches. This creates a reservoir of moisture that the plant can draw upon during the intervals between your watering sessions.
The timing of your watering can also impact the health of your violets and the efficiency of your garden routine. Morning is the ideal time because it allows any accidental moisture on the leaves to evaporate quickly as the sun comes up. Watering in the evening can leave the plants damp overnight, which creates the perfect environment for slugs and fungal pathogens to thrive. If you must water in the afternoon, be aware that much of the water may evaporate before it even reaches the roots.
Observation is your best tool for determining when it is time to bring out the hose or watering can. You should get into the habit of checking the soil moisture with your finger before deciding to add more water. If the soil feels moist an inch below the surface, you can usually wait another day or two before watering again. Over-watering is just as harmful as under-watering, as it can lead to soil compaction and root rot in heavy or poorly drained soils.
More articles on this topic
Essential nutrients for woodland violets
Common blue violets are not heavy feeders, but they do require a balanced supply of nutrients to produce the best flowers and foliage. Nitrogen is the most important element for leaf development, giving the plants their characteristic deep green color. Phosphorus is essential for healthy root growth and the production of the early spring blossoms that many gardeners love. Potassium helps the plant regulate its water use and provides overall strength to the cellular structure of the stems and leaves.
Organic matter is the best long-term source of nutrition for these plants, as it mimics the natural leaf litter of their native habitat. You can provide almost all the nutrients they need simply by applying a thin layer of high-quality compost or leaf mold each spring. As this material breaks down, it slowly releases minerals into the soil in a form that the plants can easily absorb. This method also improves the soil structure, making it better at holding onto both water and nutrients over time.
If you choose to use a commercial fertilizer, a balanced, slow-release granules formula is usually the best choice for violets. You should look for a product with an N-P-K ratio like 10-10-10 or 5-5-5, which provides an even distribution of the primary nutrients. Apply the fertilizer in early spring just as the new growth appears, following the package directions for application rates. Avoid using high-nitrogen lawn fertilizers near your violets, as this can lead to excessive leaf growth at the expense of flowers.
Micronutrients like iron, magnesium, and calcium also play supporting roles in the health and vigor of your violet colony. These are usually present in sufficient quantities in healthy, organic-rich soil, but they can become depleted in older garden beds. If you notice unusual leaf colors or distorted growth, it might be worth having your soil tested to see if any specific minerals are lacking. Adding a bit of kelp meal or rock dust can be a gentle way to replenish these essential trace elements without overwhelming the plants.
Application timing and organic alternatives
The most effective time to fertilize your violets is during the window of active growth in the spring and early summer. You want the nutrients to be available when the plant is building new tissues and preparing its reproductive structures. Avoid fertilizing in late summer or autumn, as this can stimulate soft, new growth that will be easily damaged by the coming frosts. By following the natural rhythm of the plant’s life cycle, you ensure that your inputs are used as efficiently as possible.
Liquid fertilizers or “compost teas” can be used as a quick boost if your plants are looking particularly tired or stressed. These are absorbed much faster than granules and can be applied directly to the soil around the base of the plants. You should always dilute liquid fertilizers according to the instructions to avoid the risk of salt buildup in the soil or burning the roots. This is a great option for plants that are growing in containers or in areas where the soil is naturally very sandy and poor.
For those who prefer a strictly organic approach, there are many natural amendments that work wonders for violets. Fish emulsion is a popular choice for providing a gentle dose of nitrogen and other minerals that stimulate healthy green growth. Bone meal can be used to boost phosphorus levels if you feel the flowering has been lackluster in previous years. Even a simple mulch of shredded autumn leaves will eventually transform into a nutrient-rich “black gold” that the violets will absolutely love.
You should always water your plants thoroughly after applying any type of dry fertilizer to help the nutrients move down into the root zone. This also prevents the concentrated salts in the fertilizer from sitting directly against the plant’s crown or stems. If you are using compost or mulch as your primary nutrient source, you can simply spread it over the area and let the rain do the work for you. Consistency is more important than intensity when it comes to feeding these resilient and adaptable woodland plants.
Signs of nutrient imbalance and correction
Learning to identify the visual cues of nutrient problems will allow you to correct issues before they cause permanent damage. If the leaves of your violets are turning pale yellow while the veins stay green, this is often a sign of iron deficiency or “chlorosis.” This is common in alkaline soils where the iron is chemically locked away and unavailable to the plant. You can correct this by adding chelated iron or by lowering the soil pH with organic matter or elemental sulfur.
A lack of nitrogen typically manifests as a general yellowing of the entire leaf, starting with the older growth at the bottom of the plant. You might also notice that the plants are smaller than usual and are not spreading as quickly as they should. A quick application of an organic nitrogen source like blood meal or fish emulsion will usually restore the green color within a week or two. Be careful not to over-correct, as too much nitrogen can make the plants more attractive to sap-sucking pests like aphids.
Phosphorus deficiency is less common but can be identified by leaves that take on a purplish or reddish tint, especially on the undersides. You may also notice that the plant produces very few flowers in the spring despite having a healthy-looking canopy of leaves. Since phosphorus moves very slowly through the soil, it is best to incorporate a source like bone meal or rock phosphate into the root zone during planting or division. This ensures the nutrient is exactly where the plant needs it most.
Finally, keep an eye out for signs of fertilizer burn, which appears as brown, crispy edges on the leaves or a sudden wilting of the plant. This usually happens when too much synthetic fertilizer is applied or if it is applied to dry soil. If you suspect your plants have been over-fertilized, the best course of action is to flush the area with plenty of clean water to leach the excess salts away. Moving forward, switching to a slow-release organic method will prevent these kinds of spikes and keep your violets on a steady path of health.